Home Automation with Raspberry Pi: Home Assistant, Router, NVR and more!

Using Raspberry Pi as a smart home device is not strange. You can set up it for a secure soft router, firewall, smart home hub, or local NVR, or you can use Home Assistant to integrate everything together! Let’s take a look at how to use Seeed’s Raspberry Pi CM4-based devices mini router and reTerminal to work with a local home automation system and customize it in a controller hub! We will continue on more applications in this blog, feel free to share with you cool apps you’ve tried!
What is Home Assistant?
Home Assistant is a free and open-source software for home automation designed to be a central control system for smart home devices, which can be referred to as a smart home hub. It offers you home automation without needing the cloud, which means your home automation system is not dependent on remote servers or an internet connection. This local control means, you can have far better security than cloud-connected devices. Also, it offers greater reliability when it comes to keep it running 24×7.

It is flexible to use and very easy to get started even for beginners with the great documentation offered by Home Assistant. Also, there is an active community on Home Assistant Forum with many members who will be there to help you if you come across any issues when building and running Home Assistant.
After setting up Home Assistant, it can be accessed through a web-based user interface by using companion apps for Android and iOS, or by voice commands via a supported virtual assistant such as Google Assistant or Amazon Alexa. If you want to quickly experience a demo on your web browser, please click here.
Configure Home Assistant Kiosk at reTerminal
This wiki will walkthrough step-by-step on how you can connect smart home devices with Raspberry Pi and control them with a touchscreen dashboard on the reTerminal LCD.
Furthermore, if you want to customize the dashboard with endless choices, Home Assistant offers mainly three ways to extend capabilities:
- Addons allow you to extend the functionality around Home Assistant by installing additional applications. For example, connect with smart sensors with ESPHome, automatic backup of Home Assistant to Google Drive, etc.
- Integrations allow you to connect Home Assistant with other services. For example, connect with smart lights, CCTV cameras, etc.
- HACS (Home Assistant Community Store) allows you to add components for custom Front-end integrations inside Home Assistant. For example, new hardware/sensor support, and new themes.

Custom IoT sensors with ESPHome work with Home Assistant
ESPHome is a system for controlling ESP8266/ESP32 boards with a simple and powerful profile and controlling them remotely through Home Automation systems. YAML is used to create the configuration file. Each ESPHome device has its own individual configuration file. Users can control ESP boards using YAML configuration files. Since ESPHome supports a long list of sensors, you can take hundreds of off-the-shelf components like temperature sensors, LCD displays, pressure sensors, and humidity sensors and put all those together, then ESPHome will do all of the codings and compiling for you. T
ESPHome has support for many different sensors. Each of them is a platform of the sensor domain and each sensor have several base configuration options. We have listed 34 Grove modules that support ESPHome including Gas, Temperature, Humidity, Barometer, Motion, and Displays. You can use these sensors directly with XIAO-ESP32C3, an expansion board along with an acrylic case to DIY your own sensor work with Home Assistant system! You can learn from ESPHome working with ESP32 and also stay tuned for our tutorials!
Is your router secure?
When setting up a router, security is always a big concern. So we recommend OpenWrt which allows for full internet connectivity without exposing your router or connected devices to cyber attacks. OpenWrt’s resistance to common vulnerabilities also contributes to its security as its Linux OS is unaffected by many common attacks. Furthermore, OpenWrt is actively updated so any vulnerabilities are closed shortly after they are discovered. OpenWrt is an open-source Linux operating system that runs on embedded devices/ routers. It offers more features, performance, and security than a traditional router. It has a filesystem that’s fully writable and includes a package management system. You can make use of these packages to suit your applications in various ways.

By using OpenWrt you can have various features such as:
- Increase overall network performance when multiple devices are connected
- Share files between devices via an external storage drive connected directly to the router
- Increase network security
- Run a BitTorrent client from the router
- Connect a printer directly to the router to create a networked printer
- Limit bandwidth usage of a particular device in the network
- Active queue management
- Real-time network monitoring
- Create Dynamic DNS
- Set Up a VPN client or server
You can use a Raspberry Pi standalone configure with OpenWRT but here comes some issues:
- Only one 1 Gigabit Ethernet cannot to switch and pass the network traffic to other devices via Ethernet, you will have to add another Ethernet port using a USB to Ethernet adapter.
- Troublesome initial OpenWrt configuration
- Overheat issues: when running OpenWrt on a bare Raspberry Pi 4, the CPU tends to overheat dramatically with all the processing.
Wouldn’t it be better if we had a system that has a smooth overall out-of-the-box experience? Well, meet the Seeed Mini Router.
Let’s DIY a router with minimum effort using Seeed Mini Router
Seeed Mini Router consists of a Raspberry Pi Compute Module 4 as the brains, with a carrier board to extend many different I/O interfaces.

Pre-installed packages out-of-the-box
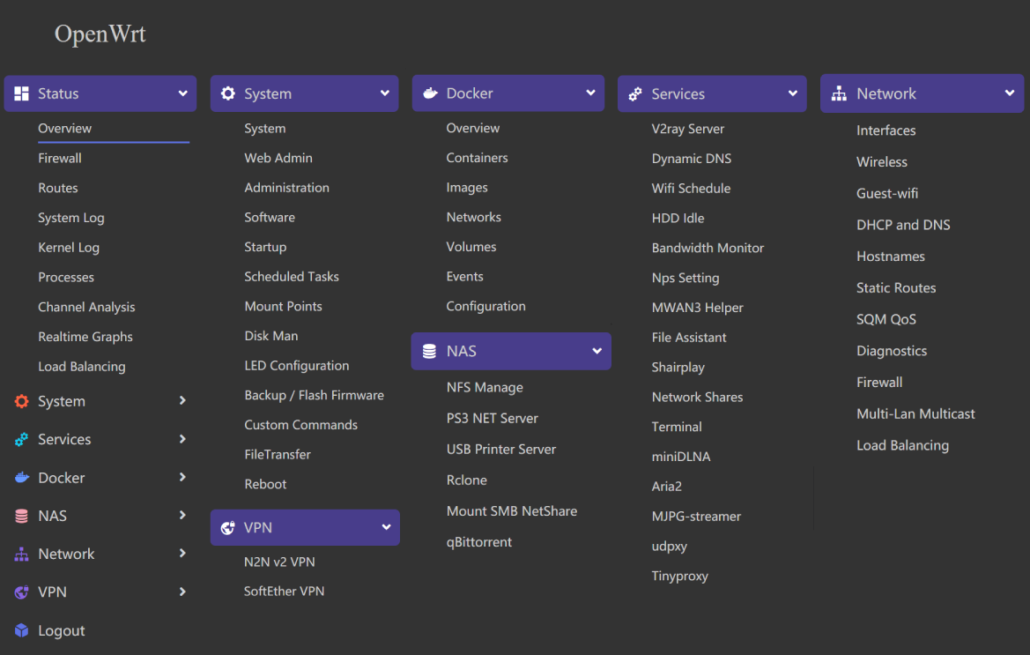
The OpenWrt system that comes out-of-the-box with the Mini Router board includes a number of packages already pre-installed such as NAS, VPN, File Server, Printer Server, Media Server, qBittorent server, and much more. So you will easily be able to experiment and deploy your favorite application on the board.

Dual Gigabit Ethernet ports
Unlike a traditional Raspberry Pi 4, the Seeed Mini Router comes with 2 Gigabit Ethernet ports, which means you will easily be able to connect the LAN interface to another switch to extend the router functionality. One Ethernet Port is connected to the Gigabit Ethernet PHY of the CM4 module which is based on Broadcom BCM54210PE. On the other hand, the other Gigabit Ethernet Port is connected to Microchip’s LAN7800 which is a USB 3.0 to GbE (Gigabit Ethernet Bridge). The USB 3.0 interface here is extended from the PCIe interface of the CM4 Module. Also, both ports can support speeds up to 1Gbps.

Trouble-free initial OpenWrt configuration
When you buy the Seeed Mini Router, you will find that a custom OpenWRT built by Seeed comes pre-installed with the board. This means you do not even need to flash anything to the board. You do not need to configure LAN, WAN ports, and firewall settings. They all come preconfigured. So after you open the box, you simply need to make the necessary Ethernet connections, open the Web UI at 192.168.2.1 on the PC and you will be good to go!

However, here is an explanation of how the 2 ports are configured.
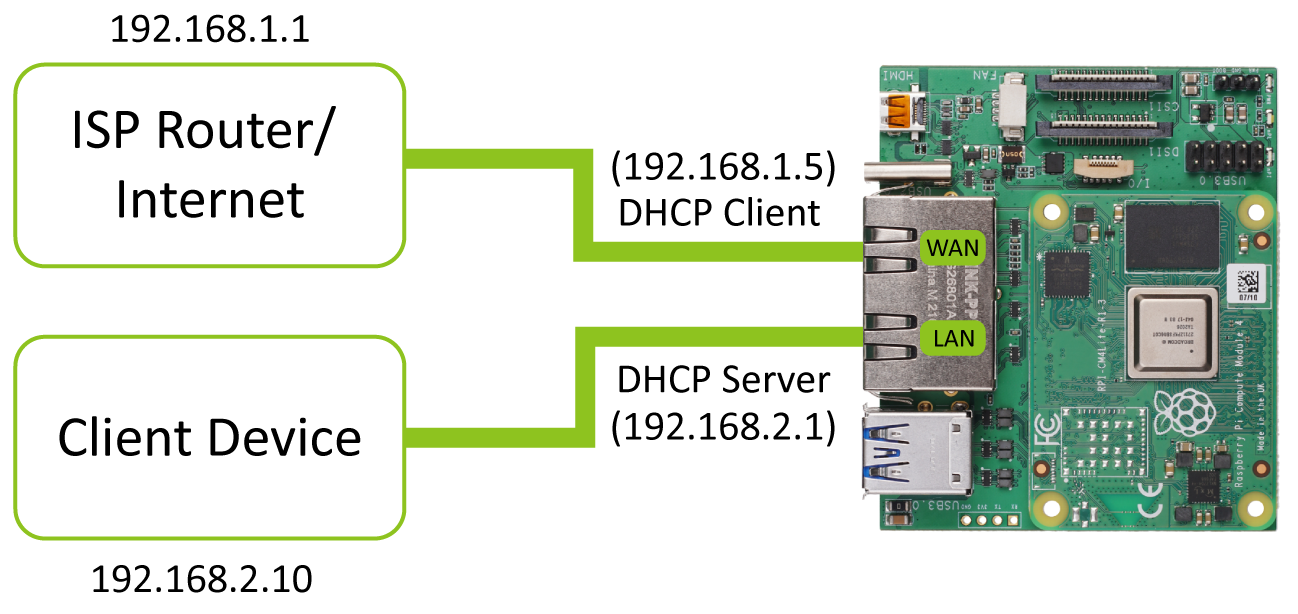
One port is configured as a LAN interface and the other as a WAN interface. The WAN interface is the one that can be connected to the internet and it is configured as a DHCP client. On the other hand, the LAN interface is the one that can be connected to the client devices and it is configured as a DHCP server.
Here the LAN interface is configured so that it has a static IP address of 192.168.2.1. However, if you connect this OpenWrt router to another router with the default gateway IP of 192.168.2.1, you might want to change the IP address on the LAN interface or else, OpenWrt will have an IP conflict. Please follow the FAQ to learn more!
Also, we are actively maintaining this OpenWrt build on GitHub and you can flash the new builds as they are rolled out by flashing the onboard eMMC
Build a local AI processing NVR camera system with Frigate
Traditional NVRs have higher false positive rates and can require hours of fine-tuning to reduce false positive rates because they rely on simple motion detection. Leveraging Google Coral TPU USB accelerator for 100+ FPS object detection, you can run advanced AI analysis with a Raspberry Pi or Odyssey Blue, an Intel Celeron J4125 powered powerful Linux mini PC, to determine if the motion is actually a person, car, or any object you want to detect. With Frigate’s local processing, there is no need cloud fee any more for storing your personal camera footage and the analysis record.

All processing performed locally: No need to pay for sending your personal camera footage to the cloud for analysis.
Never miss a frame of detection: Frigate can run over 100 object detections per second, so it never misses a frame. Frigate tracks objects in real-time and can determine the exact time a person starts walking up your front steps or a car enters your driveway.
Fine-tune your events and alerts with zones: Frigate tracks objects in real-time and can determine the exact moment a person starts walking up your front steps or when a car enters your driveway. Refine your notifications based on precise locations.
Designed for Home Assistant, seamless integration into your smart home system
Give your home eyesight by integrating object detection into Home Assistant, OpenHab, NodeRed, or anything with MQTT support. Frigate integrates directly into Home Assistant’s media browser, provides a low-latency camera entity, and exposes real-time sensors and switches to power automation and notifications to your heart’s content.
Easily monitor cameras with activity: Dynamically renders cameras with active detection with Birdseye view.
We will continue on this blog to bring more smart home options for Raspberry Pi. Feel free to discuss with us on Discord for any suggestions and cool ideas!!


