Learn TinyML using Wio Terminal and Arduino IDE #7 Machine Learning on ARM Cortex M0+ MCU Seeed Studio XIAO SAMD21 and XIAO RP2040
Updated on Feb 28th, 2024
This is the last article of the TinyML course series – in the previous articles we have discussed how to train and deploy machine learning models for audio scene classification, anomaly detection, speech recognition and other tasks to Wio Terminal, a compact production-ready development board from Seeed studio. All of the articles were published on Seeed blog and for videos, you can have a look at TinyML course with Wio Terminal playlist on YouTube.
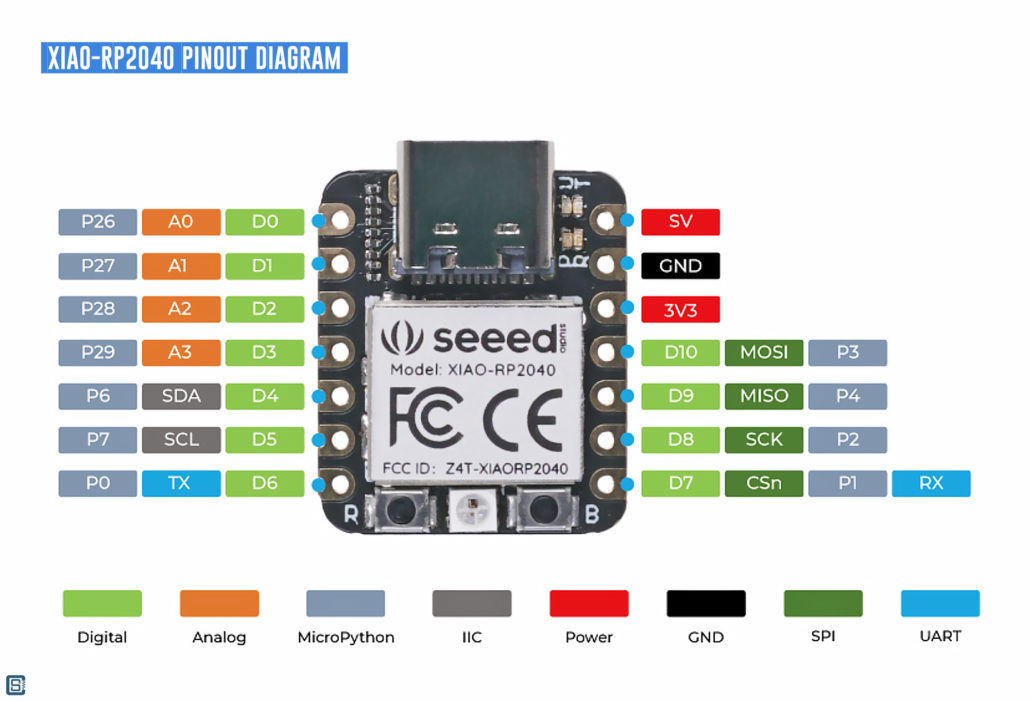
Wio Terminal while being convenient for experiments due to the presence of multiple built-in sensors and a case, might be a bit too bulky for some applications for example, wearables. In the last project we’ll go even Tinier and use Seeed Studio XIAO boards – namely the original XIAO SAMD21 (which used to be named Seeeduino XIAO) and newer XIAO RP2040 and will briefly mention soon-to-be-released XIAO BLE.
For more details, watch the video version of the tutorial!
Specks-wise, the XIAO SAMD21 at the time of launch was likely the smallest M0 development board available and was packing quite a punch for its size with ARM® Cortex®-M0+ 48MHz microcontroller(SAMD21G18) and 256KB Flash, 32KB SRAM.

Later RP2040 chip arrived and delivered even better specs Cortex M0+ design. Both are quite capable of running the tiny neural network we will have for this project, but if you have some more demanding applications it does make sense to choose XIAO RP2040 over the original XIAO.
As a software engineer I, like many of you I’m sure, spend a lot of time in front of the glowing screen on my chair. And later in the day it becomes difficult to maintain a proper pose.

If only there was a way to make a device that could learn your specific body position for proper and wrong poses and warn you when you slouch too much or go into “Python pose”… Wait a moment, there is!
The best sensor for the task that will provide the data for machine learning model is obviously accelerometer. All of the XIAO series boards, being very small do not come equipped with accelerometer sensor. While we could use a XIAO expansion board for development and testing, it eliminates the low-footprint advantage XIAO boards have. If you are going to create your own product, the better option would be to create your own custom PCB board for the chip or SoM. I asked our hardware engineer to design a simple carrier board for XIAO, that would include LIS3DH accelerometer, a buzzer and a battery connector with a power switch.
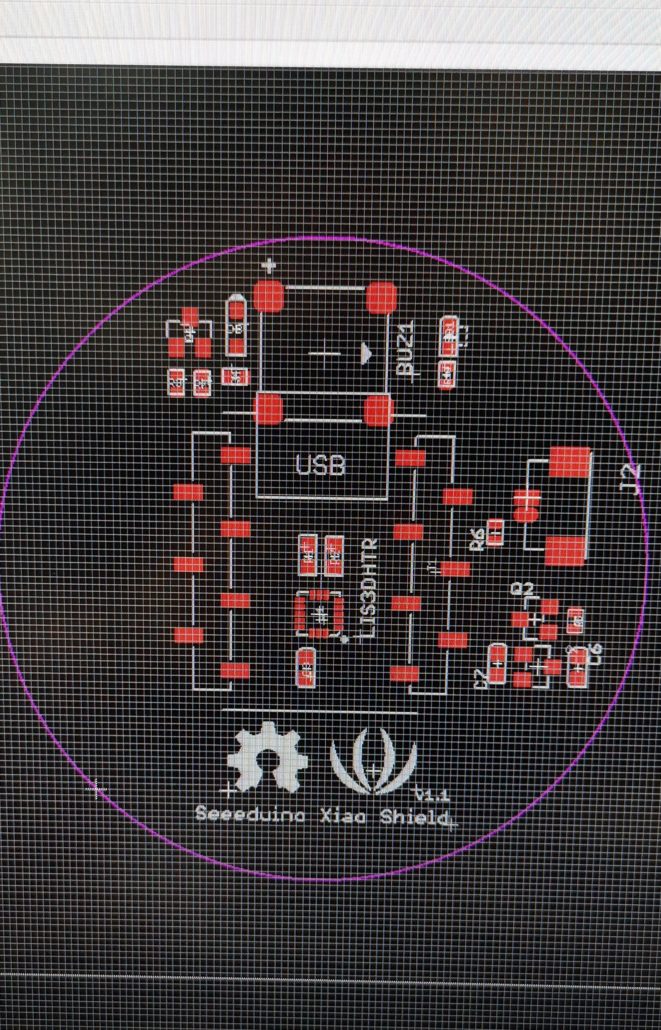
Then we used Seeed studio Fusion service to print some PCBA samples – for that go to https://www.seeedstudio.com/fusion_pcb.html and upload Gerber files, which contain the PCB design and choose the proper parameters for the board, such as number of layers, base material, minimum drill hole size and so on. We can see that a simple 2-layer board is approximated to cost 4.9 USD for 10 pieces plus shipping cost.

If you’d like to repeat the experiment without custom PCB, you can connect Grove LIS3DH accelerometer module to XIAO expansion board and start collecting the data. I collected 3 data samples for each posture, 60 seconds each with device attached to t-shirt on my back.
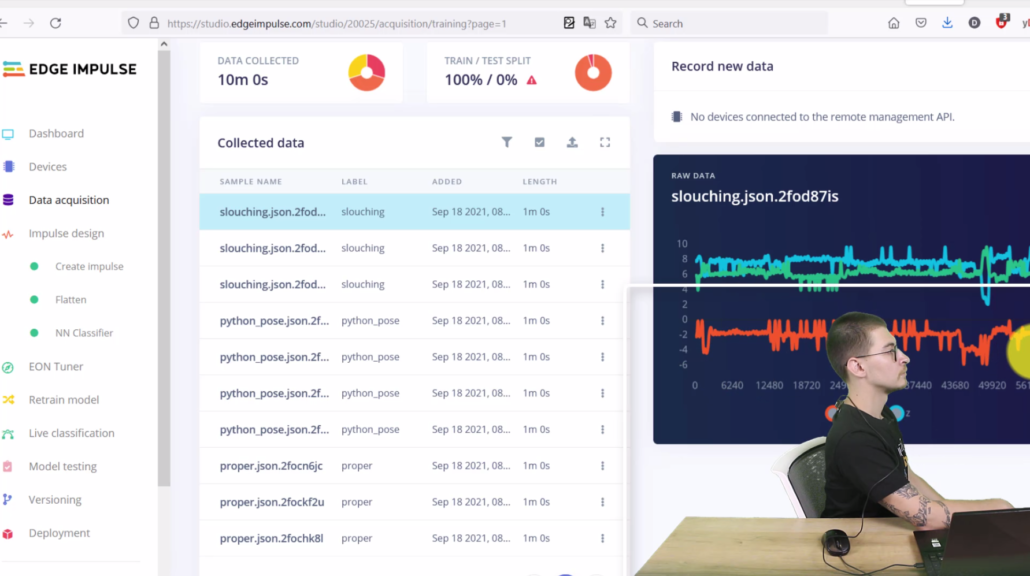
For each sample, I maintained the same pose, but included some arm, head and torso movements to simulate normal activity.
I have chosen 5 seconds time window with window shift of 1 second and Flatten processing block, since we are dealing with very slow moving data. A very plain fully connected network provided a good accuracy. Here is the link to public version of the Edge Impulse project.
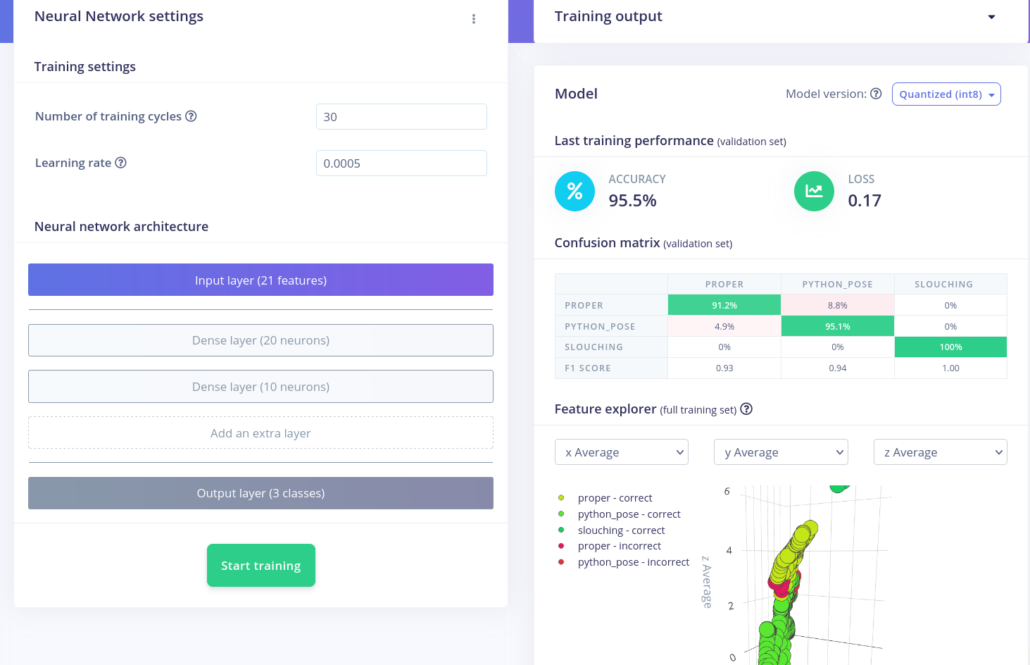
Some improvement can be made by collecting more data and making sure proper and improper postures can be recognized with some variations in device positioning on the clothes. Since the device is thought to be individual usage device it does not need to generalize to different people’s postures and can be easily re-trained. You can check how well it detects your postures after training in Live classification tab.
After you’re satisfied with accuracy download the resulting model as Arduino library and copy it to your Arduino sketches/libraries folder. You can download sample code, that would collect 5 second sample, performs the inference and turn on the buzzer if one of the improper poses are detected.
void loop()
{

    ei_printf("Sampling...\n");

    // Allocate a buffer here for the values we'll read from the IMU
    float buffer[EI_CLASSIFIER_DSP_INPUT_FRAME_SIZE] = { 0 };

    for (size_t ix = 0; ix < EI_CLASSIFIER_DSP_INPUT_FRAME_SIZE; ix += 3) {
        // Determine the next tick (and then sleep later)
        uint64_t next_tick = micros() + (EI_CLASSIFIER_INTERVAL_MS * 1000);

        lis.getAcceleration(&buffer[ix], &buffer[ix+1], &buffer[ix + 2]);
        buffer[ix + 0] *= CONVERT_G_TO_MS2;
        buffer[ix + 1] *= CONVERT_G_TO_MS2;
        buffer[ix + 2] *= CONVERT_G_TO_MS2;

        delayMicroseconds(next_tick - micros());
    }

    // Turn the raw buffer in a signal which we can the classify
    signal_t signal;
    int err = numpy::signal_from_buffer(buffer, EI_CLASSIFIER_DSP_INPUT_FRAME_SIZE, &signal);
    if (err != 0) {
        ei_printf("Failed to create signal from buffer (%d)\n", err);
        return;
    }

    // Run the classifier
    ei_impulse_result_t result = { 0 };

    err = run_classifier(&signal, &result, debug_nn);
    if (err != EI_IMPULSE_OK) {
        ei_printf("ERR: Failed to run classifier (%d)\n", err);
        return;
    }

    // print the predictions
    ei_printf("Predictions ");
    ei_printf("(DSP: %d ms., Classification: %d ms., Anomaly: %d ms.)",
        result.timing.dsp, result.timing.classification, result.timing.anomaly);
    ei_printf(": \n");
    for (size_t ix = 0; ix < EI_CLASSIFIER_LABEL_COUNT; ix++) {
        ei_printf("    %s: %.5f\n", result.classification[ix].label, result.classification[ix].value);
    }
#if EI_CLASSIFIER_HAS_ANOMALY == 1
    ei_printf("    anomaly score: %.3f\n", result.anomaly);
#endif

  if (result.classification[1].value > ALARM_THRESHOLD || result.classification[2].value > ALARM_THRESHOLD)
  {
  tone(BUZZER_PIN, 523, 250);
  delay(250);
  noTone(BUZZER_PIN);
  delay(250);
  tone(BUZZER_PIN, 523, 250);
  delay(250);
  noTone(BUZZER_PIN);
  }

}
Since it is relatively slowly changing data and we do not need fast response times, normal sequential inference pipeline suits this application well.
A step above would be to use the newest XIAO nRF52840 Sense and connect the device to user’s smartphone, which would allow for better alerts, statistics, and so on.
Choose the best tool for your TinyML project
Grove – Vision AI Module V2
It’s an MCU-based vision AI module powered by Himax WiseEye2 HX6538 processor, featuring rm Cortex-M55 and Ethos-U55. It integrates Arm Helium technology, which is finely optimized for vector data processing, enables:
- Award-winning low power consumption
- Significant uplift in DSP and ML capabilities
- Designed for battery-powered endpoint AI applications
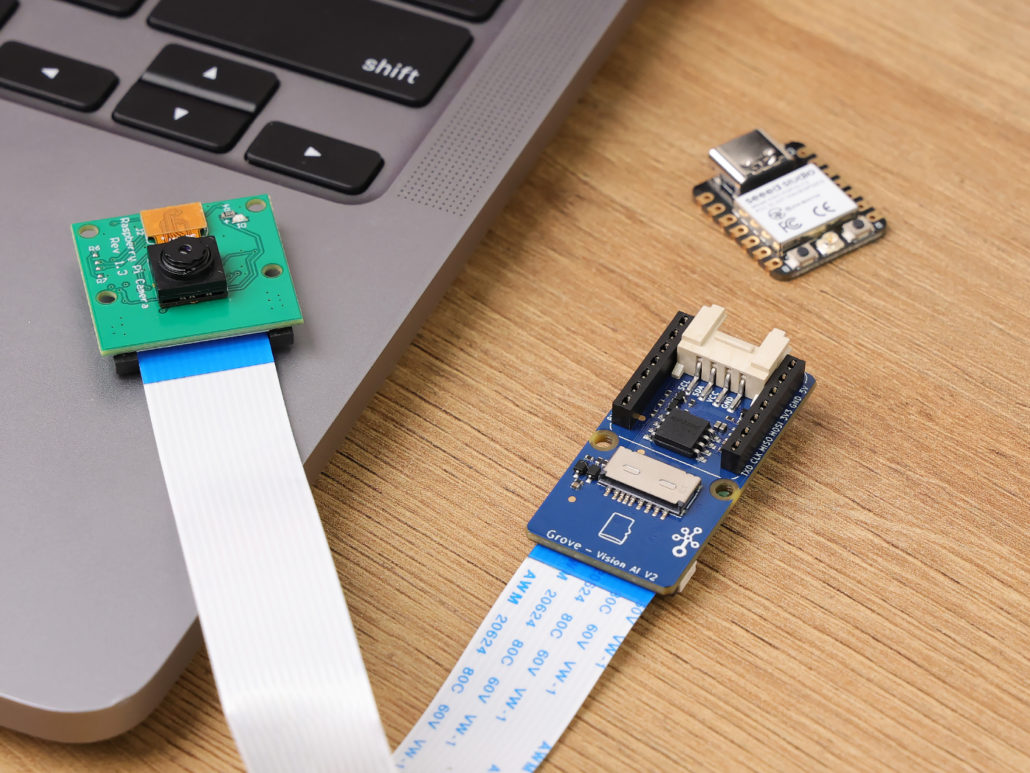
With support for Tensorflow and Pytorch frameworks, it allows users to deploy both off-the-shelf and custom AI models from Seeed Studio SenseCraft AI. Additionally, the module features a range of interfaces, including IIC, UART, SPI, and Type-C, allowing easy integration with popular products like Seeed Studio XIAO, Grove, Raspberry Pi, BeagleBoard, and ESP-based products for further development.
Seeed Studio XIAO ESP32S3 Sense & Seeed Studio XIAO nRF52840 Sense
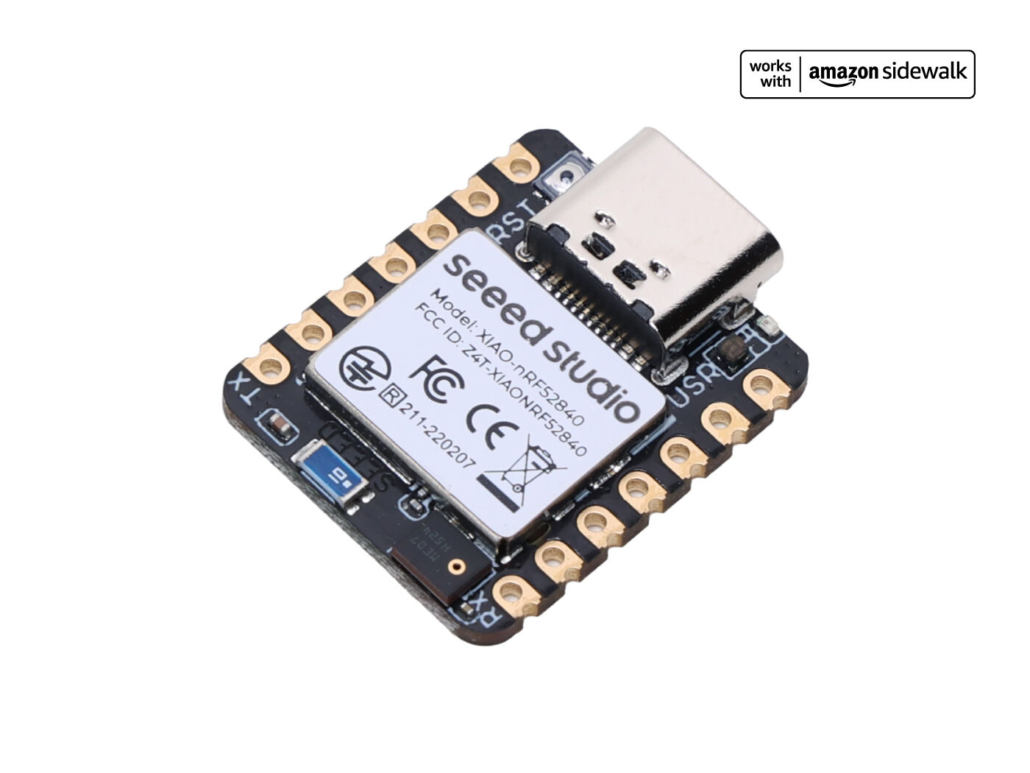
Seeed Studio XIAO Series are diminutive development boards, sharing a similar hardware structure, where the size is literally thumb-sized. The code name “XIAO” here represents its half feature “Tiny”, and the other half will be “Puissant”.
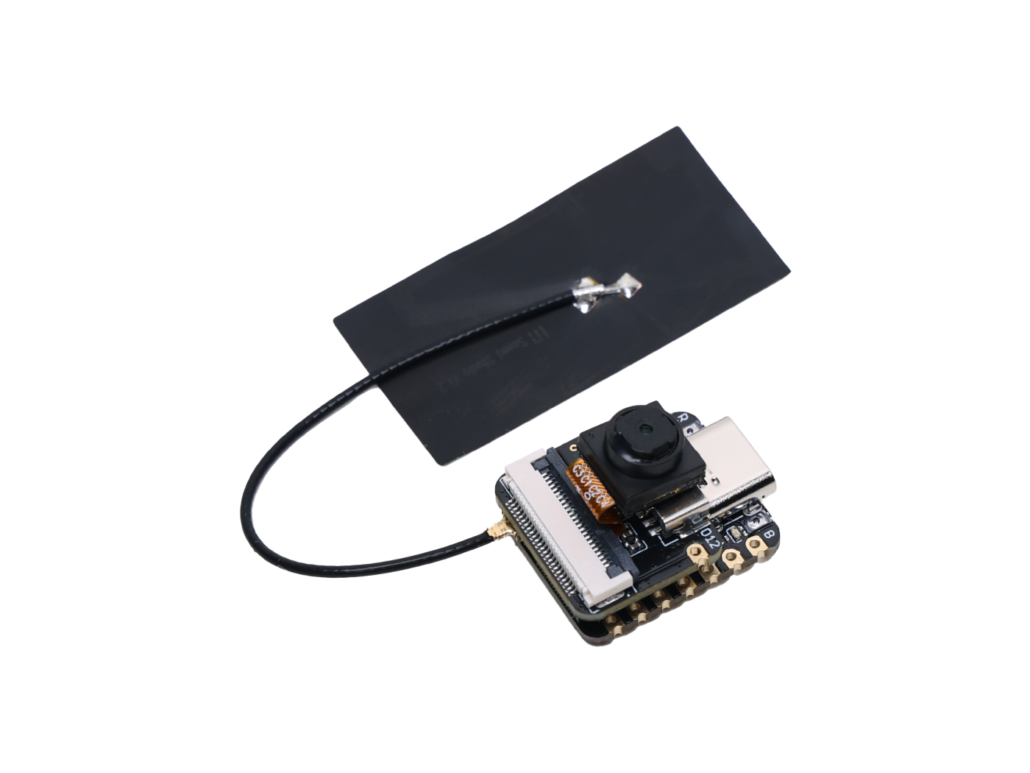
Seeed Studio XIAO ESP32S3 Sense integrates an OV2640 camera sensor, digital microphone, and SD card support. Combining embedded ML computing power and photography capability, this development board can be your great tool to get started with intelligent voice and vision AI.
Seeed Studio XIAO nRF52840 Sense is carrying Bluetooth 5.0 wireless capability and is able to operate with low power consumption. Featuring onboard IMU and PDM, it can be your best tool for embedded Machine Learning projects.
Click here to learn more about the XIAO family!
SenseCraft AI
SenseCraft AI is a platform that enables easy AI model training and deployment with no-code/low-code. It supports Seeed products natively, ensuring complete adaptability of the trained models to Seeed products. Moreover, deploying models through this platform offers immediate visualization of identification results on the website, enabling prompt assessment of model performance.

Ideal for tinyML applications, it allows you to effortlessly deploy off-the-shelf or custom AI models by connecting the device, selecting a model, and viewing identification results.
Hope you enjoyed my TinyML course video series and learned a lot about Machine Learning on microcontrollers. Tinkering with Machine Learning on smallest of devices has been truly an eye-opening experience for me, after executing much larger ML models on SBCs and servers. If you would like to continue learning on that topic, have a look at free courses by Coursera and Edge impulse and also Codecraft, a graphical programming environment that allows creating TinyML application and deploying them to Wio Terminal.