How to Get Started with Raspberry Pi Pico
At this point, the Raspberry Pi Pico microcontroller unit (MCU) is prominent for being Raspberry Pi’s first MCU in the family. For beginners, getting started learning and using an MCU like the Pi Pico can be daunting, with all of the programming and soldering involved. Therefore, I am here to guide you step-by-step to get started with your Pi Pico!
I will not teach you how to become a pro, but after following this, you will be fairly confident at working on your own projects. Without further ado, here are the four steps that you should follow to get started with your Pico:
Step 1: Get to know your Pico
Before you get started using the Pico, you should understand what it actually is. This is not essential, but it will help you a long way with your projects by understanding the concepts and the different features.
Step 2: Start Programming with your Pico!
After you familiarised yourself with what the Pico is, you can start using it! I recommend trying out a project that solely involves programming with the Pico without any fancy accessories for your first. Understanding the programming language and what each function is essential to fully utilising the Pico.
Step 3: Get more accessories for your Pico!
By this point, you should have tried out a project or two by yourself. With that, you can move on to more complicated and intricate projects. However, to work on them, you’ll need more accessories/modules such as sensors and relay.
Step 4: Work on more intricate projects!
After you purchased the modules required, you can start working on your projects! There are tons of project tutorials out there on the internet and the modules are reusable.
Those are the four steps to get you started with your Pi Pico. In the next few sections, I will share the background information about the Pi Pico, projects for you to try out, and accessories for you to expand your repertoire!
- What is the Raspberry Pi Pico?
- Benefits of the Raspberry Pi Pico
- Easy Projects to get you started!
- Explore more Products and Accessories to Enhance your experience!
Let’s get started!
What is the Raspberry Pi Pico?
Released in the early part of 2021, the Pi Pico garnered much attention as it is Raspberry Pi first microcontroller. The Pi Pico was neither speculated nor predicted, with no one in the known until Raspberry Pi announce it! How cool is that!

Raspberry Pi is no stranger to disrupting the status quo. Rather than being another Linux-based single-board computer (SBC), the Raspberry Pi Pico is an ARM-based microcontroller (MCU).
What is a Microcontroller?
By definition, a microcontroller is a small computer on a single integrated circuit containing memory, a processor core, and programmable input/output peripherals! They are very energy efficient, with all their components (i.e. CPU, Memory, I/O) connected on a single chip.
Rather than performing intensive processing like a computer, a microcontroller excels where the task is fixed and predefined. For example, microcontrollers are used as the core of many household appliances such as a washing machine, performing the predefined tasks of spinning the clothes, draining the water, etc. By not running on an OS, the microcontroller is more reliable in performing these repetitive tasks. Learn more about microcontrollers, together with microprocessors and SBCs at “All about CPUs: Microprocessor, Microcontroller and Single Board Computer”.
The RP2040 Chip
The main highlight of the Raspberry Pi Pico is the chip it’s running on, the RP2040 chip. The RP2040 chip is Raspberry Pi’s own microcontroller chip, announced alongside the Raspberry Pi Pico.
The RP2040 can be programmed with both MicroPython and C++. Based on the ARM Cortex-M0+, the most energy-efficient processor, it can deliver high performance while maintaining low power consumption and low leakage! It also carries a variety of low-power modes to support extended battery-operated durations!.
The main headline features of the RP2040 is its unique Programmable I/O (PIO) subsystem. PIO refers to input-output pins which can process ingoing or outgoing data without a CPU. The Pi Pico has 8 PIO state machines, which can be programmed to separately handle data. The PIO steals the spotlight when it comes to processes that require continuous instructions i.e. fading an LED, which requires constant input to vary the PWM (pulse width modulation). This is just a brief introduction to the RP2040 and its PIO feature, but you can read more in-depth at “Programmable I/O with Raspberry Pi Pico”!
Benefits of Raspberry Pi Pico
Being a microcontroller, the Raspberry Pi Pico comes with the advantages that a microcontroller provides. However, with the new chip, the Raspberry Pi Pico comes with its own quirks as well!
Energy Efficiency – As mentioned, the Raspberry Pi Pico runs on the RP2040 chip, which is based on the ARM Cortex-M0+ processor! This processor is known to many as the most energy-efficient processor, being able to run high-performance tasks at very low power.
Easy-to-Use – For advanced users, coding on the Pi Pico with C/C++ is the best. However, the Pi Pico also offers MicroPython, a version of Python 3 for microcontrollers! MicroPython is always cited as the most beginner-friendly language for microcontrollers!
Input/Output Capabilities – For GPIO, the Pico operates at 3.3V with 26 GPIO pins! It also has two channels each for UART, I2C and SPI functionality! Where it really stands out is the aforementioned eight PIO “state machines”! You can say that the Pi Pico nails it for being a very versatile microcontroller!
Easy Projects to get you started!
Now that you got the first step down, “get to know your Pico”, you can get started doing some basic projects! In this section, I will share some projects that most beginners started off doing with their Pi Pico.
Blinking an LED
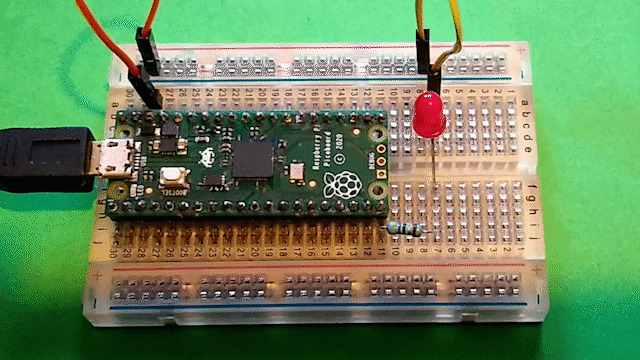
For most, if not all first-time users of the Raspberry Pi Pico, their first mini-project would be to blink the onboard LED!
Source: Raspberry Pi
This may seem daunting, but there are many guides out there, including one from Raspberry Pi themselves, teaching you how to do it! You will install an integrated development environment (IDE), and write a program to blink the onboard LED. This will be a great way to introduce yourself to programming on the Pi Pico.
Get Started with Sensors and Modules with Grove Starter Kit for Raspberry Pi Pico!
Now that you’ve introduced yourself to the Pi Pico programming language, you can start trying to use your Pi Pico with some sensors and modules!
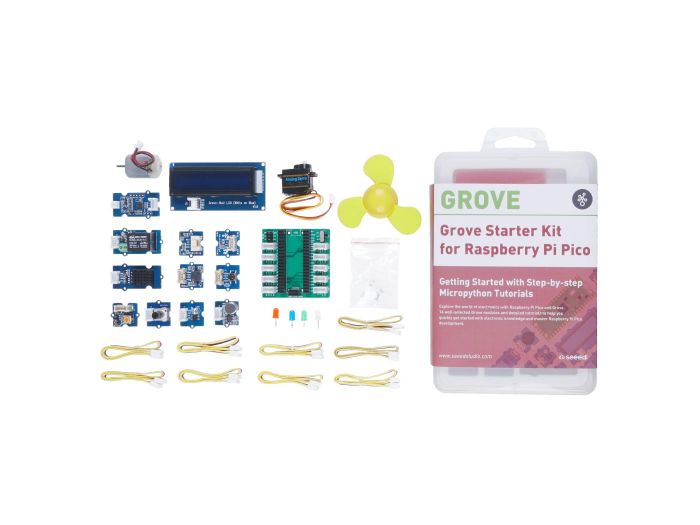
Here at Seed, we have a Grove Starter Kit designed for the Raspberry Pi Pico! It comes with 5 sensors, 5 actuators, 2 LEDs, 1 LCD display, and 1 Grove shield, making it easy to get started with the Raspberry Pi Pico.
What is Grove?
Grove is a modular, standardized connector prototyping system. Grove takes a building block approach to assemble electronics. The Grove system consists of a base unit (stem) and various modules (twigs) with standardized connectors. Compared to a jumper or solder based system, it is easier to connect, experiment and build and simplifies the learning system!
The Grove Shield that comes with the Grove starter kit enables you to connect the 13 Grove sensors to the Raspberry Pi Pico without any soldering! At Seeed’s wiki site, we’ve also compiled a series of 6 projects for you to get started with the Pi Pico and the modules!
What’s Included?
- Grove – LED Pack – 1X
- Grove – RGB LED (WS2813 Mini) – 1X
- Grove – Light Sensor – 1X
- Grove – Sound Sensor – 1X
- Grove – Rotary Angle Sensor – 1X
- Grove – Temperature & Humidity Sensor – 1X
- Grove – mini PIR motion sensor – 1X
- Grove – Passive Buzzer – 1X
- Grove – Button – 1X
- Grove – Servo – 1X
- Grove – Mini Fan – 1X
- Grove – Relay – 1X
- Grove – 16×2 LCD – 1X
- Grove Shield for Pi Pico – 1X
- Grove Cable – 8X
Automatic Light Intensity LED

Source: Arduino Project Hub
By using a light sensor (light dependent resistor), the Pi Pico can measure the change in light intensity – increasing or reducing the current sent to the LED bulb! This is a fun little project that can get you started using your Pi Pico with the different modules. All you need is a light-dependent resistor, and a relay. Both of which comes with the Grove Starter Kit for Raspberry Pi Pico!
For the full schematics, refer to this tutorial by Muhammad Ansar on the Arduino Project Hub!
Automated Fan Control
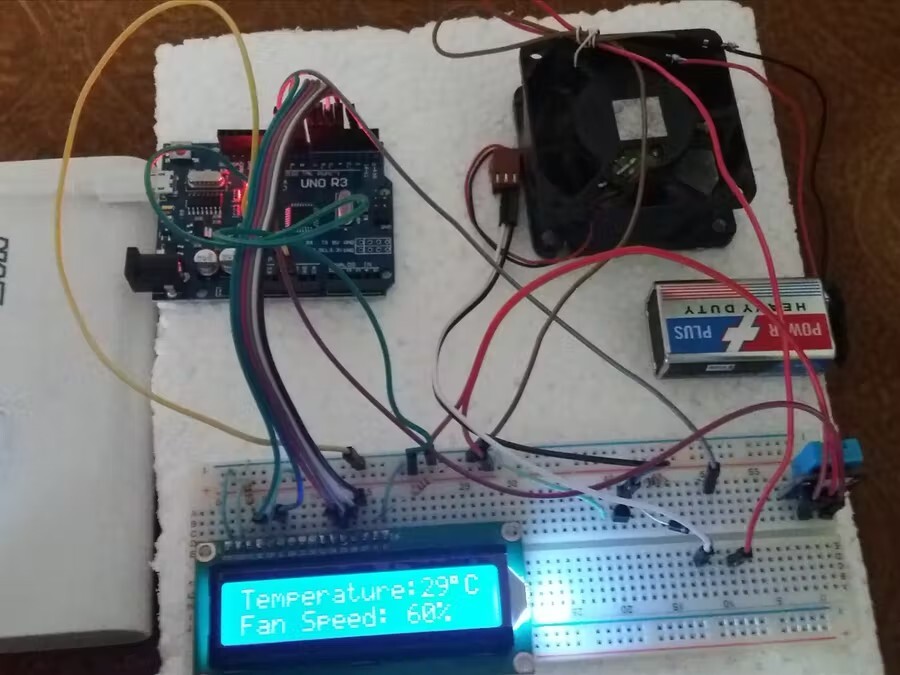
Source: Hackster.io
By using a temperature sensor to monitor the real-time environmental temperature, the Pi Pico can use a Relay to put the fan on to different speeds! This will be great if you need a real-time automated temperature-dependent fan control system! All you need is a temperature sensor and a relay which can be found in the Grove Starter Kit for Raspberry Pi Pico as well!
This article by Muhammad Sheraz on Hackster uses a small fan for their demonstration, but you can always add a Grove Relay and a larger fan for a bigger breeze!
You can find out more projects for Raspberry Pi Pico at “10 Raspberry Pi Pico Project Ideas!”!
Explore more Products and Accessories to Enhance your experience!
By now, you should be more or less familiarised with your Raspberry Pi Pico! The world is your oyster when it comes to developing on a microcontroller like a Raspberry Pi Pico! Here at Seeed, we have an array of accessories and Pi Pico alike devices for you to explore!
Maker Pi Pico Base
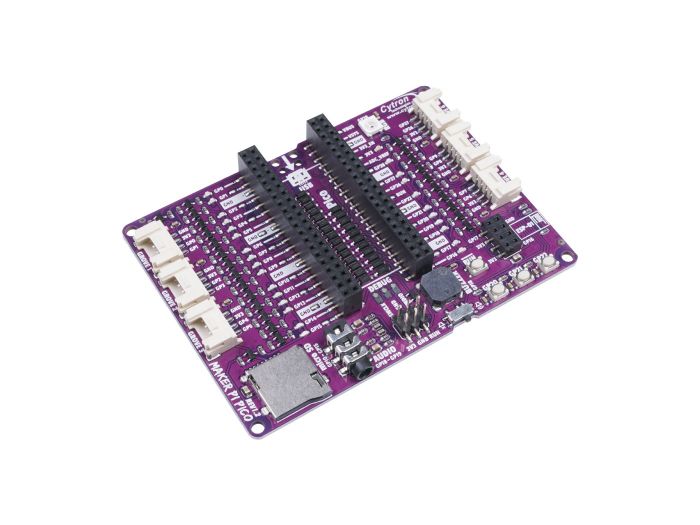
The Maker Pi Pico Base comes with the much-desired Reset button for use with the Raspberry Pi Pico and can be programmed in CircuitPython, MicroPython, and C/C++. With its rich peripherals, including six Grove ports, this board is ideal to sit at the centre of your STEM and robotics projects!
Product Features
- Work out-of-the-box. No soldering!
- Access to all Raspberry Pi Pico’s pins on two 20 ways pin headers
- LED indicators on all GPIO pins
- 3x programmable push button (GP20-22)
- 1x RGB LED – NeoPixel (GP28)
- 1x Piezo buzzer (GP18)
- 1x 3.5mm stereo audio jack (GP18-19)
- 1x Micro SD card slot (GP10-15)
- 1x ESP-01 socket (GP16-17)
- 6x Grove ports for Interfacing with 300+ Grove Modules
Visit Seeed’s online store to get one for yourself!
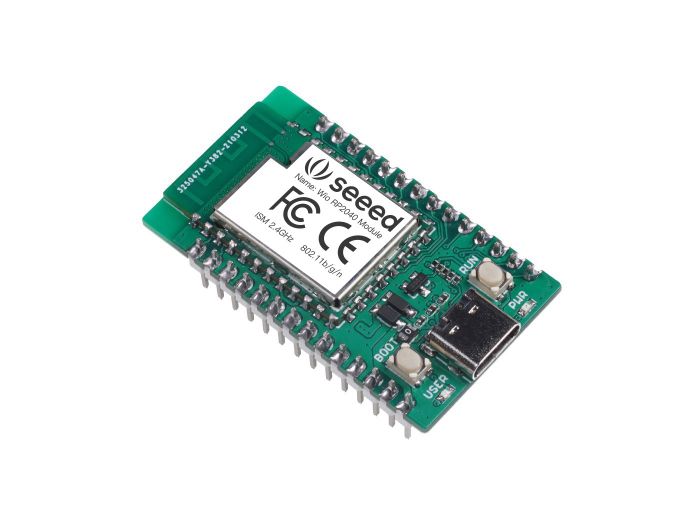
Wio RP2040 mini Dev Board – Onboard Wifi

The Wio RP2040 tiny development board is based on the Wio RP2040 module, which has wireless capabilities! The Wio RP2040 Family is centred around the Wio RP2040 Module, which includes built-in WiFi capabilities to provide steady and reliable wireless communication. The module works with all RP2040 development tools, including MicroPython and the Thonny Python code editor for the Raspberry Pi Pico!
Product Features
- Powerful CPU: dual-core 133MHZ RP2040 processor and 264KB SRAM, 2MB Flash
- Reliable wireless connection: using powerful wifi chip, supporting 2.4~2.4835 GHz frequency and Ap&Station mode
- Flexibility: compatible with Thonny editor
- Easy project operation: breadboard friendly
- Multiple certifications: FCC and CE Certified
Visit Seeed’s online store to find out more!
Arduino Nano RP2040
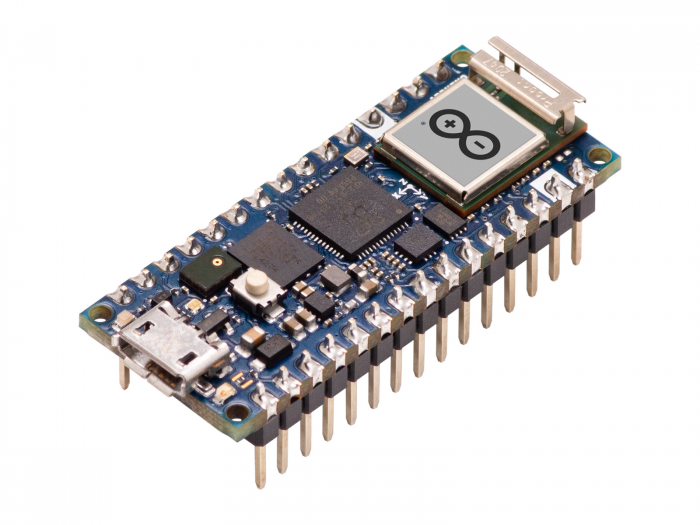
The Arduino Nano RP2040 Connect is the newest addition to Arduino’s RP2040 chip-based microcontroller line. Most notably, the Nano RP2040 Connect comes with an expanded set of connectivity and sensor peripherals, allowing you to maximize the RP2040’s already expansive capabilities!
Product Features
- Raspberry Pi RP2040 Microcontroller
- Dual-Core 32-bit Arm® Cortex®-M0
- U-blox® Nina W102
- ST LSM6DSOX 6-axis IMU
- Microchip ATECC608A Cryptographic Co-processor
- Step down converter: Achieve high efficiency and low noise over a wide input voltage range with the built-in switch mode power supply
- Arduino Nano Form Factor
Visit Seeed’s online store to find out more!
Summary
With that, we have come to the end of the guide! I hope that you had learnt how to get started with your Raspberry Pi Pico with this guide. The Raspberry Pi Pico is a great microcontroller for you if you are just getting started with microcontroller development. With its RP2040 chip, there will be more than enough power to handle most of your applications!
If you find this guide useful, here are some other articles that may interest you:
- Adding Ethernet to Raspberry Pi Pico
- 10 Raspberry Pi Pico Project Ideas!
- Programmable I/O with Raspberry Pi Pico