Building Edge GPU Clusters – Edge Computing Guide
A computer cluster is defined as a group of computers (or nodes) that are working collectively as a single computing entity. In fact, some of the world’s most vast computing capabilities are achieved through cluster computing. What, then, is a GPU cluster – and what makes an edge GPU cluster so unique? Join us in this article to learn about how an edge GPU cluster can enhance your edge computing applications!
This article covers the following content and more:
- What is Clustering & Clustering on the Edge?
- How are GPU Clusters Unique?
- Why are GPU clusters used?
- Applications & Use Cases for GPU Clusters
- Building a GPU Cluster – Components & Hardware
- Tutorial: Build a Kubernetes Edge GPU Jetson Cluster with Jetson Mate
Introduction to Edge GPU Clustering
Edge GPU clusters are computer clusters that are deployed on the edge, that carry GPUs (or Graphics Processing Units) for edge computing purposes. Edge computing, in turn, describes computational tasks that are performed on devices which are physically located in the local space of their application. This is in contrast to cloud computing, where these processes are handled remotely.
In essence, both edge and cloud computing are meant to do the same things – process data, run algorithms, etc. However, the fundamental difference in edge and cloud computing is where the computing actually takes place.
Some examples of common edge devices are mobile phones, smart watches, and even autonomous vehicles! Edge computing brings numerous benefits such as reduced latency, lower costs, increased data security and system reliability.

Traditionally, cluster computing was unique to cloud computing, but as advances in Single Board Computers (SBCs) & network infrastructure take strides, this is no longer the case. For example, the Jetson Mate Carrier Board shown below allows you to connect up to four Jetson Nano modules to create your very own computer cluster in an extremely compact footprint of 11 x 12 cm!

In simple terms, you can understand Cluster Computing on the Edge as a new paradigm which aims to bring the benefits of cluster computing into edge computing to get the best of both worlds! And in an edge GPU cluster, this is specifically done with multiple GPUs!
Graphics Processing Units (GPUs) & GPU Clusters
What are GPUs?
To understand GPU clusters, we have to first explore the functions of an individual GPU. Graphics Processing Units are a type of ASIC (Application Specific Integrated Circuit), and were originally designed to accelerate 3D graphics rendering. Over time, however, they became effective for use in more fields as a result of greater programmability.
CPUs vs GPUs
You may be familiar with the close cousin of GPUs – CPUs or Central Processing Units). CPUs are designed to quickly process tasks in rapid succession in order to provide low latency interactivity. For example, reading stored media, navigating file systems or surfing the web are generally performed by the CPU.
On the other hand, GPUs specialise in parallel computing. They break complex problems into much smaller tasks in order to compute them all at once, in order to achieve high throughput computing. Traditionally, graphics processing benefited immensely from this, since the rendering of textures, lighting and shapes had to be done simultaneously to produce smooth motion graphics.

It is important to understand that GPUs do not work in isolation, and instead heavily complement CPUs. Thus, all modern computers typically come in some combination of a CPU and a GPU!
Evolution of GPUs – GPGPUs
The transition of GPUs away from graphics rendering is thanks to modern GPU frameworks, which now allow us to program GPUs to perform general purpose workloads beyond graphics rendering. This is abbreviated as GPGPU, short for General Purpose GPU. The two most popular GPU frameworks to date are:
1. CUDA (Compute Unified Device Architecture), which is NVIDIA’s proprietary framework,
2. or OpenCL (Open Computing Language), which is an open-source GPGPU framework.
In general, if your application allows, CUDA is the preferred framework by the developer community due to better performance results. This is because of the excellent support from NVIDIA for app developers that use CUDA, which will also ensure smooth integration between your software and GPU hardware. NVIDIA also produces top of the line GPUs for personal, enterprise, or edge computing use, which all have native compatibility with CUDA.
Why Cluster GPUs?
There are three types of GPU clusters that in turn correspond to the benefits of GPU clustering. They are summarised as follows:
- High Availability – Ensures that applications are always available by rerouting requests to another node in the event of a failure.
- Load Balancing – Spreads computing workloads evenly across slave nodes to handle high job volumes.
- High Performance – Multiple slave nodes are used in parallel to increase computing power for tasks with high computing requirements.
Notably, however, GPU clusters can provide several benefits in contrast to traditional CPU-only clusters. For instance, they bring reduced demands for space, power and cooling, while also minimising the number of operating system images to be managed. In combination with unique parallel computing capabilities, GPU clustering is definitely a strong contender for numerous edge computing applications.
Edge GPU Clusters Uses
Keen to take advantage of the benefits of an edge GPU cluster, but not sure how to implement it? Today, GPU clusters operating on the edge are no longer a rare sight. In fact, they might now even be described as essential – here are a few examples!
Graphics Rendering
We’ve talked about how GPUs have evolved to perform high-throughput general purpose computing, but that certainly isn’t to say that its original role of graphics rendering is now obsolete! Photo, video editing, 3D modelling, virtual or augmented reality are just some of the many relevant modern applications that continue to rely on the traditional functions of GPUs. Unfortunately, laptops equipped with discrete GPUs are large and expensive, whereas desktop solutions lack the portability required in numerous situations.
For a mobile and affordable solution, consider an edge GPU cluster! Packed in a much smaller form factor yet still delivering significant amounts of power, you can offload graphics intensive workloads from your main computer to the edge GPU cluster to more efficiently process intensive graphics workloads.

Image / Video Processing
Alternatively, GPUs are great resources for handling large amounts of image and video data, like in surveillance systems! This is even more so if such data has to be processed from multiple inputs streams, such as multiple security cameras in a surveillance system. In recent years, hardware-accelerated video processing thanks to advancements in GPUs have significantly transformed video surveillance applications, bringing both higher resolutions and faster frame rates.
In IoT surveillance systems, an edge GPU cluster can drastically enhance the capabilities of the system to handle more cameras at higher resolutions. This allows the system to be far more scalable and allows cost savings on hardware or electricity in the long run.
Machine Learning on the Edge
Machine learning, or neural networks / deep learning in particular, require a considerable amount of computational power due to the great number of calculations that must be performed. As a result, powerful GPUs housed in data centres have long been indispensable for handling simultaneous calculations in machine learning workloads.

Today, however, that is no longer necessarily the case. With an edge GPU cluster, we can now bring the once exclusive computing capabilities of cloud computing into edge IoT devices to make them smarter. With the capability to run machine learning inferences, edge devices can now perform complex tasks like make predictions, process complex data, and even administer solutions.
Furthermore, this shift to Edge AI brings along with it several key benefits including reduced latency, reduced bandwidth requirement and cost, increased data security and improved reliability. Read about Edge AI and its transformative effects in Edge IoT in my previous article.
Deploy Scalable Applications with Kubernetes
These days, it’s almost impossible to talk about cluster computing without mentioning Kubernetes, which is an open-source platform for managing containerised workloads and services. While it’s definitely not the only solution available, it is one of the most popular ways to deploy computer clusters in 2021. You can think of it as a management interface that helps you manage your clusters, scaling resources up or down as required to make the most efficient use of your GPU clusters and more!

How does Clustering Really work?
A computer cluster consists of multiple machines, each of which are known as a node. In each cluster, there is usually a single head node, followed by multiple slave nodes (or worker nodes). All of them are connected to and able to communicate with each other through high bandwidth connections, and typically run the same operating system.
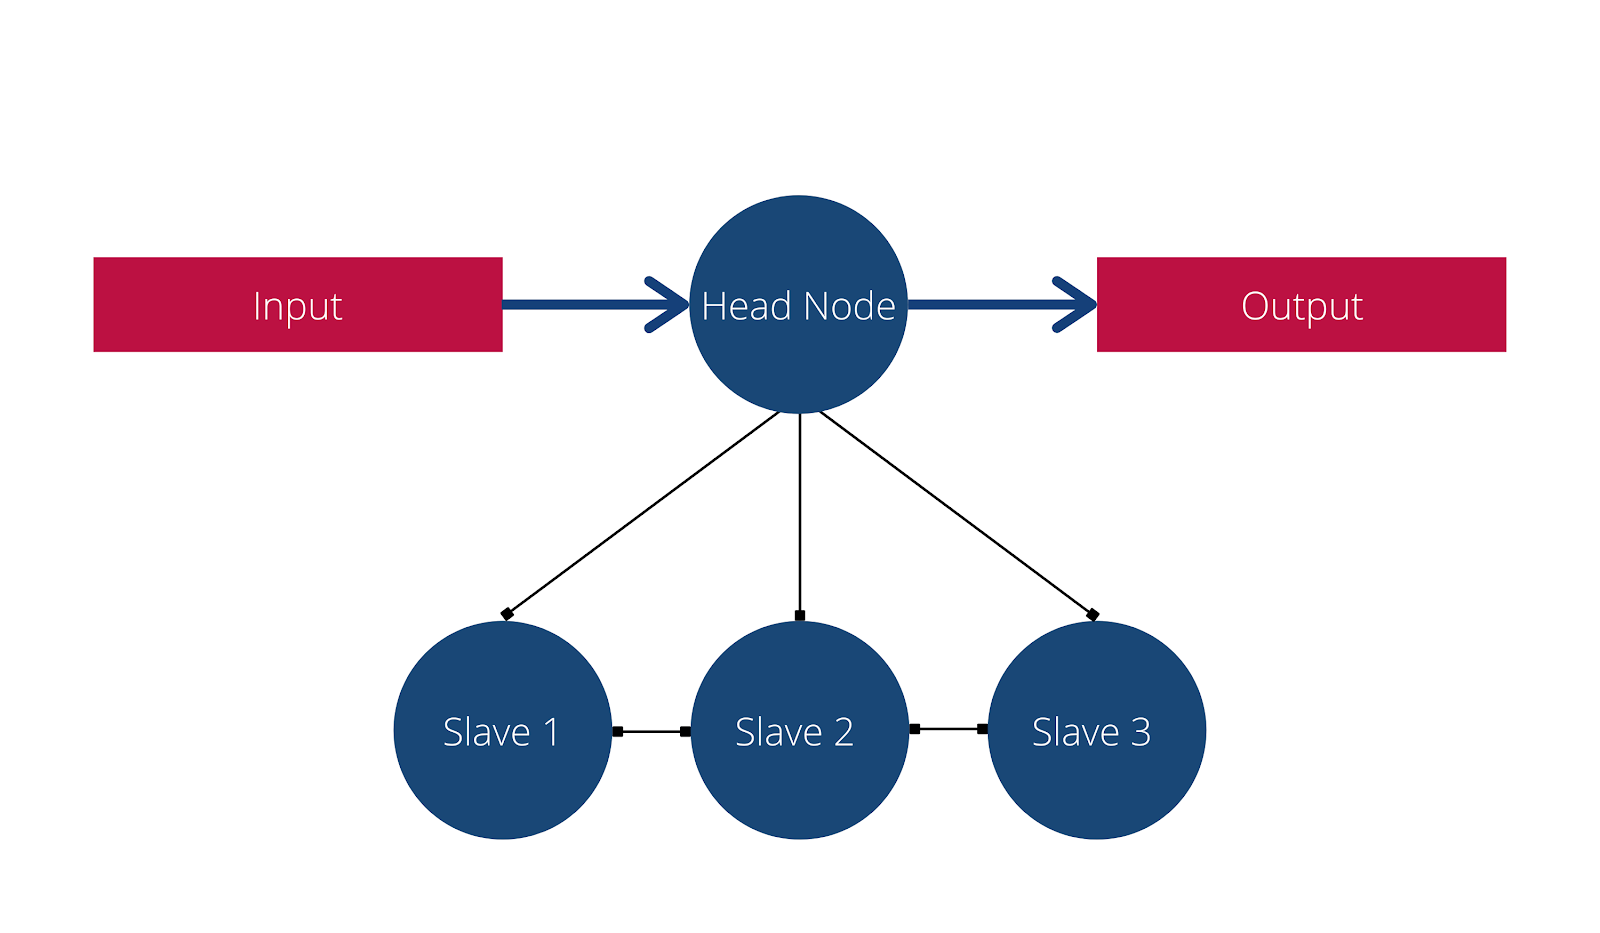
When the cluster receives a job, such as a request to process and return some data, the head node is responsible for delegating the jobs to the slave nodes. The way that the computing workload is distributed is largely where clusters differ from each other. Some clusters, for instance, focus on delivering the highest performance possible, while others are designed to guard against failure.
Building a GPU Cluster – Components & Hardware
Seeed’s Edge GPU Clustering Solutions
Seeed is proud to share our complete edge GPU clustering solution with the Jetson Mate and NVIDIA’s Jetson Nano / Xavier NX modules. Complete with a carrier board and the Jetson modules, you can easily get your hands on a complete NVIDIA GPU Cluster powered by NVIDIA’s industry-leading GPUs for edge applications!
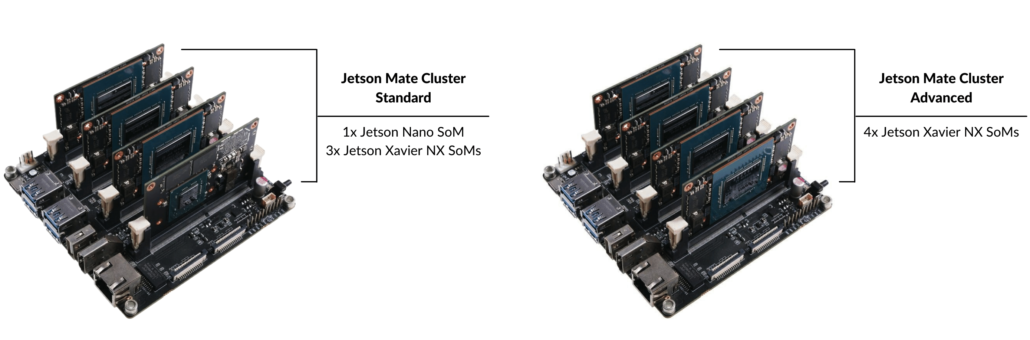
You can now pick up the hardware for a complete edge GPU cluster from Seeed in two convenient packages:
- Jetson Mate Cluster Standard with 1 Jetson Nano SoM and 3 Jetson Xavier NX SoMs
- Jetson Mate Cluster Advanced with 4 Jetson Xavier NX SoMs
Continue reading to learn more about the components of edge GPU clustering, featuring the Jetson Mate!
Hardware #1 – Carrier Board
In an edge cluster, the carrier board is definitely the most important component. After all, it connects your computer nodes to one another in order to create the high performance or high availability characteristics of a computer cluster in the first place!. Thus, it is extremely important for the edge cluster’s carrier board to have the following characteristics:
1. Able to facilitate high speed communication between head and worker nodes
2. Provides sufficient I/O and cooling for the cluster’s specific application
Complete Clustering Solution: Jetson Mate
If you’re looking for a comprehensive and reliable solution for a carrier board in your edge GPU cluster, the Jetson Mate will be an ideal choice. Equipped with an onboard 5-port gigabit switch that enables up to 4 SoMs to communicate with each other, as well as independent power for 3 worker/slave nodes, the Jetson Mate with its rich peripherals (CSI, HDMI, USB, Ethernet) and inbuilt fan is a complete solution for building GPU clusters on the edge.
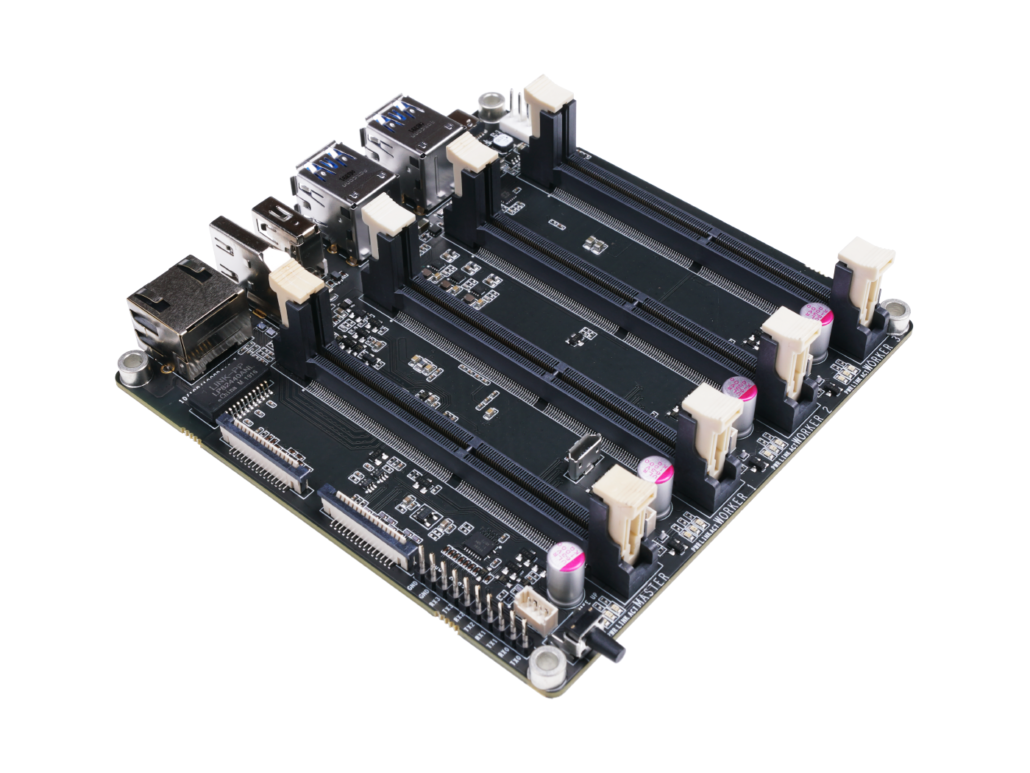

The Jetson Mate can house up to 4 of NVIDIA’s very own Jetson Nano / NX SoMs in its compact form factor to deliver immense computing power on the edge. With an easy-to-build design that can be easily set up with our step-by-step guide, the Jetson Mate also offers high flexibility and performance for your GPU clusters.
To learn more about the Jetson Mate, be sure to visit its product page on the Seeed Online Store!
Hardware #2 – Computer Nodes
Naturally, the next component that you should direct your attention and budget to are the hardware for the compute nodes. Ideally, you would want all the modules to be the same for ease of management and the flexibility to change node roles later on if needed. Here are two recommendations for GPU-equipped nodes that you can use with the Jetson Mate Carrier Board to create your edge GPU cluster!
NVIDIA Jetson Nano Module
Designed specially for AI applications with NVIDIA’s JetPack SDK, you can easily build, deploy and manage powerful machine learning applications at the edge with low power consumption with the Jetson Nano and its 128 NVIDIA CUDA Cores. It’s the perfect GPU-capable module for beginners, and also comes in a developer kit form factor, complete with its own IO and peripherals.

Product Features:
- Quad-Core ARM Cortex-A57 MPCore Processor
- NVIDIA Maxwell GPU with 128 NVIDIA CUDA Cores
- 4GB 64-Bit LPDDR4 Memory at 1600MHz 25.6GBps
- 16GB eMMC Storage
- NVIDIA JetPack SDK for AI Development
Pick up your very own NVIDIA Jetson Nano Module on the Seeed Online Store!
NVIDIA® Jetson Xavier™ NX Module
While a tad pricier than the Jetson Nano, the Jetson Xavier NX module absolutely pulls out all the stops when it comes to GPU compute power. With 384 NVIDIA CUDA cores and 48 Tensor cores for machine learning, the Jetson Xavier NX is capable of up to a whopping 6 TFLOPS (trillion floating point operations per second) for FP16 values and 21 TOPS (trillion operations per second) for INT8 values. Similarly compatible with the NVIDIA Jetpack SDK, the Jetson Xavier NX module will cover all your bases no matter the end goal.

Product Features:
- Compact size SoM powerful enough for advanced AI applications with low power consumption
- Supports entire NVIDIA Software Stack for application development and optimization
- More than 10X the performance of Jetson TX2
- Enables development of AI applications using NVIDIA JetPack™ SDK
- Easy to build, deploy, and manage AI at the edge
- Flexible and scalable platform to get to market with reduced development costs
- Continuous updates over the lifetime of the product
Pick up your very own NVIDIA Jetson Xavier NX Module on the Seeed Online Store!
Hardware #3 – Peripherals
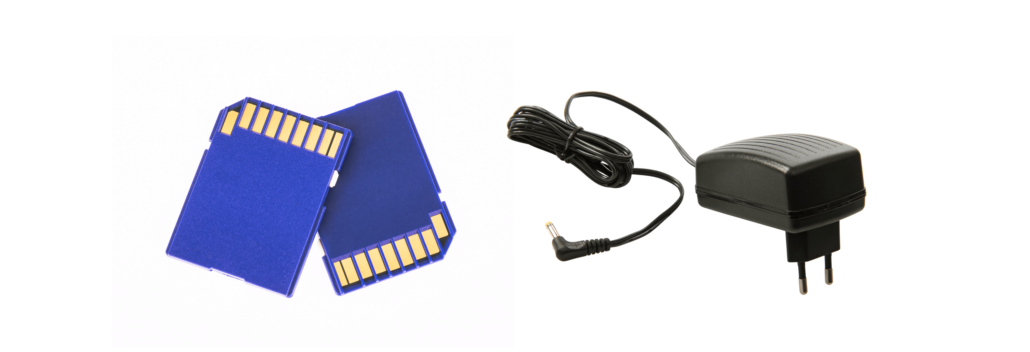
It’s also important to ensure that the performance of your cluster is not crippled by inappropriate peripherals. For example, you should ensure that modules use SD cards that are fast enough so as to avoid read-write bottlenecks. On the other hand, using a suitable power supply is critical to allow your computers to function at their maximum potential. Providing insufficient power can lead to system failure, or in the worst case, data corruption and loss.
Tutorial: Build a Kubernetes Edge GPU Jetson Cluster with Jetson Mate
In this section, I’m going to show you just how easy it is to set up your very own edge GPU cluster with the Jetson Mate and the powerful Jetson Nano modules. You can also read the complete tutorial on our Seeed Wiki page.
Required Materials
To follow along with this tutorial, the following items are recommended. Take note that you will need to have at least two Jetson Nano modules, since we require a minimum of one master / head node and one worker / slave node.
- Jetson Mate Carrier Board
- Jetson Nano Module (at least 2)
- Qualified Type-C Power Adapter (65W minimum) with PD Protocol
Install & Configure Jetson OS
We will have to configure the operating system for each of the modules using NVIDIA’s official SDK manager.
First, choose the target hardware as shown below.
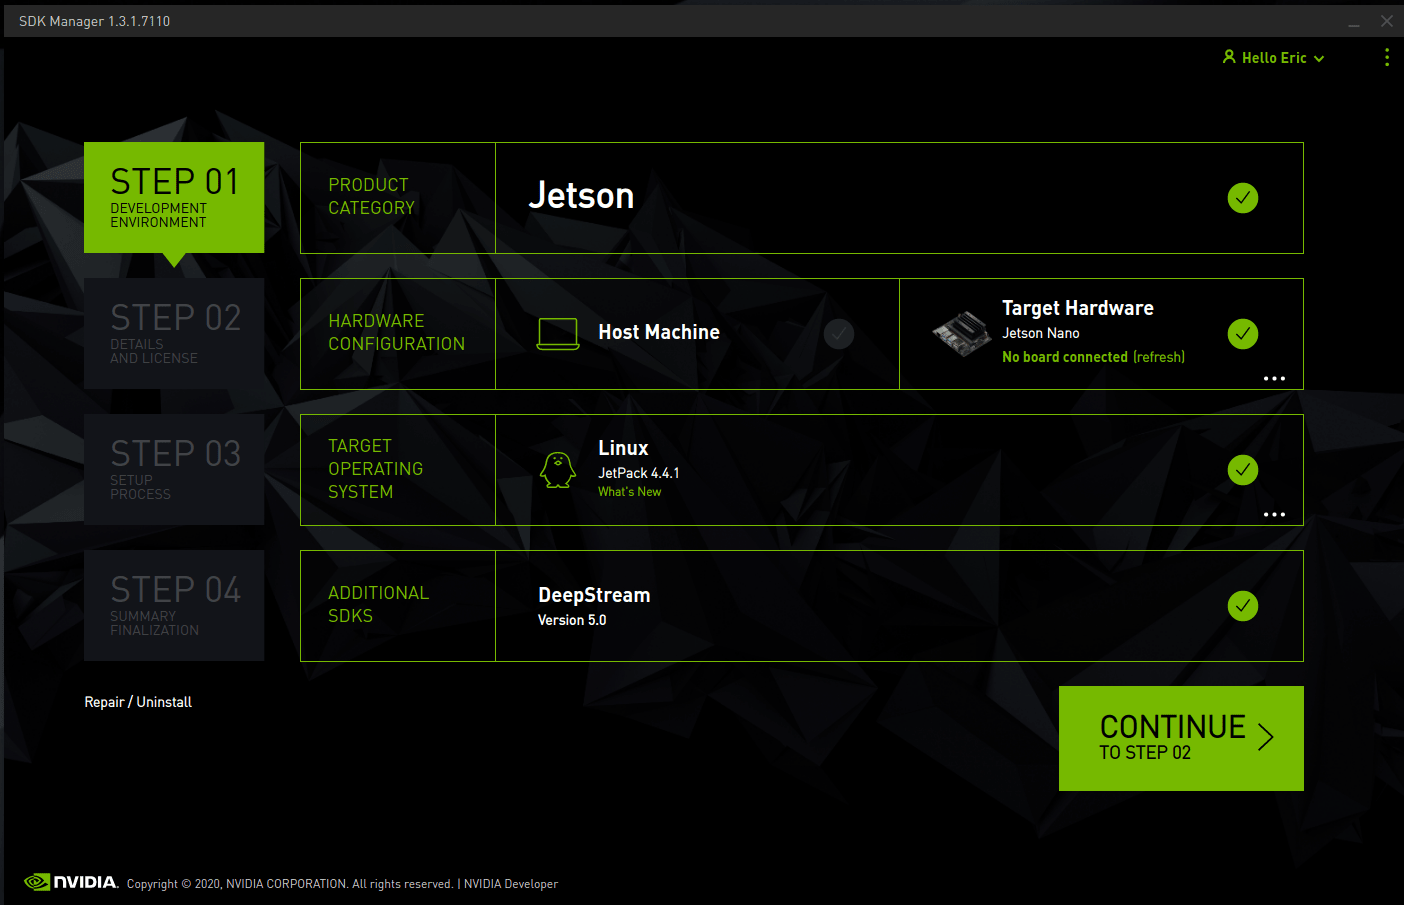
Then, choose the OS and Libraries you want to install:

Download and install the files. While downloading, insert the Jetson Nano compute module into the main node of the Jetson Mate.

Following this, short the 2 GND pins according to the picture shown.

Connect the Jetson Mate to your computer via the micro USB port and power on the machine by pressing the wake up button.
The final step is to flash the operating system onto the compute module. When the installation of the OS and software library is completed, you will see a window pop up. Select Manual Setup option, then click flash and wait until completion. That’s it!
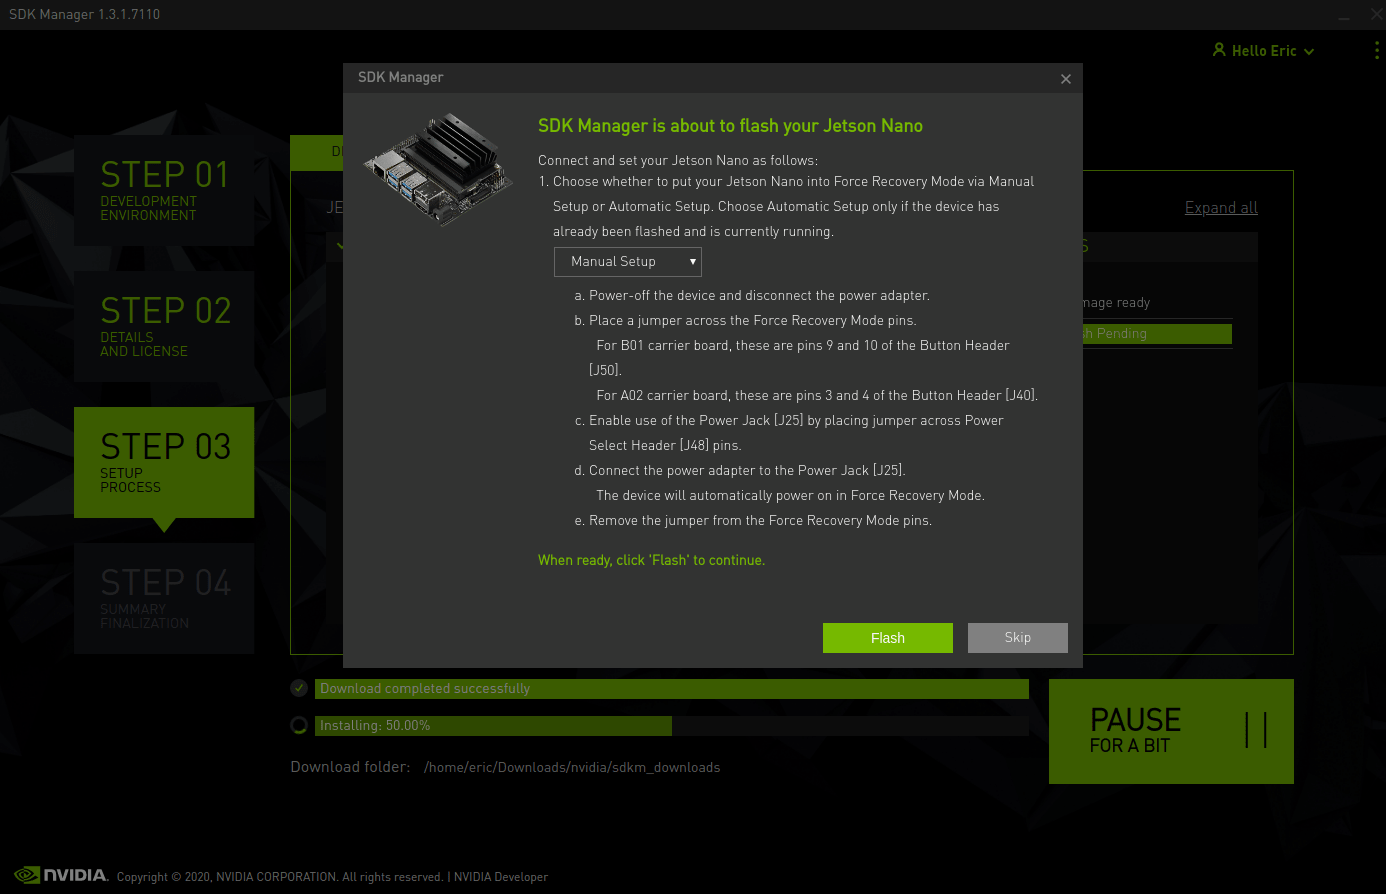
Take note that all the modules can only be flashed when installed on the main node. You are required to flash and configure all your modules one by one on the main node.
Running Kubernetes on our Cluster
In the following steps, we will install and configure Kubernetes to run on our cluster of NVIDIA Jetson Nano modules!
Configuring Docker
For both Worker & Master modules, we need to configure the docker runtime to use “nvidia” as default.
Modify the file located at /etc/docker/daemon.json as follows.
{
    "default-runtime" : "nvidia",
    "runtimes": {
        "nvidia": {
            "path": "nvidia-container-runtime",
            "runtimeArgs": []
        }
    }
}
Restart the Docker daemon with the following command,
sudo systemctl daemon-reload && sudo systemctl restart dockerthen validate the Docker default runtime as NVIDIA.
sudo docker info | grep -i runtimeHere’s a sample output:
Runtimes: nvidia runc
Default Runtime: nvidia
Installing Kubernetes
For both Worker & Master modules, install kubelet, kubeadm, and kubectl with the following commands in the command line.
sudo apt-get update && sudo apt-get install -y apt-transport-https curl
curl -s https://packages.cloud.google.com/apt/doc/apt-key.gpg | sudo apt-key add -

# Add the Kubernetes repo
cat <<EOF | sudo tee /etc/apt/sources.list.d/kubernetes.list
deb https://apt.kubernetes.io/ kubernetes-xenial main
EOF
sudo apt update && sudo apt install -y kubelet kubeadm kubectl
sudo apt-mark hold kubelet kubeadm kubectl
Disable the swap. Note: You have to turn this off every time you reboot.
sudo swapoff -aCompile deviceQuery, which we will use in the following steps.
cd /usr/local/cuda/samples/1_Utilities/deviceQuery && sudo makeConfigure Kubernetes
On the Master module only, initialize the cluster:
sudo kubeadm init --pod-network-cidr=10.244.0.0/16The output shows you the commands that can be executed for deploying a pod network to the cluster, as well as commands to join the cluster. If everything is successful, you should see something similar to this at the end of the output:
Your Kubernetes control-plane has initialized successfully!

To start using your cluster, you need to run the following as a regular user:

  mkdir -p $HOME/.kube
  sudo cp -i /etc/kubernetes/admin.conf $HOME/.kube/config
  sudo chown $(id -u):$(id -g) $HOME/.kube/config

You should now deploy a pod network to the cluster.
Run "kubectl apply -f [podnetwork].yaml" with one of the options listed at:
  https://kubernetes.io/docs/concepts/cluster-administration/addons/

Then you can join any number of worker nodes by running the following on each as root:

kubeadm join 192.168.2.114:6443 --token zqqoy7.9oi8dpkfmqkop2p5 \
    --discovery-token-ca-cert-hash sha256:71270ea137214422221319c1bdb9ba6d4b76abfa2506753703ed654a90c4982b
Following the instructions from the output, run the following commands:
mkdir -p $HOME/.kube
sudo cp -i /etc/kubernetes/admin.conf $HOME/.kube/config
sudo chown $(id -u):$(id -g) $HOME/.kube/config
Install a pod-network add-on to the control plane node. In this case, we use calico.
kubectl apply -f https://raw.githubusercontent.com/coreos/flannel/master/Documentation/kube-flannel.ymlMake sure that all pods are up and running:
kubectl get pods --all-namespacesHere’s the sample output:
NAMESPACE     NAME                                       READY   STATUS    RESTARTS   AGE
kube-system   kube-flannel-ds-arm64-gz28t                1/1     Running   0          2m8s
kube-system   coredns-5c98db65d4-d4kgh                   1/1     Running   0          9m8s
kube-system   coredns-5c98db65d4-h6x8m                   1/1     Running   0          9m8s
kube-system   etcd-#yourhost                             1/1     Running   0          8m25s
kube-system   kube-apiserver-#yourhost                   1/1     Running   0          8m7s
kube-system   kube-controller-manager-#yourhost          1/1     Running   0          8m3s
kube-system   kube-proxy-6sh42                           1/1     Running   0          9m7s
kube-system   kube-scheduler-#yourhost                   1/1     Running   0          8m26s
On the Worker modules only, it is now time to add each node to the cluster, which is simply a matter of running the kubeadm join command provided at the end of the kube init command. For each Jetson Nano you want to add to your cluster, log into the host and run:
 the cluster - your tokens and ca-cert-hash will vary
$ sudo kubeadm join 192.168.2.114:6443 --token zqqoy7.9oi8dpkfmqkop2p5 \
    --discovery-token-ca-cert-hash sha256:71270ea137214422221319c1bdb9ba6d4b76abfa2506753703ed654a90c4982b
On the Master node only, you should now be able to see the new nodes when running the following command:
kubectl get nodesHere’s the sample output for three worker nodes.
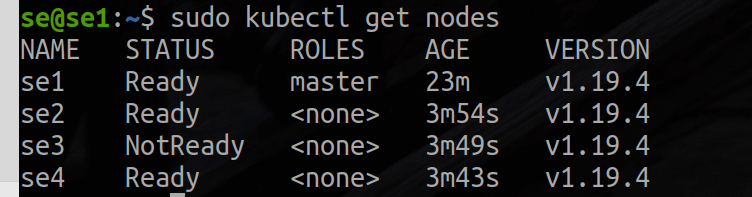
To keep track of your nodes, tag each worker node as a worker by running the following commands according to the number of modules you have! Since this example uses three workers, we will run:
kubectl label node se2 node-role.kubernetes.io/worker=worker
kubectl label node se3 node-role.kubernetes.io/worker=worker
kubectl label node se4 node-role.kubernetes.io/worker=worker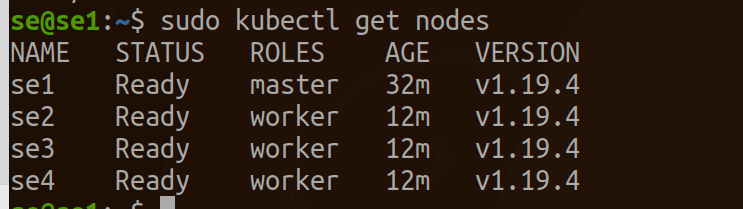
Now you have your very own kubernetes cluster running on your Jetson Mate & Jetson Nano modules! From here, you can do a variety of things, such as use a Jupyter runtime to run data analytics or machine learning workloads on the cluster!
To read more on how you can do that, be sure to visit the Seeed Wiki Page!
Summary & More Resources
And that concludes today’s article on edge GPU clusters! Powerful computing is now no longer exclusive to centralised data centres or cloud services, and can now be easily realised even in edge computing applications with the help of the Jetson Mate and Jetson modules.
As the computing landscape is further progressing towards a greater reliance on powerful edge computing capabilities, edge GPU clusters are definitely a leading solution that you should get started exploring today!
To learn more about edge computing applications and clustering, you may wish to read the following articles:
- Cluster Computing on the Edge – What, Why & How to Get Started
- Edge AI – What is it and What can it do for Edge IoT?
- How Machine Learning has Transformed Industrial IoT
- How to Choose Hardware for Edge ML!