How to run Cluster Management Software K3s on NVIDIA Jetson?
Ever thought of learning how to run a cluster management software in your IoT applications? This tutorial will take you through everything from the purpose why we’re choosing K3s to how you can run a complete test! This original tutorial is by GPUSolution.
Without further ado, let’s first talk about the purpose of using k3s:
We’ll be using Kubernetes lightweight management tool K3S, to build a Docker container cluster using 4 node devices. The purpose of this is as follows:
- The Docker container is trending in the software development, this also includes Artificial Intelligence (AI) application
- Kubernetes is currently the most commonly used cluster management application in the Docker field
- Since K3S is a lightweight management tool, there would be fewer resources used, and it’ll be much more convenient to install. Thus, making it suitable for embedded AIOT platform applications
Let’s Get Started!
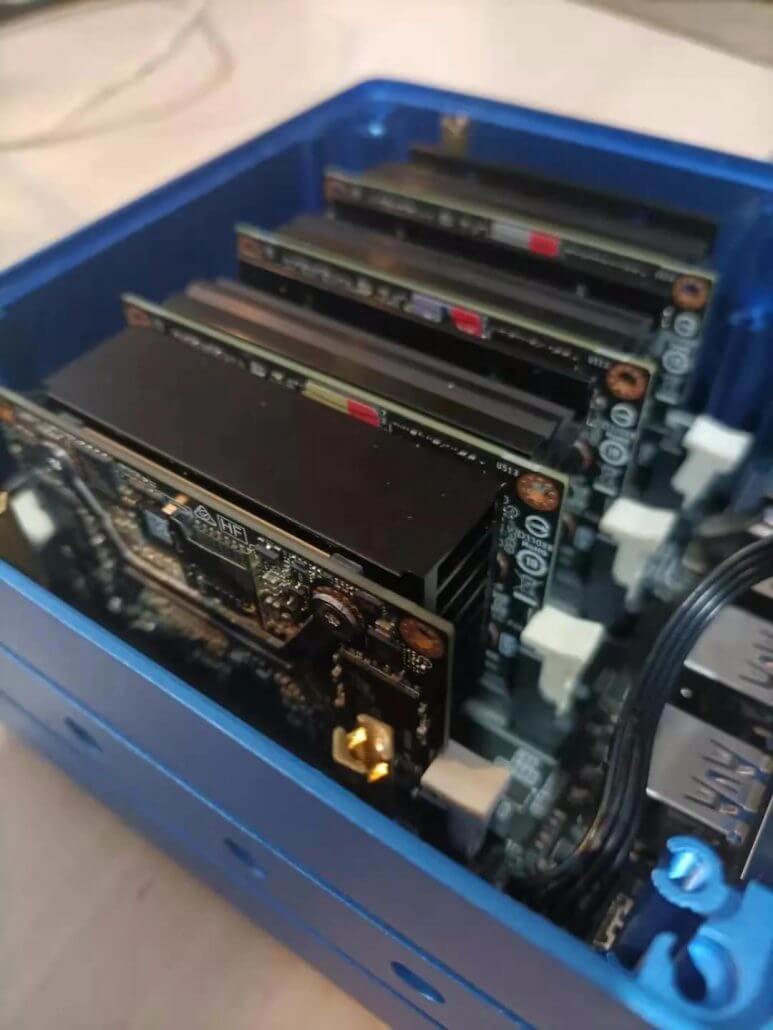
This experiment will use Xavier NX as the master node, and 3 Jetson Nano 4GB as the worker node. All devices will be using Jetpack 4.4.1 version as the development environment, with Docker 1.19 version and Nvidia-docker2 management tool pre-installed.

In the process of the experiment, you’ll also be required to download the compatible Jetpack 4.41, NVIDIA l4t-ml:r32.4.4-py3’s mirror from NGC (ngc.nvidia.com). This mirror supports a variety of Deep learning application frameworks and Jupyter interactive environment with an instruction.
Building K3S cluster using 4 Jetson nodes
Description of the cluster environment:
Appoint a node as the Master and the other nodes as the workers in Seeed’s devices. The example below shows the configuration of each node: (Set the IP portion of the table according to your environment)
| Role | IP | Host Name | Type of Device | Jetpack version |
| Master | xx.xx.xx.30 | Node0 | Xavier NX | 4.4.1 |
| Worker | xx.xx.xx.31 | Node1 | Jetson Nano 4GB | 4.4.1 |
| Worker | xx.xx.xx.32 | Node2 | Jetson Nano 4GB | 4.4.1 |
| Worker | xx.xx.xx.33 | Node3 | Jetson Nano 4GB | 4.4.1 |
Add all 4 IP and Hostname into the 4 nodes’/etc/hosts folder
127.0.0.1 localhost
127.0.1.1 node3<= Set your own hostname
# Add all the cluster nodes’ IP and Hostname down below
xx.xx.xx.30 node0
xx.xx.xx.31 node1
xx.xx.xx.32 node2
xx.xx.xx.33 node3
(Archive)
By doing this, you will be able to directly use every nodes’ hostname instead of memorising their IP when you are performing operation later.
Using K3S to build Nano management cluster
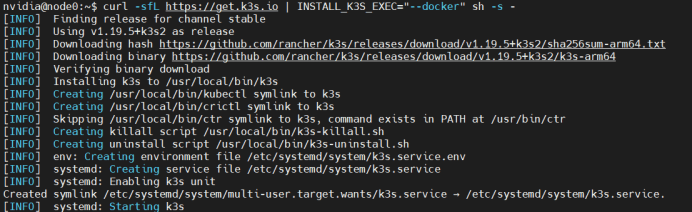
- Install K3S Server on the Master (node0):
The executing commands are as follows:
curl -sfL https://get.k3s.io | INSTALL_K3S_EXEC=”–docker” sh -s –
Check if the installation is completed:
docker images

sudo kubectl get node

To test whether you’re able perform calculation, execute the third-party packaged cuda devicequery container:
sudo kubectl run -it nvidia –image=jitteam/devicequery –restart=Never
If everything went well, the screenshot below will be shown:

- Install K3S agent on the 3 workers (node1/node2/node3):
- 1. First, locate the k3s server token on the Master (node0) and execute the following commands sudo cat /var/lib/rancher/k3s/server/node-token
You should be able to see a similar alphabetic string about the length as shown below (it will be different):

2. On every worker (node1/node2.node3), execute
” export k3s_token= <node-token alphabetical string “as shown in the previous step

export
k3s_url=”https://<IP_OF_MASTER>:6443″#
The <IP_OF_MASTER>is node0

Then execute the command as shown below:
curl -sfL https://get.k3s.io | K3S_URL=${k3s_url} K3S_TOKEN=${k3s_token} sh –
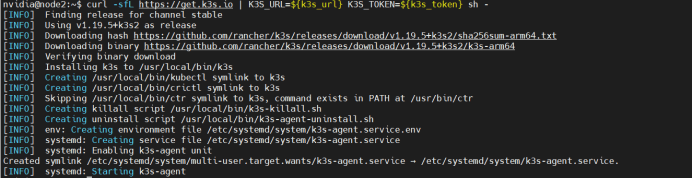
*The steps, as shown above, are all executed on the worker nodes
3. Execute the following commands on Master, and check the agent installation:
sudo kubectl get nodes
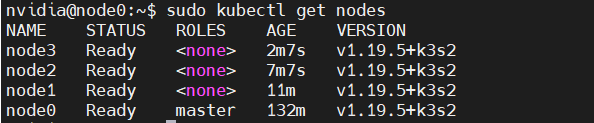
This would indicate that 3 worker nodes have entered the scope of k3s management, but the roles haven’t been set.
4. To set the roles for each worker, execute role setting command on the Master node (mode0)
sudo kubectl label node node1 node2 node3 node-role.kubernetes.io/worker=worker

Then check the status of the node:
sudo kubectl get nodes

With that, you’ve completed building the k3s cluster.
5. Check the cluster information an execute the following command:
sudo kubectl cluster-info

Executing NVIDIA l4t-ml container’s TensorFlow
- Download l4t-ml:r32.4.4-py3’s mirror docker pull nvcr.io/nvidia/l4t-ml:r32.4.4-py3
- Type jetson-tf.yaml
apiVersion: v1
kind: Pod
metadata:
  name: jetson-tf
spec:
  restartPolicy: OnFailure
  containers:
  - name: nvidia-l4t-ml
    image: "nvcr.io/nvidia/l4t-ml:r32.4.4-py3"
    command: [ "/bin/bash", "-c", "--" ]
args: [ "while true; do sleep 30; done;" ]- Check the pod status and execute:
sudo kubectl get pod

- Once you’ve confirmed that pod (jetson-tf) is running, it’ll be ready for usage. But if its status states “ContainerCreating”, wait till it states running
- To activate this container, execute sudo kubectl exec -it jetson-tf — python3

Enter container’s puthon3 interactive environment and execute the following codes:
from tensorflow.python.client import device_lib
device_lib.list_local_devices()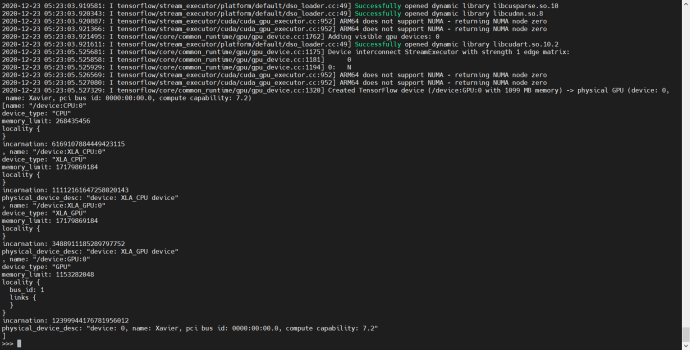
This would then display the GPUs supported by Tensorflow in the k3s container.
For a complete test, you can further execute the following code in Python3:
from tensorflow.python.client import device_lib
def get_available_gpus():
local_device_protos = device_lib.list_local_devices()
return [x.name for x in local_device_protos if x.device_type == 'GPU']
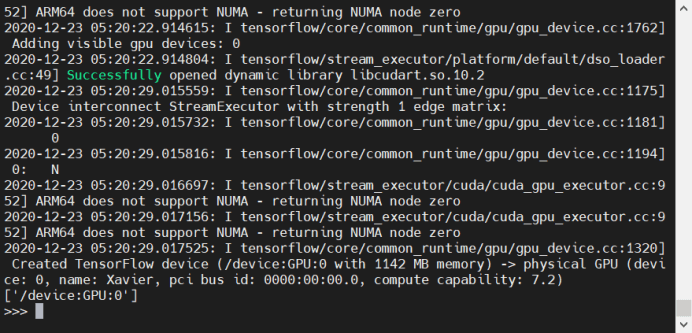
get_available_gpus()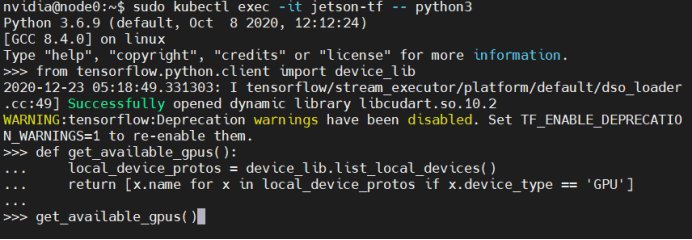
After executing, you’ll get the following output:
Summary
And that’s all for our tutorial on running K3s on your devices! Do let us know if you’ve enjoyed this article and hope that this has helped you in any sort of way!