What are AT Commands?
AT commands are a set of instructions used to control a modem, where AT is short for “attention”. AT commands get their name from the fact that the syntax for every command issued begins with “AT”.
In today’s definitive guide, learn all you need to know about AT Commands and how to get started in building your IoT projects!

What are AT Commands For?
AT commands control modems. A modem is a device which transmits data between our local networks and the outside world, or Wide Area Network (WAN). In other words, a modem enables long distance wireless data transmission – a critical function in our IoT applications!
AT commands have been used since the days of dial-up modems. Over time, we used AT commands to interface with the modems in mobile devices. These includes 2G modules (GPRS/EDGE/1x), 3G modules (HSDPA/HSPA/EVDO) and 4G modules (LTE).
Typically, we can use AT commands to access the following services on a modem:
- SMS, MMS, & Fax
- Voice / Data Transmission
- System Information and Setting Configuration
Today, AT commands are still being used to configure and establish network connections on modern 5G modems, as well as the increasingly popular LoRa modules. However, AT commands also assist with accessing system status and information, which is critical for troubleshooting and debugging applications.
AT Commands are issued to modems with a terminal via a serial connection. If you are new to serial communication, I’d recommend you read our beginner’s guide to serial communication here.
AT Command Syntax
In this section, let’s break down the syntax of an AT command.
An AT command typically consists of the following:
AT<COMMAND><SUFFIX><DATA>
AT commands can be classified into 4 general categories with different suffixes.
| Type | Use | Suffix |
| Test | Check the compatibility of a command with a modem | =? |
| Read | Extract information from or regarding the modem | ? |
| Set | Configure the settings of the modem | = |
| Execute | Perform an operation on or with the modem | None |
For example, to check the modem’s manufacturer, we may type:
AT+CGMI
This command could, for example, return:
u-blox
OK
The first line, “u-blox”, is information returned to our command, and “OK” is the result code. The result code tells us the status of the command response. In this case, “OK” tells us that the command has been completed successfully.
An “ERROR” may also be returned, which may mean one of the following:
- Syntax of the AT Command is Incorrect
- Modem is incompatible with the AT Command issued
- Modem is currently unable to process the command (eg. when trying to change settings while modem is active and transmitting)
AT Command References
No matter which modem you have, there are two primary groups of AT Commands that you can use.
- Universal AT Commands: Common commands can be used on any modem.
- Proprietary AT Commands: Specific commands developed by your modem’s vendor for use with your modem.
Even different modems from the same vendor can have different compatibilities with AT commands, so it’s best to consult the manual that comes with your device for the full list of AT commands!
Nonetheless, here are 7 basic and common AT Commands to get started with the modem you have on hand.
AT
Checks the interaction between the computer and the module.
Returns a result code of “OK” if the port and the module can connect correctly, else returns “ERROR”.
+CMGF
Sets up the SMS mode. By adding 1 or 0 with the command, text or PDU mode can be selected. The text mode, while easily operable, is limited. On the other hand, the PDU mode allows a more detailed access to the SMS service, although to use this you require some basic knowledge of TDPU.
AT+CMGF=<mode>
+CMGS
Sends an SMS to a provided phone number.
AT+CMGS=<Serial Number of SMS to be sent>
ATD
Makes a call to a provided number.
ATD;(Enter)
ATA
Answers incoming calls. Incoming calls are denoted by a message ‘RING’, which are duplicated for every ring from the incoming call. After the call ends, a message saying ‘NO CARRIER’ will be displayed.
ATA(Enter)
+CMGW
Used to store a message in the SIM. After the execution of the command, the ‘>’ sign appears in the next line where the message can be entered.
AT+CMGW=” Phone number”
> <Message to be stored>
ATH
Disconnects a remote user with the GSM module.
Recommendations for IoT Projects!
If you’re looking at AT commands, you’ll definitely be looking for a modem-enabled development platform for your IoT projects. We hope that you will enjoy our following recommendations!
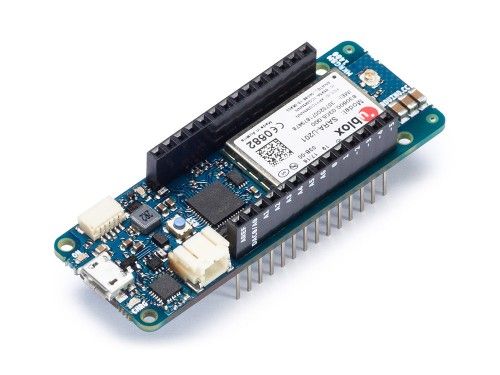
Beginner-Friendly Option: ARDUINO MKR GSM 1400

The Arduino MKR GSM 1400 has been designed to offer a practical and cost effective solution for you. Add global GSM connectivity to your projects even with no prior experience with the help of the beginner-friendly Arduino IDE.
Furthermore, you can also make use of the MKRGSM Library from Arduino to easily interface with this GSM board!
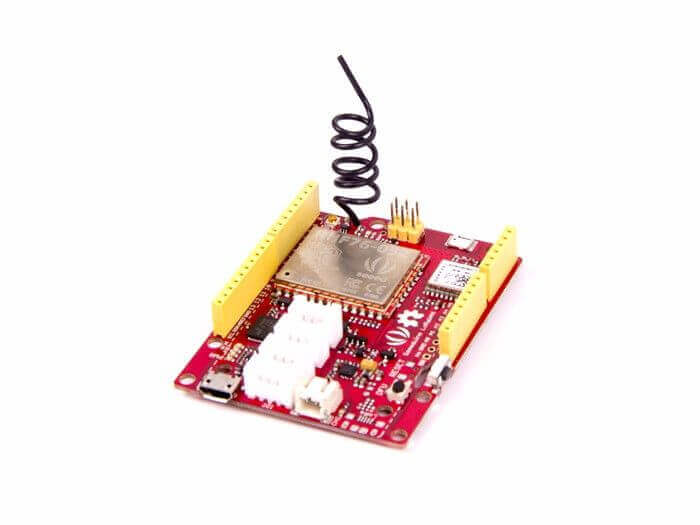
Best LoRaWan Option: Seeeduino LoRaWan with GPS

The Seeeduino LoRaWAN W/GPS is an Arduino development board enabled with LoRaWan protocol and GPS functions. With four standard Grove connectors, it is easy to get started with building any kind of IoT project.
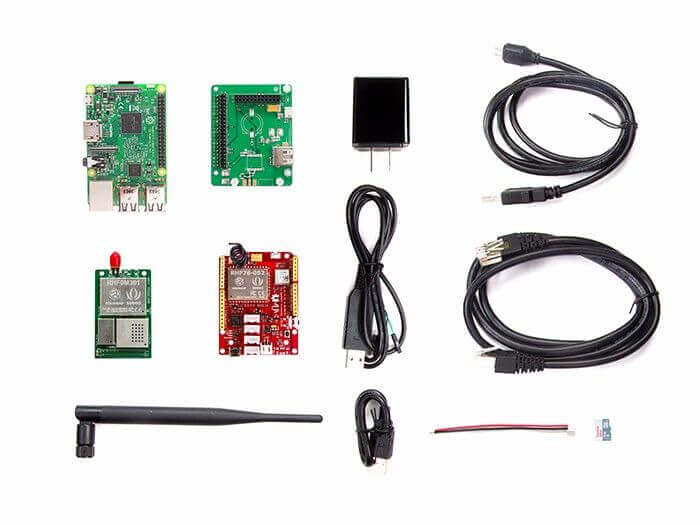
Complete Package: LoRa LoRaWAN Gateway – 868MHz Kit with Raspberry Pi 3

This complete kit comes with a Raspberry Pi 3, a Seeeduino LoraWan with GPS, and a gateway & local server. The LoRaWan Gateway with Raspberry Pi will allow you to collect and transfer data among all of your LoRa nodes. Combined with the Seeeduino LoRaWan and Grove modules, your IoT prototype can be completed within minutes.
Summary
Thank you for reading our definitive guide to AT commands! We hope that you now have a better understanding of AT commands and their importance in interfacing with wireless modems.
For an example on wireless IoT solutions to get started, be sure to visit Smart Poultry Farming | Wireless IoT Solution at Kinghoo with SenseCAP LoRaWAN Products.
You might also be interested in the following resources for learning more about modems and AT commands!
- Introduction to Modems
- Twilio’s Introduction to AT Commands
- LoRapedia, An Introduction of LoRa and LoRaWan Technology