Interesting 3D printing projects you need to check out in 2023!
3D printing is also known as additive manufacturing, it basically describes how this technology creates objects layer by layer. The 3D printing technology has progressed and improved massively as compared to when it was first invented in the 80s. Thus, you can do so much with different materials using a 3D printer!
With that said, we will be looking at a variety of 3D printing projects that you should try out if you haven’t already! If you’re not familiar with 3D printers, do scroll till the end for resources that would help you with that.
But before we can jump into the projects, let’s look at what are the basic hardware and software you should have!
What you’ll need for 3D Printing:
Hardware
- 3D Printer. Main components: Build platform, Extruder, Print Head, Control Interface.
- Material for 3D printing
- Common: PLA (Polylactic acid, a plastic), ABS (Acrylonitrile Butadiene Styrene, a plastic), PETG (Polyethylene terephthalate glycol, a thermoplastic)
Should you need materials for 3D printing, Seeed does offer a few PLA and ABS filaments:
Software
- Autodesk Fusion 360
- AutoCAD
- Solidworks
- Blender
- ZBrush
- Thinkercad (For beginners)
3D Printing Projects
Stand for cotton swab sticks and discs

Sick of having your cotton pads and swabs laying around your house in plastic packaging? You can now have a place to organise and store them if you own a 3D printer! This project allows you to produce your cotton pads and swabs organizer that you can reach for whenever you need it.
What you’ll need:
- Rasp
- Wire cutters
- Medical clamp
- Taper Drill Bit
- Triangular Burr Scraper
- Blades
- Tape Polyimide Adhesive Insulating
- Hot Melt Glue Gun
- Liquid Dispenser Pump
- 3D printer
Don’t want to lose your cotton swabs and pads anymore? Click on this project to solve your problem!
Tealight Holder (Twinkling Bloom)

A DIY candle holder to beautify your living area can really improve one’s mood. Now you don’t have to buy a candle holder if you own a 3D printer to create this project!
What you’ll need:
- 3D printer
- PLA filament material
Do check out this project if you’re into home decors and candle holders!
3D Printed Camera Slider – Motorized
Constantly using your DSLR for photoshoots but want to keep a slider with adjustable speed and direction? You can create your very own motorised camera slider and keep your hands-free from now on!
What you’ll need:
- 3D printer
- DC motor
- Speed controller
- Timing belt
- 2-way switch
- PVC pipes
- scrap wood
Give this project a shot if you’d like a motorised slider to mount on your tripod!
Smart Lamp
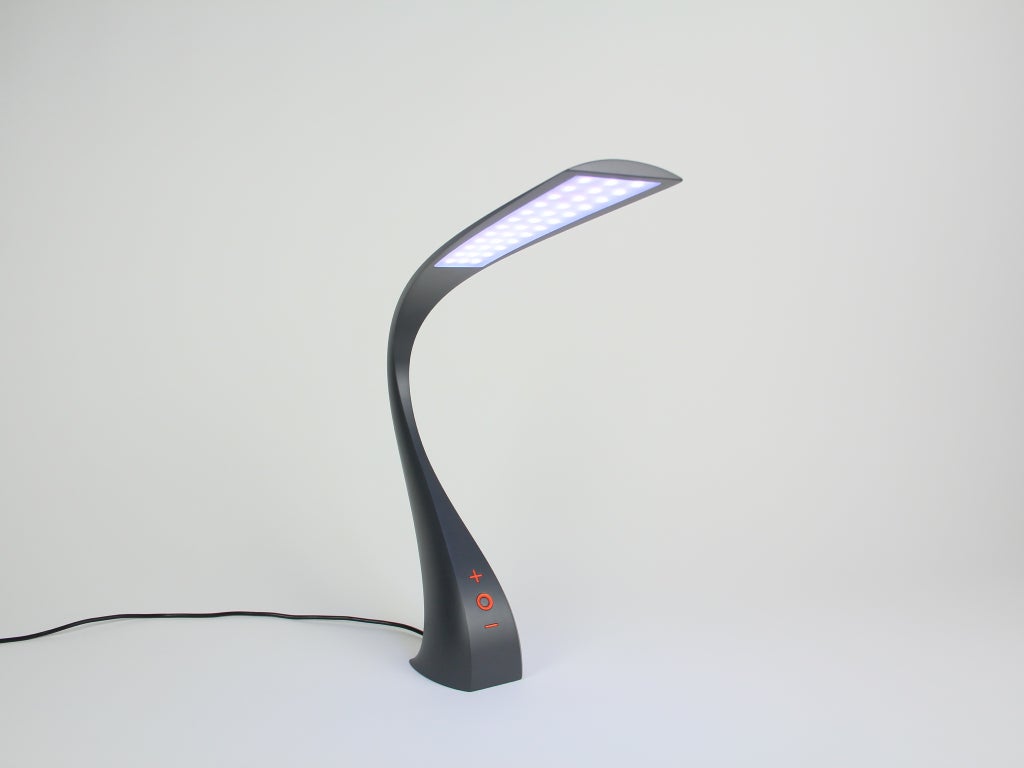
If you’re pretty experienced in electronics and Fusion 360, you can build your very own smart lamp that is connected through a Wifi chip and microcontroller! This project also goes into details about IoT if you wish to learn more about it as well.
What you’ll need:
- 3D Printer
- WINC1500 Breakout board
- 3x of N Channel MOFSETS
- Light Sensor
- Capacitive Touch Board
- LEDs for the backlight Power button (you only need a couple of LEDs)
- Stranded Core Wire
- Wire Cutters
- Wire strippers
- Solid Core wire (for the capacitive touch buttons)
- LED Strip
- Bi-Directional Switching regular (12V to 5V)
- Teensy 3.2 // Seeeduino Mega
- 3x protoboards
- 12V DC Power Supply and 2.1 mm Barrel Jack (The one linked includes both!)
- 3x 68-ohm resistors (one per backlight LED)
- Heat Shrink tubing 1/8”
- Breadboard
- Heat Gun
- Soldering Iron (link includes everything solder related – solder included)
- Solder
- Water (for cleaning the solder pad)
If you’re interested in building your IoT lamp, do check out this project!
Mini USB Vacuum Cleaner
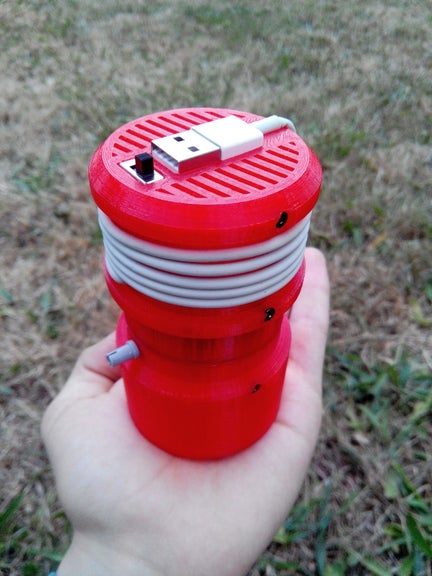
Want a tiny vacuum cleaner that allows you to clean hard to reach areas? This project shows you how to build your portable mini vacuum cleaner that charging through a USB cable!
What you’ll need:
- Superglue
- A screwdriver
- 6x Pozidriv screws (I found them into an old CD driver)
- Scalpel/cutter
- Flat pliers
- Cutting pliers
- Sandpaper
- Heat shrink (4 mm diameter)
- Soldering iron
- solder
- Calliper
- 1x DC motor RE-140 (I chose this motor because it is very common, and you can easily find it in old toys. If you decide to use a different kind of motor, do not forget to change the SolidWorks files)
- An old USB Apple cable (from iPhone 5 or more recent)
- Switch (6*12 mm)
- LEGO technique fixation
- Flexible pipe
- Teabag (for the filter)
- 3D printer
Sounds like something up your alley? Try out this project by clicking on the link now!
3D Printed Wireless Lantern
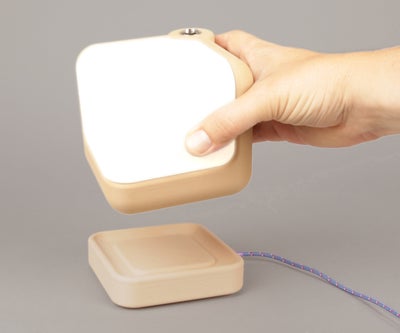
Looking for a wireless charging lamp you can put it anywhere in your house? This project allows you to build a lamp that runs on battery and will glow for 1.5 hours on a single charge!
What you’ll need:
- Wireless Charging Transmitter
- Wireless Receiver Module
- Micro Lipo w/MicroUSB Jack – USB LiIon/LiPoly charger
- Lithium-Ion Battery – 3.7v 2000mAh
- 1 Watt Cool White LED – Heatsink Mounted
- Panel Mount Self-Locking Metal Push Button Switch 16mm
- 3D printer
- Soldering iron
- Small screwdriver
If you’re interested in building a cute wireless charging lamp, do check out this project for yourself!
MiniZowi Bluetooth Dancing Controlled Robot
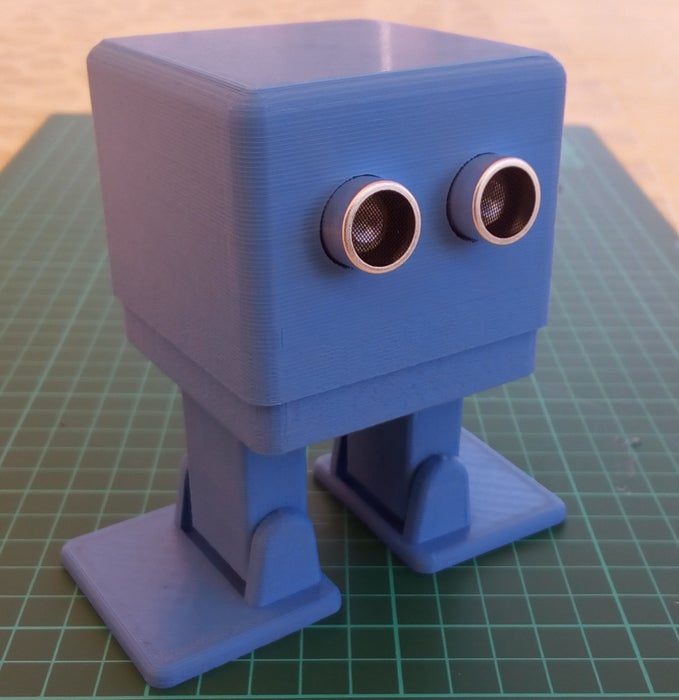
Want to have some fun with your dancing Bluetooth robot? This project shows you how to build your very own robot that you can control its actions like dancing through Bluetooth!
What you’ll need:
- 3D printer
- 1x Arduino Nano v3.0 // Seeeduino Nano
- 4x Servomotor Sg9
- 1x portabattery 4xAA
- 1x Bluetooth module HC-06
- 1x ultrasonic module HC-SR04 // Grove – Ultrasonic Distance Sensor
- 1x protoboard
Sounds fun? Do check out the project for more details!
Among Us crewmates model
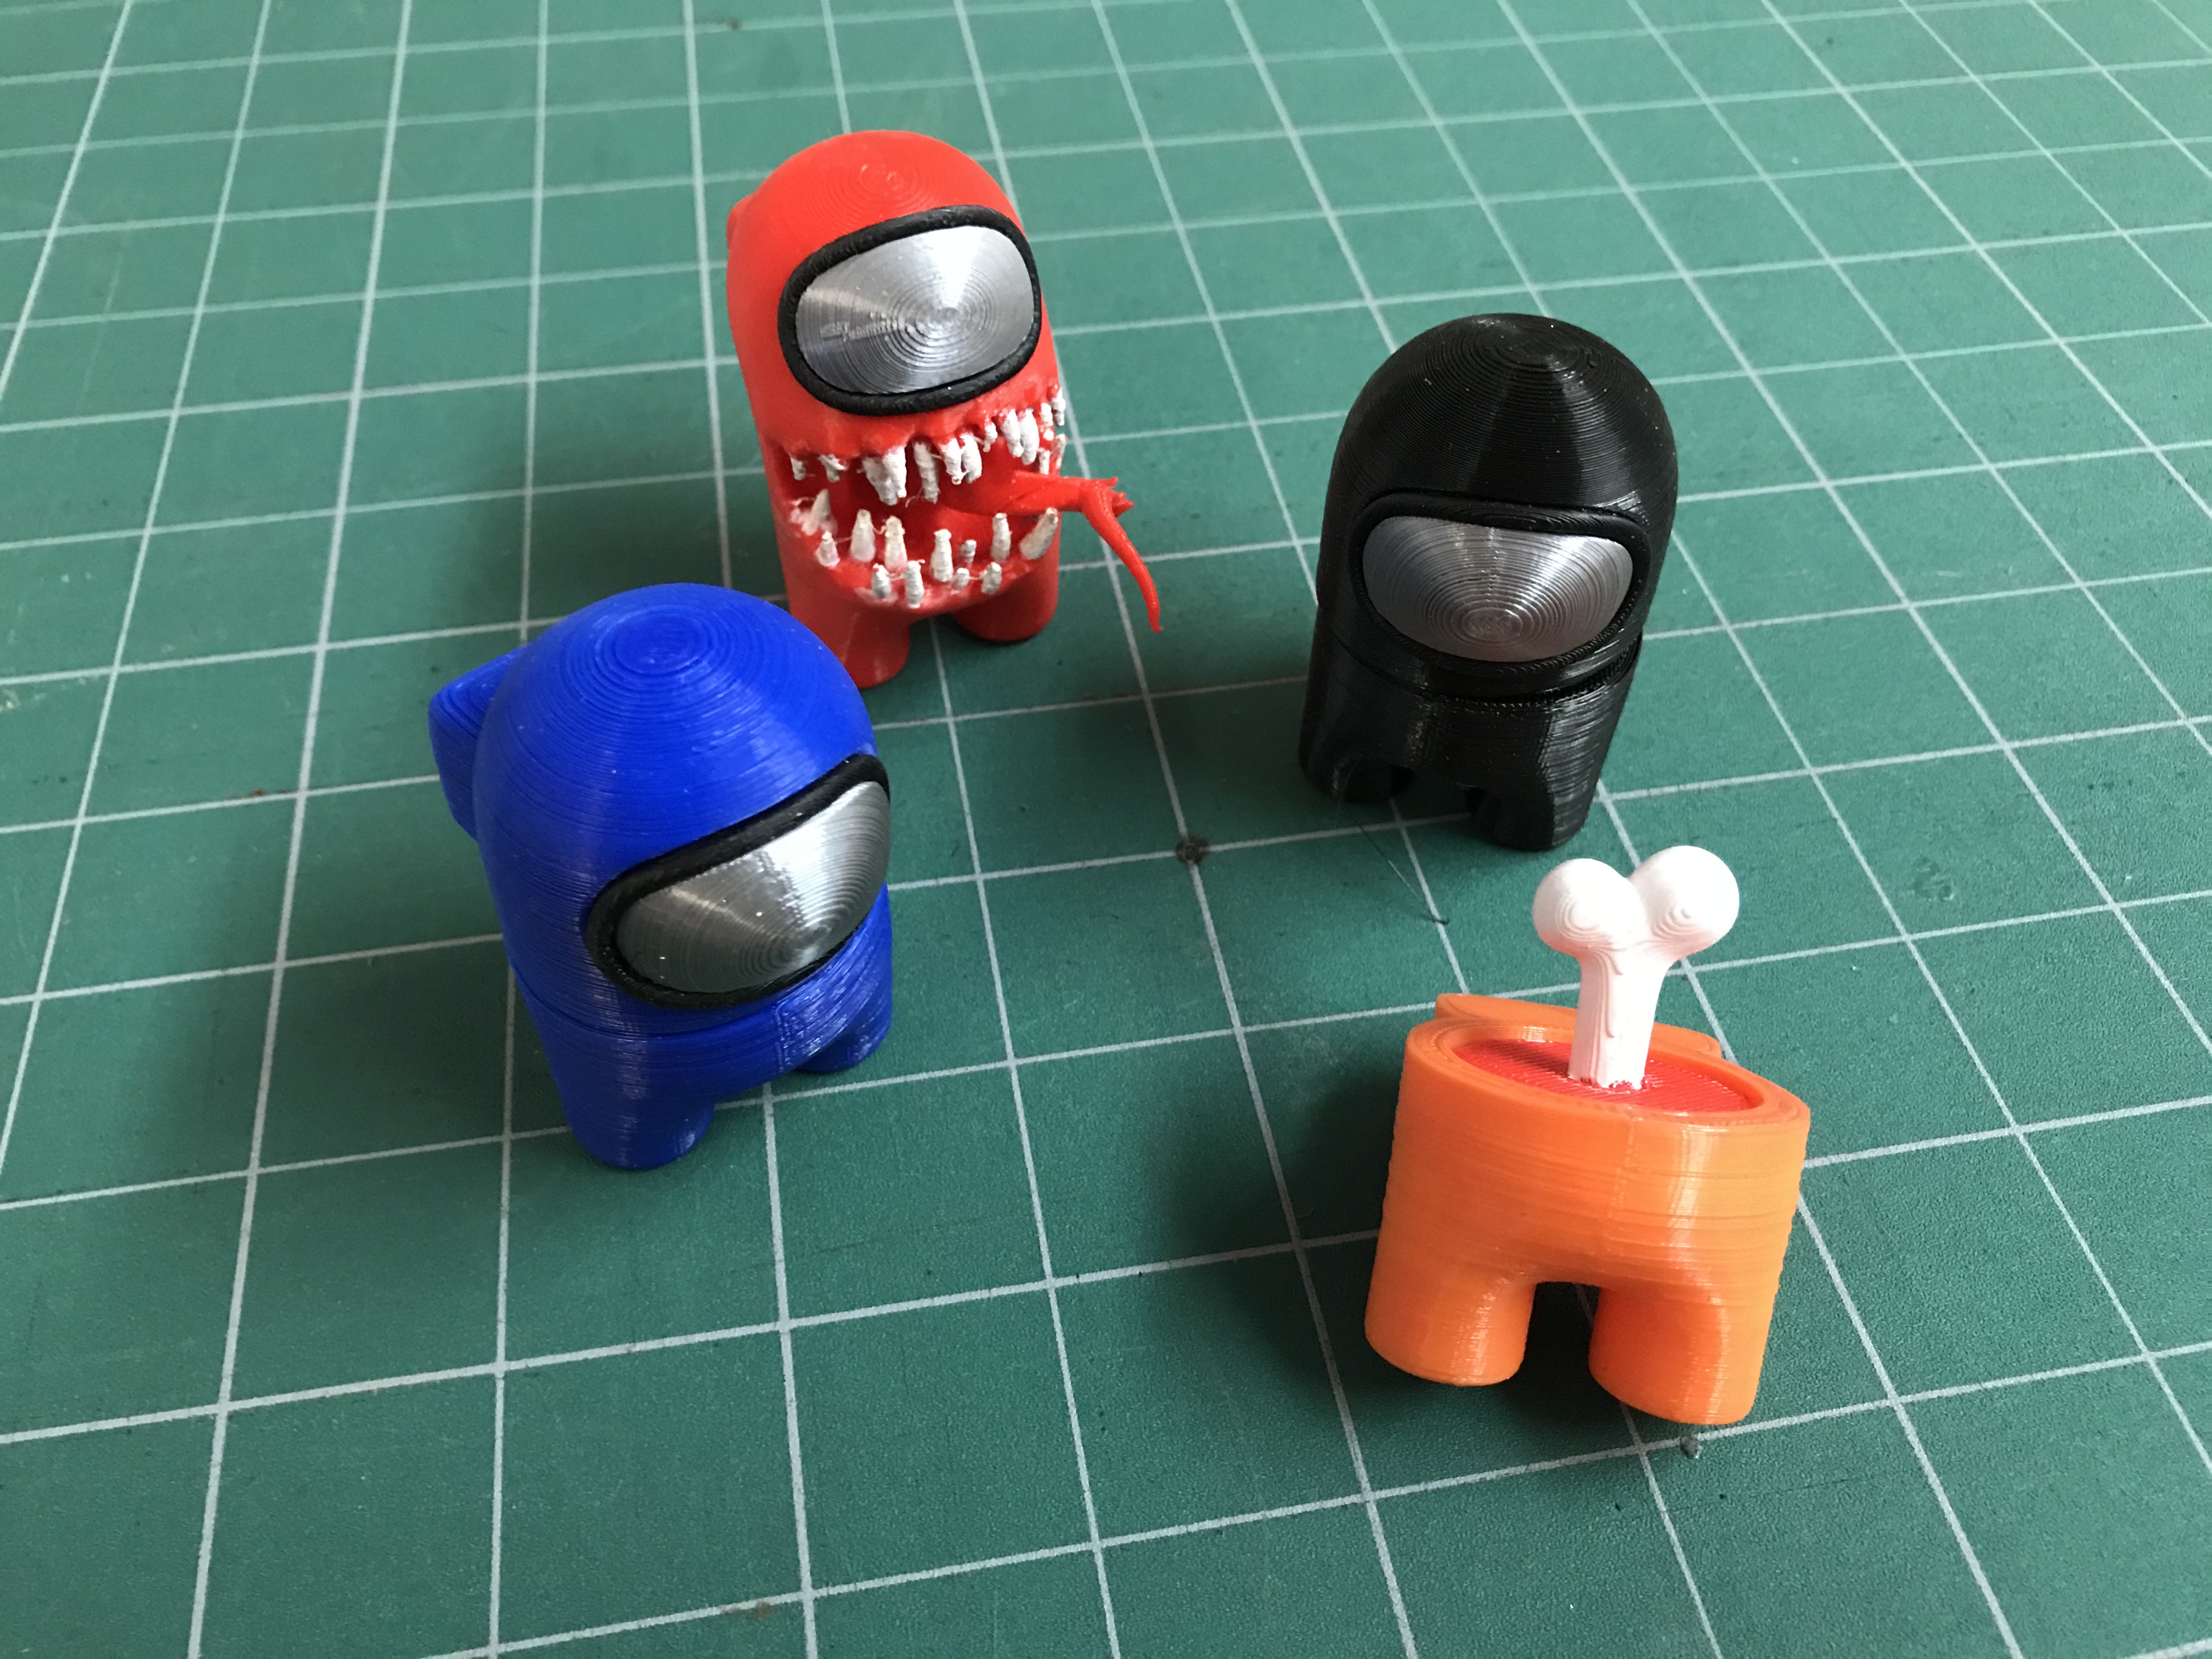
“You’re sus!”, the popular game Among Us has gotten a lot of attention lately and many have bought merch because of that. But what if you could 3D print your very own Among Us crewmates and give it to your friends as Christmas gifts? This project shows you exactly how you can do that!
What you’ll need:
- 3D printer
Do check out this project for yourself and start gifting! But do note that you would need to contact the IP owners if you wish to print and sell it.
Automatic Alcohol Dispenser
During this Covid situation, it is advised that we should wash our hands as frequently as possible. Thus, making your very own dispenser using a 3D printer could come in handy.
What you’ll need:
- 3D printer
- DC pump x 1
- PVC tube x 1
- Adjustable Spray Nozzle x 1
- TIP32C Transistor x 1
- IR Proximity sensor module x 1
- Micro USB breakout board x 1
- 1N4002-4007 Rectifier Diode x 1
- 100R 1/4W Resistor x 1
- Mini Breadboard x 1
- Prototyping board x 1
- Project enclosure (like a mason jar)
Check out this project and make your dispenser now to keep yourself safe!
Self Watering Pot Plate
Tired of watering your plants? Forget to water your plants? This will never be an issue again with a self-watering pot plate! Should you be away from home for a long time and will not be able to water your plants, this self-watering system will keep your green leafy friends hydrated.
What you’ll need:
- 25 cm silicone tube Ø 8mm
- 35 cm silicone tube Ø 3mm
- Empty PET bottle, e.g. from water or milk
- 3D printer
- Fusion 360 (optional)
Make sure to check out this project if you have plants at home!
Wifi Moravian Star Christmas Tree Topper
It’s December, which also means its the month of Christmas! Your Christmas tree wouldn’t be complete without a Christmas tree topper. If you’d like to DIY this year, this project would be perfect for you!
What you’ll need:
- 3D printer
- Soldering Iron
- Wire cutters
- Wire strippers
- 44 Addressable LEDs
- 3D filament (clear PETG)
- 22g Wire (Silicon coated, multi-stranded)
- Hot Glue
- ESP8266 WEMO D1 MINI
- Solder
- USB Cable
- 2A USB Charger
Need a Christmas tree topper? check out this project now!
Bike Blinkers/ Hazard Lights
Do you ride bikes at night frequently? This bike light blinker would guarantee your safety even in the darkest alleys! This is a fun and simple project for anyone who is interested in DIYing their bike light blinker.
What you’ll need:
- 20x 3mm LEDs
- 2x NPN Transistors
- 2x 35 Ohm Resistors
- 2x 100 Ohm Resistors
- 9v Battery
- 9v Battery Clip
- 2x Push Buttons
- Power Switch
- Extra Wire
- Arduino Uno // Seeeduino V4.2
- 3D printer
Sounds interested? Do check out the full detail of this project by clicking the link!
Magnet Maze
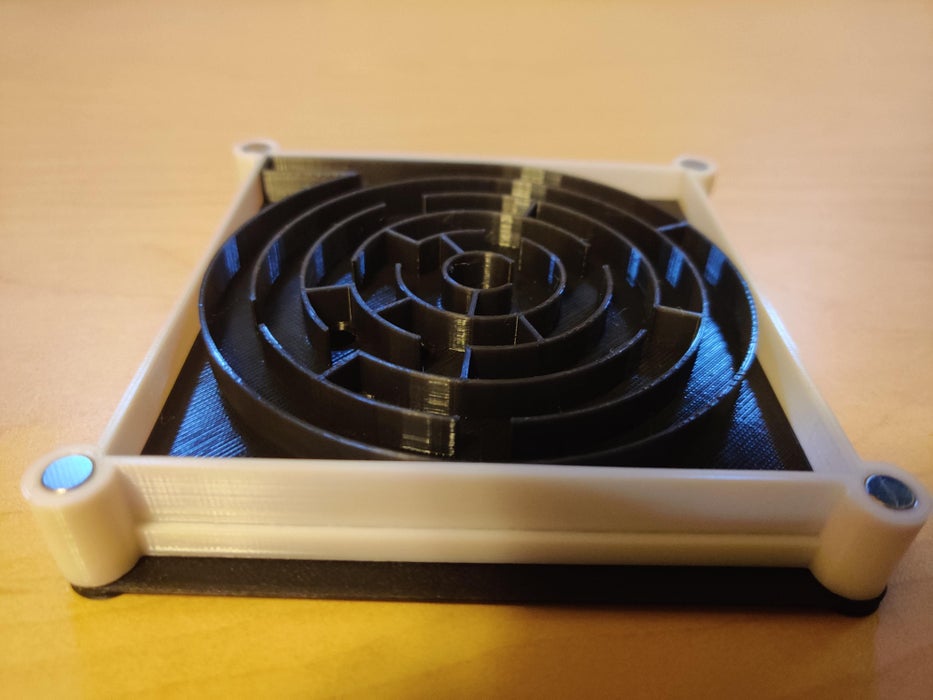
If you’re a puzzle or maze lover, you’ll definitely be thrilled to know that you can construct this 3D printed maze and it comes in two modes so you can play different mazes anytime!
What you’ll need:
- 3D printer
- 13 – 6mm x 2mm disk magnets
- superglue
- 1/4” metal ball
Check out this project now if you’re into mazes!
Hardware Volume Mixer for PC With RGB LEDs
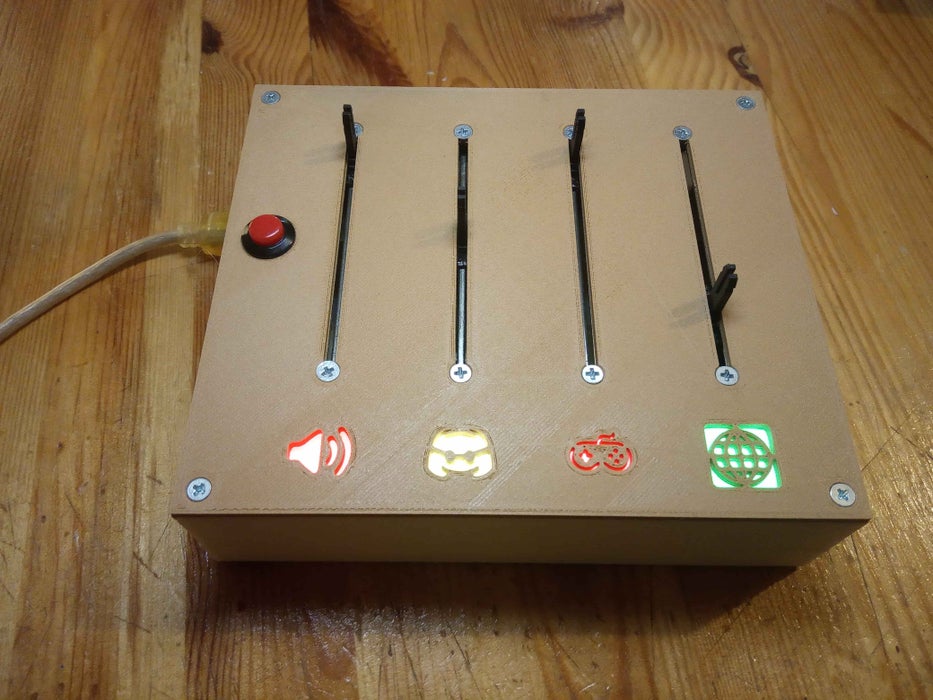
Feeling like a DJ at home? You can 3D print this controller that allows you to control the volumes for different apps without stopping what you’re doing!
What you’ll need:
- 4x 10K sliding pots
- 4x ws2812(B) LEDs
- 1x Arduino nano
- 1x pushbutton which fits in a 13mm hole.
- 1x switch
- 1x female USB B connector and a male USB mini
- 8x M3 screw 4mm, countersink
- 4x M3 screw 10mm, countersink
- 4x M3 screw 25mm, countersink
- 4x M3 nut
- 1x TopPlate
- 1x Top_Wall
- 1x Bottom_V2
- 4x Backlight_Diffuser 4x Backlight_Wall
- 4x Led_Bracket
- 3D printer
Sounds interesting? Check out this project now!
Industrial Jar Wall Lamp
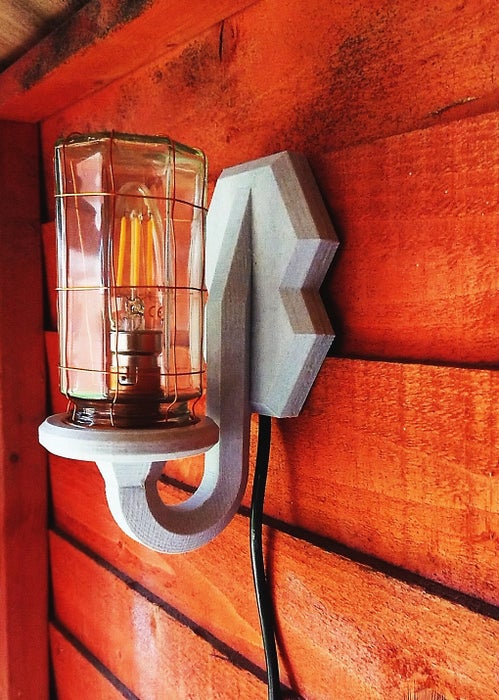
More home lighting decors! Similar to the other designs, it uses Fusion 360 as well. So if you’re familiar with that, this should be an easy project for you! This design has a rustic feel and will definitely give your living area a vintage touch!
What you’ll need:
- Mains power cord with on/off switch
- Jar with lid (small or large)
- Copper wire (any diameter)
- PLA (alternatively ABS)
- Bulb holder/socket (E14/B15 for the small version and E27/B22 for large version)
- Bulb (E14/B15 socket or E27/B22 socket)
- Glue (Gorilla super glue)
- Solder
- 2 x M3 screws
- Screwdriver
- Soldering iron
- Wire cutters/strippers
- 3D printer
Excited for more home decors? Give this project a shot!
Transformaments
Christmas ornaments, but transform-able! If you’re looking for a unique ornament to impress your friends and family this Christmas, this is a must print 3D printing object!
What you’ll need:
- 3D printer
- PLA filament
Start printing your unique ornament and check out this project!
December Project Highlight
3D打印的可穿戴龙鳞甲 (Wearable 3D Printed Dragon Scale Armor)

For our December project highlight, we have the wearable 3D printed dragon scale armour! This is a wearable open-source project shared by a verified member of Chaihuo Makers, 陈惟怡 (Chen Wei Yi). Here’s the translated version of this article as shown below!
1.Project Summary
The main function of the dragon scale is to provide an easy and convenient way of attaching smart wearable device. In this way, we can make full use of the flexibility and usability of open source hardware. There is no need for strict requirements when it comes to size, weight, and the way of wearing a wearable anymore.
To achieve this effect, I have designed the dragon scale. It is made of 3 parts combined:
1.Combine 3D printing and mesh by merging both materials together.

2.By adding metal sheets to the surface of the dragon scale, the smart device can be attached and detached through magnetic means. After detaching, the clothes can also be machine-washed. The scale will also stay put even during vigorous exercise once attached.
3.Referring to Seeed’s Grove series open source hardware, I designed 4 types of magnetic base to allow the modules to be attached onto the clothes easily and securely.
The cross-section of a single dragon scale looks like so:

2.Design Idea
1.Making use of the Fused Deposition Manufacturing (FDM) feature in 3D printing, I merged the fabric into the 3D printing parts. Unlike traditional means of sewing, riveting, and locking parts on the fabric.
2.I took Issey Miyake’s design as a reference and used different types of scales to ensure the softness of the clothing was not compromised.

3.The surface of each scale is embedded with a metal sheet, using glue and grooves. While a magnet is attached to the base of the smart device.
3.Production Progress
1.Design of scale model
I designed a few styles for testing, and I’m pleased with the results of these two as shown below: (Do take note that you should add rounded edges to your model when designing to avoid getting cuts and injuries)
A: Hexagonal scales have a smaller curvature which makes it suitable for flatter parts of the body. The length of each hexagonal sides is 20mm, and the distance between the edges of adjacent hexagons is 4mm, 3mm thickness. The hole in the centre that is used to install the metal sheet is
10.3mm in diameter (Increased by 3mm due to shrinkage of 3D printing), while the depth of the hole is 2mm.

B: Triangular scales have a larger curvature which makes it suitable for uneven areas or parts where you need bending, such as arms, shoulders, and stomach etc. The length of the triangular scales is 25mm, the distance between the edges of adjacent triangles is 3mm, 3mm thickness and the measurement for the hole is the same as stated earlier.

2.Process of printing the scales:
Required materials: Mesh (The length and width must be about 10 cm larger than the printing platform of the 3D printer), 3D Printer (We used Flashforge THOR300 in this project), 3D printing materials, 8 or more binder clips.
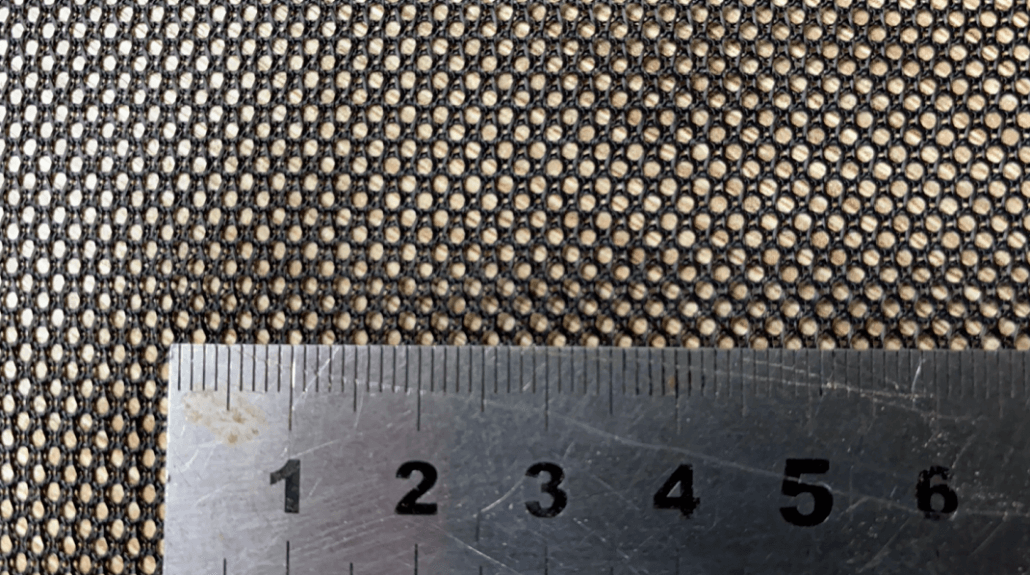

A: First, print the parts that are 0.5-1mm thick, you can stop printing according to the total estimated timing it takes to complete all your parts, some software also allows you to pause the process after you’ve printed till a certain layer.
Next, put in the mesh and pin it down on all sides using your binder clips and continue printing. The first and second 3d printed layer will then smear into the holes of the mesh and this would help to merge the two together.

Once you allow the printer to finish up the rest of the printing process, you’ll obtain the merged fabric and 3D printed part.

3.Embedded metal sheet


4.Circuit parts
The circuit part can be divided into microcontroller selection, expansion component selection and circuit connection. Since the purpose of the circuit and programming portion is to prove that the structure of the dragon scale is effective in combining smart hardware and providing a new way of using clothing, we won’t be designing complex circuits and programs. Instead, we’re using open source smart device as the core to enhance the implementability and lower the difficulty of our project.
After comparing open source microcontrollers such as Arduino’s mini Uno and Micro::bit etc., I chose Seeeduino XIAO and its corresponding Grove smart device electronics block parts in the end. Here are a few reasons why: 1. The size of the microcontroller is pretty small; it is also one of the smallest microcontrollers amongst all the open source microcontrollers currently (View image below). 2.It supports Arduino IDE and Graphical programming. 3. By using Grove expansion board and expansion parts that come in a set, I can quickly complete all sorts of smart device function designs.

According to Seeeduino XIAO and Grove series expansion parts, I designed 4 smart devices mounting base for different uses. All the mounting base are also magnetically attracted to the scales by a magnet that has a 10mm outer diameter.

Type A is used for XIAO and Grove expansion board; Type B is for OLED display, temperature and humidity sensor; Type C is for monochrome LED, buttons, and inclination sensor; Type D is for connecting series colour LED.


5.Sewing the dragon scales onto the clothes
I’m getting the tailor shop in my area to help me with that.

4.Product Results

5.Optimization Direction
After the completion of this project, I realised there are a few areas I can improve on:
The weight of which the magnet and metal sheet can attract is limited due to the size of both materials, so we could consider increasing the size of the metal sheet and magnet to attract bigger and heavier objects. Also, the printer we chose to use is a rather basic one, so it’s not able to accomplish a lot. Some ideas include:
- After embedding the fabric, embed the conductive wire (refer to Arduino Lilypad for the usage) and then supply power through the wire to complete the embedded circuit module.
- Changing the size and types of scales in each part of the body to allow the scales to cover every part.
- Make the scales thicker, alike to sports protective gears. Also, adjusting the filling amount when 3D printing to minimise the weight while making the scales thicker.
- Using TPU to print the scales would allow it to feel much softer to the touch
- Installing one or more robotic arms, as if it is Doctor Octopus from the Spiderman movie
- Adding headlight and taillight to improve safety when cycling
- Introduce computers to allow one to work easily on trains and buses.
Summary
And that’s it for now! We will continue to add more fun and interesting 3D projects for you to try out for yourself! If you’re interested in 3D project content, do check out the resources down below to find out more.
Resources
- The Free Beginner’s Guide – For beginners that have never used a 3D printer before!
- The Ultimate Guide: What is 3D Printing? – For the different variety of 3D printers you can explore!
- Thingiverse – The platform you need to know for 3D printing projects and learning about 3D printing
- Best 3D Printing Software – 3D Printing project software you should learn!