What is a Force Sensing Resistor (FSR Sensor)?
Have you ever heard of Force Sensing Resistors? Even though you may not realise it, but it’s actually used in our everyday life! They actually have many interesting uses and could be combined with other tools for some cool effects!
But before we can go about explaining what exactly is an FSR, here are some concepts you should know before getting into it:
- Electricity
- Resistance
- Circuits
- Arduino
What will be covered:
- Overview of FSR
- FSR Formulas
- Applications of FSR
- Projects with FSR
Overview of Force Sensing Resistor
What is an FSR?
Force Sensing Resistors, also known as Force Sensitive Resistors or FSR. They are basically a sensor that changes its resistance depending on the amount of pressure, force or stress applied to it.

What’s good about FSRs is that they’re cheap and really easy to use! Furthermore, as its name suggests, they’re really sensitive to touch, which means you’ll be able to obtain accurate readings.
How do FSR works?
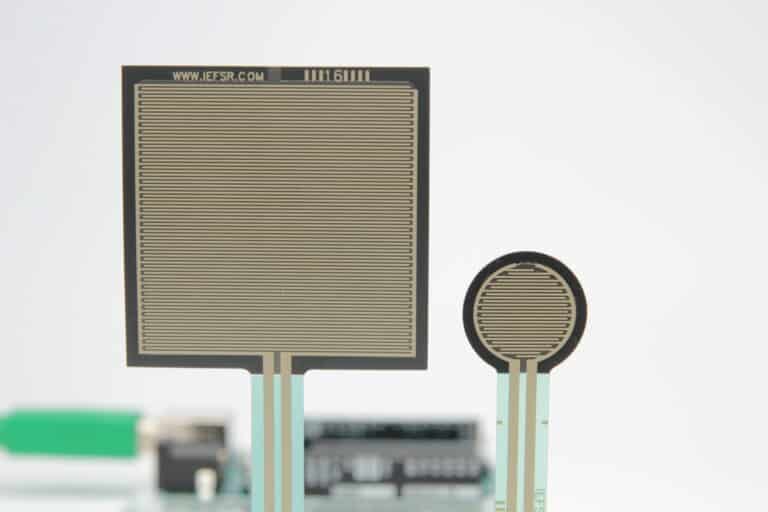
In order to understand how FSR works, you need to know its structure. FSRs consists of semi-conductive ink/material, which is placed in-between two pieces of thin substrates, separated by the spacer. Which typically looks like so:
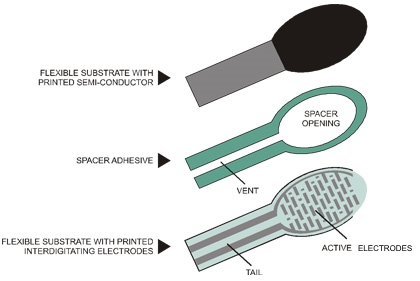
Since the sensing film consists of both semiconductors and insulators, applying pressure to the surface would cause the ink to touch the conducting electrodes, which then changes the resistance.
Types of FSR
As we mentioned how FSR works earlier, there are actually 2 types of FSR on the market:
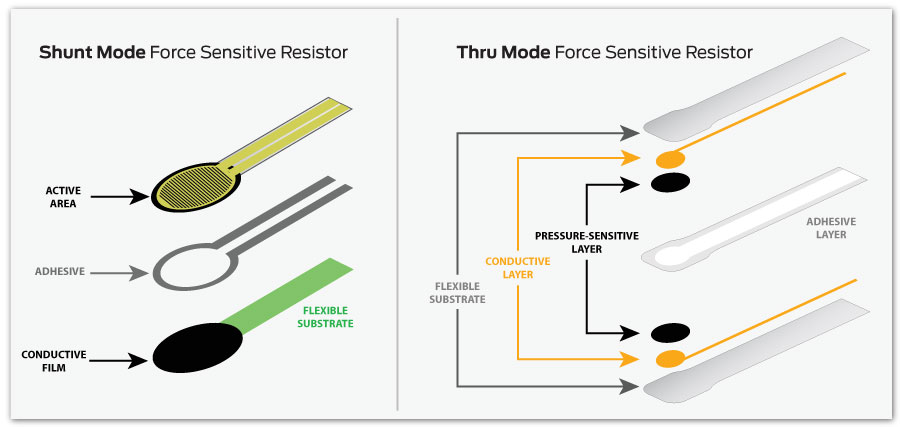
Shun Mode FSR
Shun Mode FSRs are made with polymer thick-film which has two parts separated by a spacer. This type of FSR is more common and basic, where the resistance would change by applying pressure to the surface for the ink to touch the electrodes.
Thru Mode FSR
Thru Mode FSRs are polyester film printed circuits, which are positioned on the outer parts, while the conductive parts are securing the pressure-sensitive layers. An adhesive layer will then laminate the two layers of the substrate together.
FSR Related Force Sensors
Though FSR is our star in this article, there are also members of its family! Let’s look at some of the common types of force sensors:
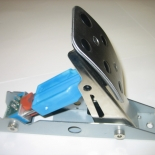
Load Cells
Load cells are also known as Loadcells, they convert applied force into an output signal that can be used to measure forces such as compressive forces and weight.

Hydraulic load cells
These are the common types of load cells:
- Strain gage load cells: Most commonly used, there are several types of strain gage load cells as well, more details will be mention in the latter part.
- Pneumatic load cells: Automatically regulate the balancing pressure, uses air pressure
- Hydraulic load cells: Similar to Pneumatic, just that Hydraulic uses oil pressure. A more pricy option as it is immune to lightning and so it excels in outdoor areas.
Strain gage
Strain gage load cells make use of strain gage to sense force, the electrical resistance changes when a force is applied.

Strain gage
A strain gage is made out of an insulating substrate onto which a conductive metallic foil pattern has been deposited in a zig-zag pattern. When force is applied to the strain gage, the device would be deformed and this change would indicate a change in electrical resistance. Through the change, the force applied can be measured.
Other force sensors
- Optical force sensor: Employs fiber cable that has inscribed Fiber Bragg Grating (FBG) at the different parts of the cable. The applied force can be determined by monitoring the light reflections in the cable as a deformation would occur.
- Ultrasonic force sensor: It emits ultrasonic sound waves and monitors the pulses received to determine the presence of external forces.
FSR Related Product Recommendation
Analog 360° Continuous Rotation Servo (FS90R) ($4.90)

This is a micro-sized servo that has been built specifically for continuous rotation. It features a 360° Continuous Rotation with speed and direction control, with a built-in potentiometer to adjust the servo stopping point.
Formulas
We mentioned the terms force and pressure several times in this article but do you know how does FSR measure force?
F=m*a // F=P*Area
Where,
- F = Force/Newtons etc.
- m = mass of the object
- a = acceleration
- P = Applied pressure
- Area = contact area

From this graph, you can tell the relationship between resistance and force is inversely proportional to each other. We will talk more about this during the interface with Arduino.
Applications of FSR
Keyboards
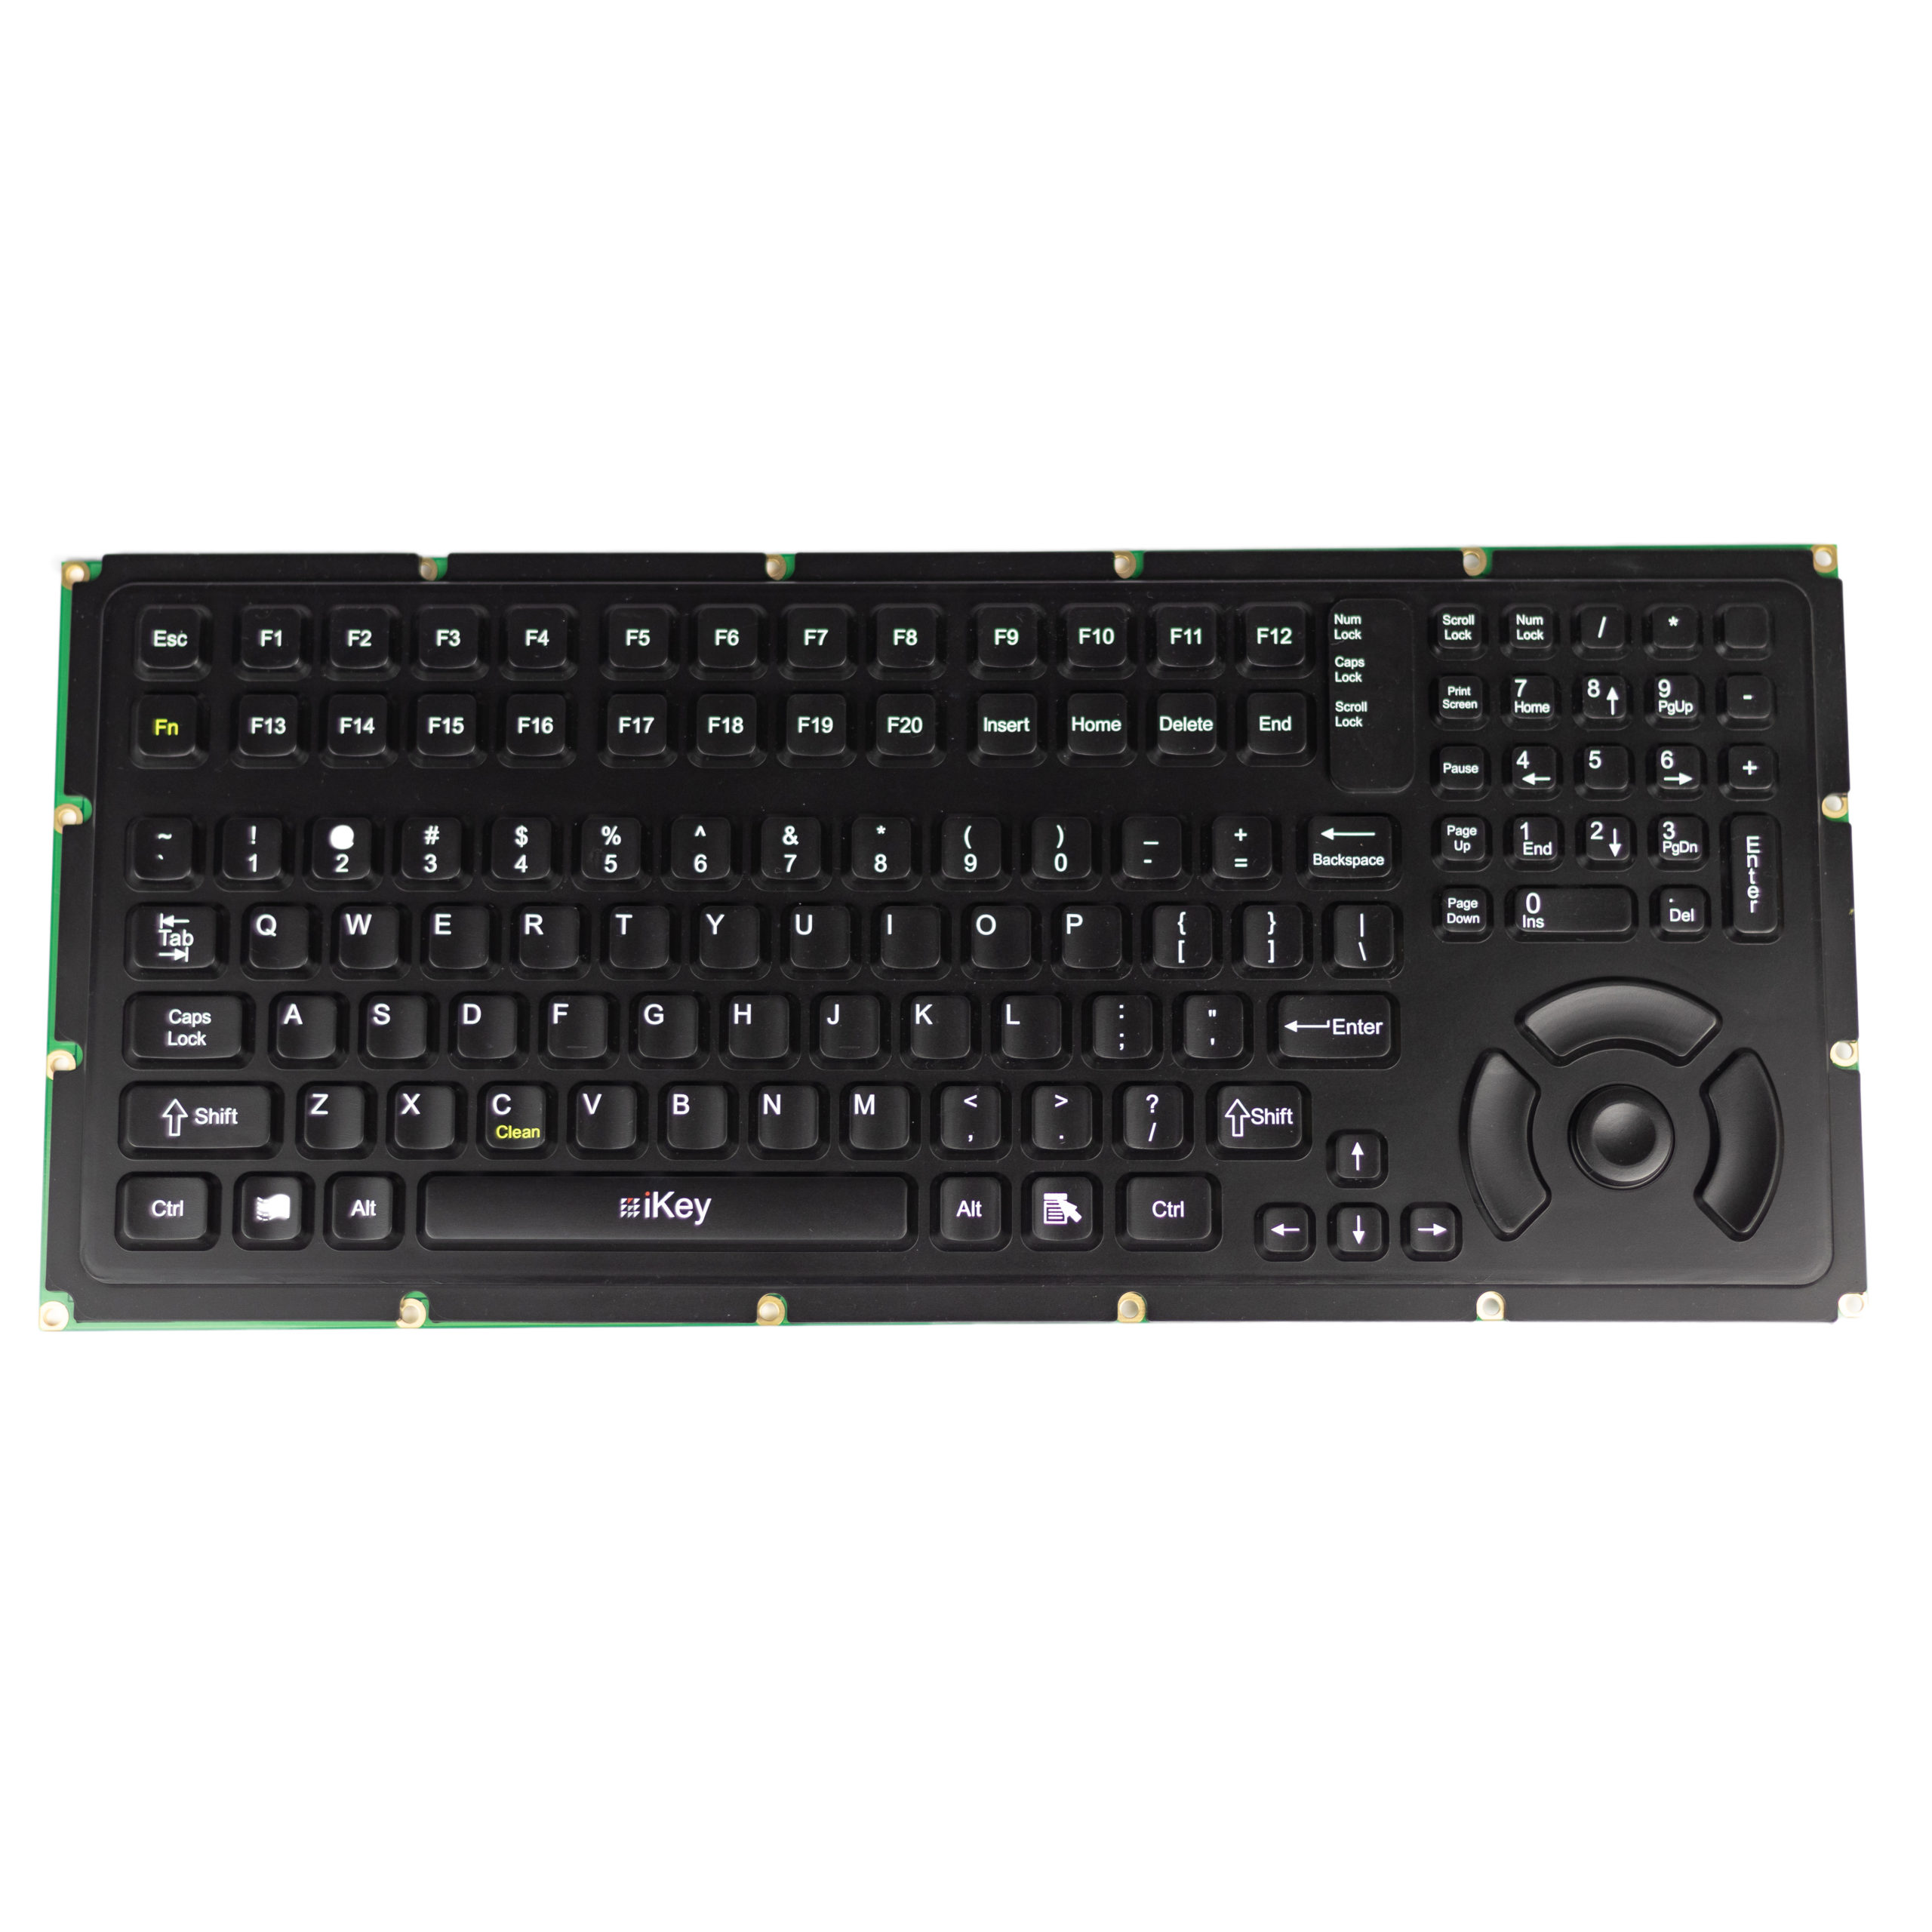
Ikey combined FSR with their keyboard which improves its sensitivity and durability. It is an interesting keyboard that is engineered for medical and industrial uses as it allows for easy data entry.
Video game brake pedals
Typically in brake pedals, a potentiometer is used. But an FSR can be used to replace potentiometer, it allows the user to control how hard they want to press on the pedal to achieve more or less braking force.
Projects with FSR
Before we get into the projects and how to interface FSR with Arduino, let’s look at what Seeed has to offer:
Round Force Sensor (FSR402) ($12.90)

If you’re interested in trying out an FSR for yourself, why not consider getting our FSR? It features a reliable mechanical structure that is made to be durable, but FSRs aren’t made to provide accurate measurements so this is one thing to note.
With that, we can now move on to configure FSR with your Arduino:
Force Sensing Resistor (FSR) with Arduino Tutorial
This tutorial not only shows you how to test your FSR, but it also provides 3 examples on how to use your FSR with Arduino example code, using FSR as a toggle switch and controlling LEDs with FSR.
What you’ll need:
- FSR402 Sensor (Round)
- FSR406 Sensor (Square)
- Arduino UNO Rev 3
- Breadboard
- Jumper wires
- 10-ohm Resistor
- LEDs
- USB cables A/B
- Multimeter
Testing your FSR
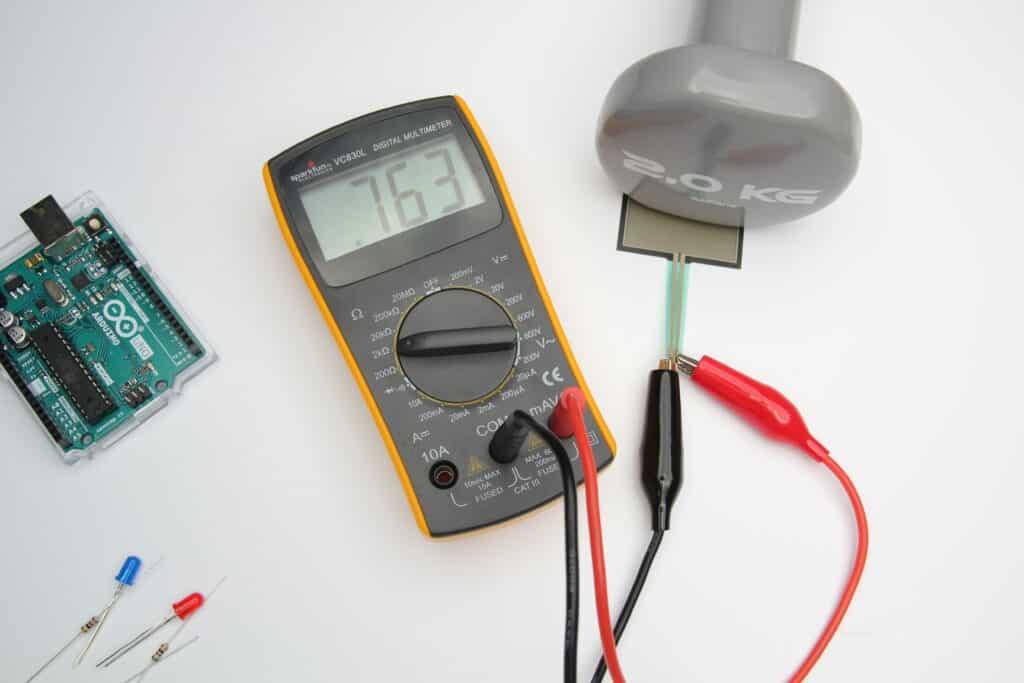
Before you even interface your FSR to your Arduino, it is crucial to test your FSR’s resistance range to see if it’s working. It is recommended to pick a multimeter with an auto-range function, but 200 kΩ should be enough.
Wiring Force Sensing Resistor (FSR) to Arduino UNO
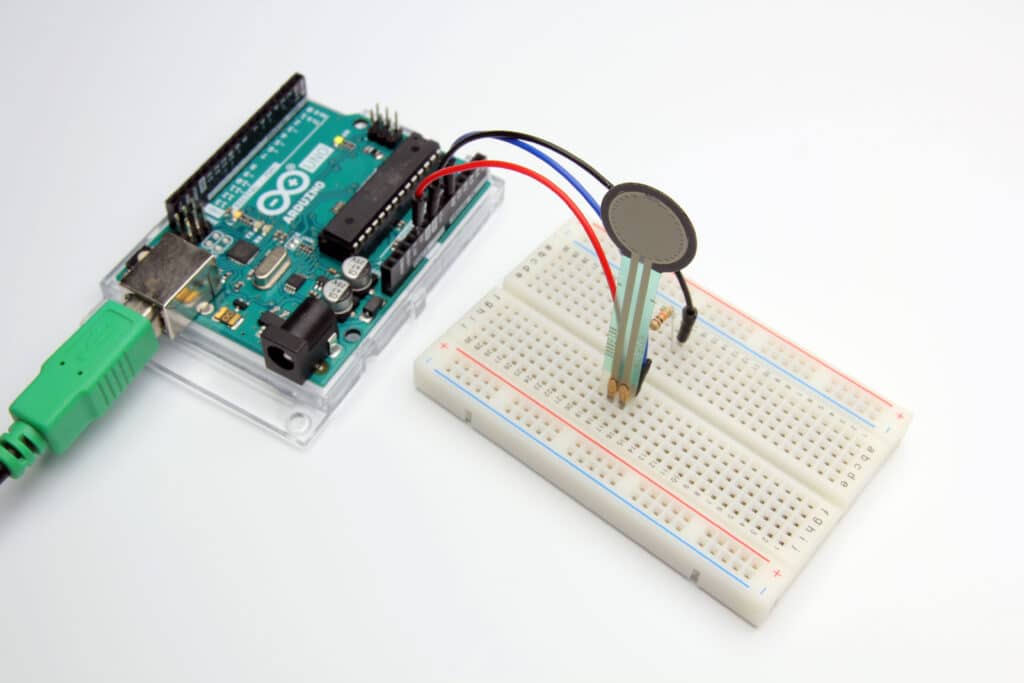
To connect your Arduino UNO to your FSR, simply use your breadboard and jumper wires. Connect one of the leads of the FSR to power and the other lead to the analog in of the Arduino (A0). Then your resistor should be connected between GND and A0.
The tutorial uses voltage divider, so if you’re not familiar with this concept, check out my article! Click on this tutorial to learn the examples and more details about it!
Arduino FSR Experiment and a Garbage Bin

Ever wondered how can you not overfill your bin? This cool project allows you to monitor when your bin gets filled, so you can say goodbye to dirty bins now!
What you’ll need:
- Arduino UNO Rev 3
- FSR402 Sensor (Round)
- 10-ohm Resistor
- 3 LEDs
- cardboard
- woodblock
- styrofoam
- bin
This project also uses voltage divider, so if you’re not familiar with this concept, check out my article! But for more info on this project, click here.
Summary
And that’s all on Force Sensing Resistor! Did you learn something interesting about FSR? Hope that this has helped you to understand and utilise FSRs in your future projects!