How does Arduino work with Ultrasonic Sensor?
How did hallway lights get turned on automatically? Why do automatic doors open when you get close? Why can the faucet of lavabo turn on and off automatically? I guess you’ll be confident enough to say, I know! Because they all have sensors!

Yes, it’s because of the sensor, but do you know how does a sensor work? How did it detect your presence? In today’s article, we will break down the big concept of sensors into individual portions. For example, what does sensor use to detect distance, and how did the detected data get sent back?
This blog will cover :
- Principles for ultrasonic sensor to detect distance
- Details on ultrasonic sensors and their function
- How does ultrasonic sensor work with Arduino
- Choice of ultrasonic sensor – Grove ultrasonic sensor or HC-SR04?
- Arduino Projects and Applications with ultrasonic sensor
Arduino and Ultrasonic Sensor – How do they work together?
Introduction to Ultrasonic Sensor
If you have a car, the astern radar helps you a lot in your daily life, isn’t it? It is more accurate than the naked eye and much more convenient.
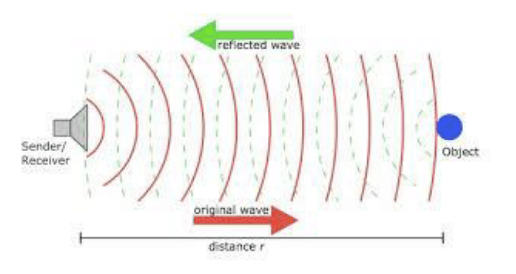
The radar detects distance by the ultrasonic sensor, but how exactly does ultrasonic work?
The ultrasonic sensor emits ultrasound at 40000 Hz that travels through the air, and bounce if there is an object or obstacle on its path. When the sensor receives the reflected wave, the distance can be thickened by the velocity of sound and time. Using the formula, Distance = velocity x time.
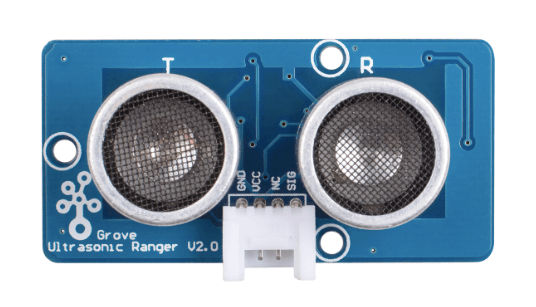
Grove Ultrasonic Sensor’s parameters
The Grove – Ultrasonic Distance Sensor can measure from 3 cm to 350 cm with the accuracy up to 2 mm. It is the perfect ultrasonic module for distance measurement, proximity sensors, and ultrasonic detectors.
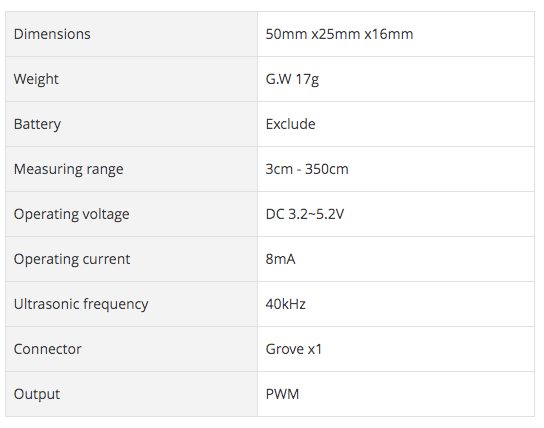
Technical details:
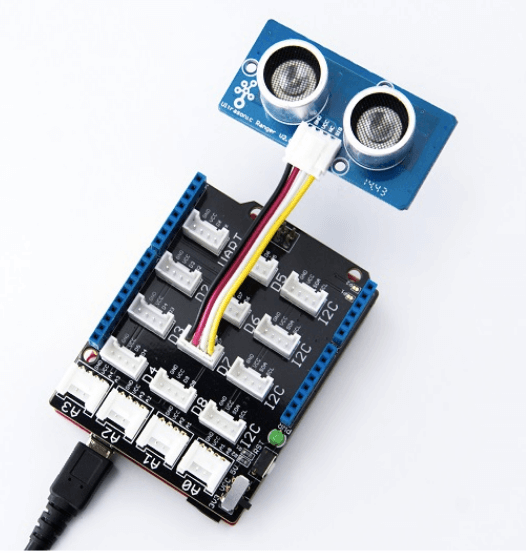
How to connect Arduino with Grove Ultrasonic Sensor
- Connect Ultrasonic Ranger to port D7 of Grove-Base Shield
- Plug Grove – Base Shield into Seeeduino
- Connect Seeeduino to PC via a USB cable
All products lists above are offered at Seeed Studio.
Why is Grove Ultrasonic Sensor better than HC-SR04?

- I/O Pins: our product integrates a single-chip microcomputer, and the transmitting signal and the receiving signal share one pin by time-division multiplexing, so only one I/O pin is occupied.
- Voltage: HC-SR04 only supports 5v voltage, while Grove – Ultrasonic Distance Sensor supports 5v and 3.3v.
- Pairing: Grove – Ultrasonic Distance Sensor can be directly connected to the I/O of the Raspberry Pi (3.3v) , while HC-SR04 requires a voltage conversion circuit.
- Bonus: Seeed provides full documents and libraries for Arduino, Python, and Codecraft, allows you to use our Grove – Ultrasonic Distance Sensor with Arduino and Raspberry pi easily.
Thus, there’s no reason not to choose our Grove – Ultrasonic Distance Sensor if you want a more user-friendly and versatile ultrasonic sensor!
Arduino Projects and Applications with Ultrasonic Sensor
Play With Arduino
After you have obtained all the products mentioned above and connected them, you can then begin with the following projects:
by Seeed Studio
- Step 1. Download the UltrasonicRanger Library from Github.
- Step 2. Refer How to install library to install library for Arduino.
- Step 3. Copy the code into Arduino IDE and upload.
If you need help with uploading the code, you can check how to upload code.
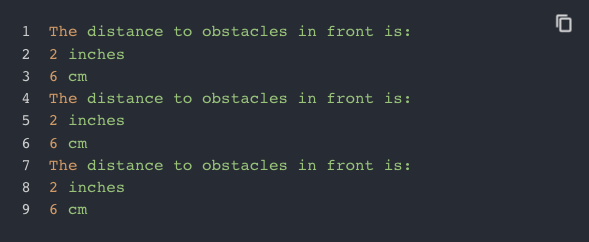
- Step 4. We’ll be able to see the distance display on the terminal as shown:
Arduino – Ultrasonic Sensor
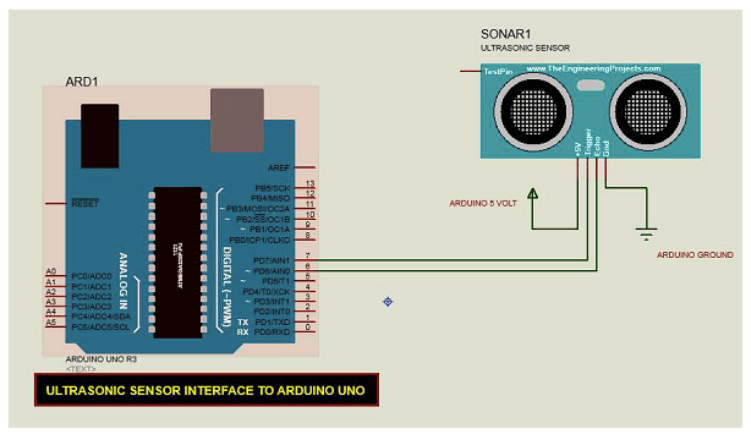
Follow the circuit diagram and make the connections as shown in the image given below.
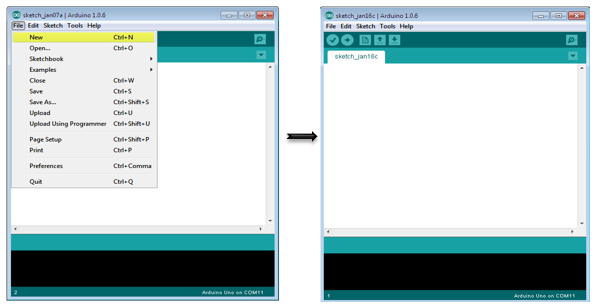
Open the Arduino IDE software on your computer. Add Coding in the Arduino language will allow you to control your circuit. Open a new sketch File by clicking New.
The Ultrasonic sensor has four terminals – +5V, Trigger, Echo, and GND connected as follows −
- Connect the +5V pin to +5v on your Arduino board.
- Connect Trigger to digital pin 7 on your Arduino board.
- Connect Echo to digital pin 6 on your Arduino board.
- Connect GND with GND on Arduino.
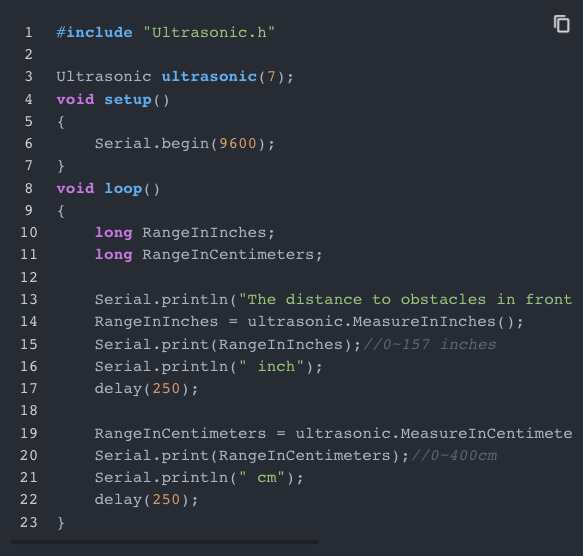
In the program, the distance measured by the sensor in inches and cm via the serial port will be displayed.
For Arduino Code in detail, visit the official website of Tutorialspoint.
Simple Arduino and HC-SR04 (Replaceble by Grove Ultrasonic Sensor)
Need a beginner-friendly set-up to start? This project requires minimal components and will definitely get you started on ultrasonic sensors!
What you will need:
- Arduino UNO R3
- HC-SR04 Ultrasonic Sensor
- Green and Red LED
- 2 x 560 Ohm (Green, Blue, Brown, Gold) Resistors
- Half Breadboard
- 8 x Male/Male hookup wires
- A ruler that measures centimeters (or a serial monitor)
Once you’ve gathered everything, time to connect all the components!
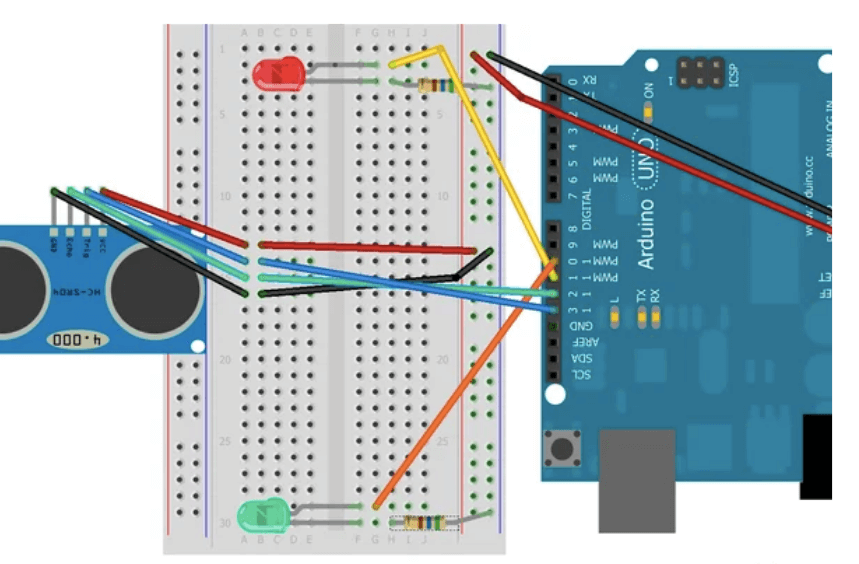
Then upload the sketch, copy the sketch to your Arduino and watch the blinky lights!
For more details on Arduino Code, visit the official website of instructables circuit
Indoor Lightning Cloud
Looking to spice up your living space with some cool lighting? Try this project out for a stormy interior feel!
What you will need:
- Seeeduino board
- Grove – Base Shield
- Wall Adapter Power Supply – 9V C 1A
- Digital RGB LED Flexi-Strip 30 LED – 1 Meter
- Grove – Ultrasonic Ranger
- Grove – Universal 4 Pin Buckled Cables at 20 cm and 50 cm
Sounds interesting? Click here for more information and instructions!
Summary
That’s all on ultrasonic sensors! Did we answer your questions? We discussed what are ultrasonic sensors and how they work. We also shared about HC-SR04 and our Grove – Ultrasonic Distance Sensor, as well as some projects and tutorials on it.
So what are you waiting for? Try out our Grove – Ultrasonic Distance Sensor today!