Raspberry Pi Camera: Comparison of High Quality Camera with Camera Module V2
Recently, The Raspberry Pi Foundation just introduced their latest Raspberry Pi High-Quality Camera and two new mount lenses for the camera. This is no doubt a good news for photographers. Now, I will introduce you to the basic information of HQ camera and compare it with other cameras suitable for Raspberry Pi. Should you upgrade your camera or not? After reading this blog, you will find an answer to it!
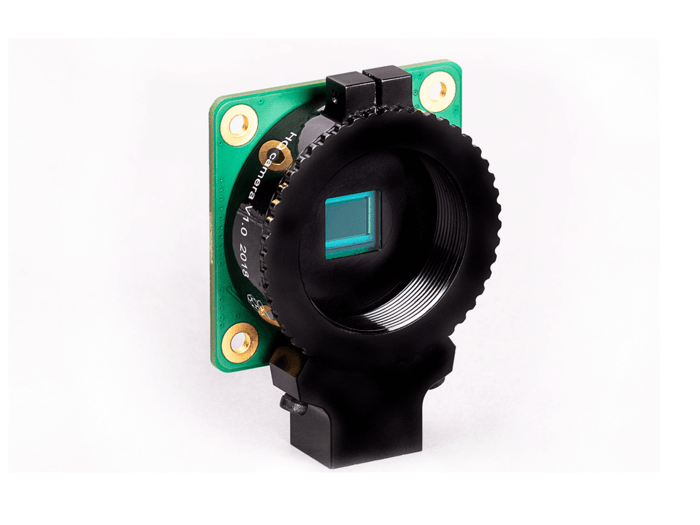
Introduction to High-Quality(HQ) Camera

Earlier before, the Raspberry Pi Foundation has officially released two cameras, the five-megapixel v1 version(OmniVision OV5647) in 2014 and the eight-megapixel v2 version(SONY IMX219) in 2016. However, the small size of the photosensitive elements of these two camera modules results in low signal-to-noise ratio(SNR) as well as poor sensitivity. Apart from that, the fixed focal length is also not suitable for mobile applications. A new product, a High-Quality camera(or “HQ camera” in short), come out. It is the latest release equipped with a higher-resolution HD camera that supports various lenses.
The High-Quality Camera (HQ Camera for short) can capture higher-resolution images than the standard Camera Module. Unlike the latter, it doesn’t have a lens already attached. Instead, it can be used with any standard C- or CS-mount lens; 6 mm and 16 mm lenses are available to purchase with the camera to help you get started.
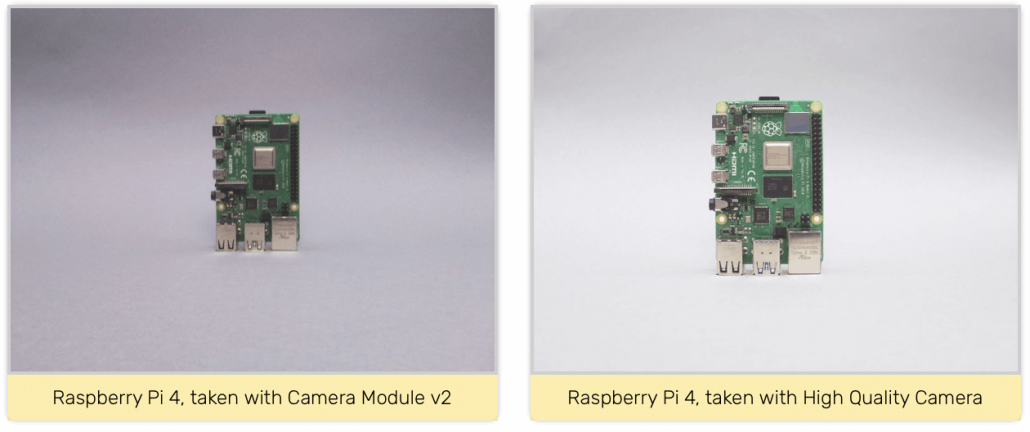
Camera Module V2 VS HQ Camera
Camera Module v2 is still available in the market to be purchased, the HQ Camera does not supersede it. Instead, it provides a different tradeoff between price, performance, and size.

| Camera Module v1 | Camera Module v2 | HQ Camera | |
| Net price | $29.90 | $29.95 | $50 |
| Size | Around 25 × 24 × 9 mm | 38 x 38 x 18.4mm (excluding lens) | |
| Weight | 3g | 3g | |
| Still resolution | 5 Megapixels | 8 Megapixels | 12.3 Megapixels |
| Video modes | 1080p30, 720p60 and 640 × 480p60/90 | 1080p30, 720p60 and 640 × 480p60/90 | 1080p30, 720p60 and 640 × 480p60/90 |
| Linux integration | V4L2 driver available | V4L2 driver available | V4L2 driver available |
| C programming API | OpenMAX IL and others available | OpenMAX IL and others available | |
| Sensor | OmniVision OV5647 | Sony IMX219 | Sony IMX477 |
| Sensor resolution | 2592 × 1944 pixels | 3280 × 2464 pixels | 4056 x 3040 pixels |
| Sensor image area | 3.76 × 2.74 mm | 3.68 x 2.76 mm (4.6 mm diagonal) | 6.287mm x 4.712 mm (7.9mm diagonal) |
| Pixel size | 1.4 µm × 1.4 µm | 1.12 µm x 1.12 µm | 1.55 µm x 1.55 µm |
| Focal length | 3.60 mm +/- 0.01 | 3.04 mm | Depends on lens |
| Horizontal field of view | 53.50 +/- 0.13 degrees | 62.2 degrees | Depends on lens |
| Vertical field of view | 41.41 +/- 0.11 degrees | 48.8 degrees | Depends on lens |
| Focal ratio (F-Stop) | 2.9 | 2 | Depends on lens |
Still Resolution
As you may be noticed, these three Raspberry Pi cameras are quite different in still resolution. But what exactly is still resolution? The digital cameras are usually measured in pixel, and these pixels are usually square and form a grid. A megapixel means one million pixels. For instance, for Camera Module v2 it has the still resolution for 8 Megapixel, it means this camera can produce images with 8 million total pixels.
Photos with a large number of pixels obtain more detail but with large file size at the same time. When you want to enlarge or crop a photo, photos with a large number of pixels are very useful, because you will not lose the quality of the image during these operations. However, these photos required more storage space and take a longer time for transmission. For Raspberry Pi, you do not need to worry about the file size since you have an option to take photos at a lower resolution.
To summarise,
still resolution: HQ Camera > Camera Module v2 > Camera Module v1
file size(default, can be modified): HQ Camera > Camera Module v2 > Camera Module v1
detail obtained(photo quality): HQ Camera > Camera Module v2 > Camera Module v1
Camera Sensor
| SONY IMX219 | SONY IMX477 |
| 10-bit A/D converter on chip | 10-bit/12-bit A/D conversion on chip |
| Back-illuminated CMOS image sensor Exmor R | Back-illuminated and stacked CMOS image sensor |
| 2-wire serial communication | 2-wire serial communication |
| PLL on-chip (rectangular wave) | Two PLLs for independent clock generation for pixel control and data output interface |
| CSI2 serial data output (selection of 4lane/2lane) | CSI-2 serial data output (MIPI 2lane/4lane, Max. 2.1 Gbps/lane, D-PHY spec. ver. 1.2 compliant) |
| Built-in temperature sensor | |
| Max. 30 frames/s in all-pixel scan mode 180 frame/s @720p with 2×2 analog (special) binning, 60 frame/s @1080p with V-crop | Full resolution @60 frame/s (Normal), 4K2K @60 frame/s (Normal), 1080p @240 frame/s Full resolution @40 frame/s (12 bit Normal), Full resolution @30 frame/s (DOL-HDR, 2 frame) |
| Fast mode transition. (on the fly) |
Sensor Image Area
The sensor image area means the active pixels to be recorded. This is used as the film back size in software and calculations. This image area of digital cameras is various depending on the recording format selected. For these cameras, when the selected format is less than the maximum resolution of the camera(open gate), the image area will be “cropped” and physically smaller.
How it affects your photos? The point is that when using a camera with a smaller sensor, a wider lens is required to obtain the same image. Moreover, the wider lens has a greater depth-of-field, which means that the smaller sensor camera can also obtain a larger depth-of-field when taking the same picture as the full-frame camera.
Therefore, as a comparison to HQ Camera, with Camera Module v2 you can only get a smaller image range, if you willing to get the same image, a wider lens is required.
Applications
As Camera Module v2 has comparative low SNR and poor sensitivity, it is not suitable for taking photos that require high image quality. Also, the fixed focal length leads it not suitable for mobile applications. For this kind of camera, we could use it for day-to-day monitoring. For example:
- Build a Video Streaming Camera
- Build an affordable crowd size estimator
- Build a Raspberry Pi Outdoor Security Camera
- Set up a security camera to monitor your home
HQ Camera capture higher-resolution images and it supports various lenses, it can be used for professional shotting such as:
- Build a wildlife camera
- Make a smart door with a video doorbell
- Shoot stop-motion videos
- Scenery shooting
- Delayed photography
Our blog 20 Best Raspberry Pi Camera Projects is here to help you to get started and gather some ideas!
Lenses for HQ camera

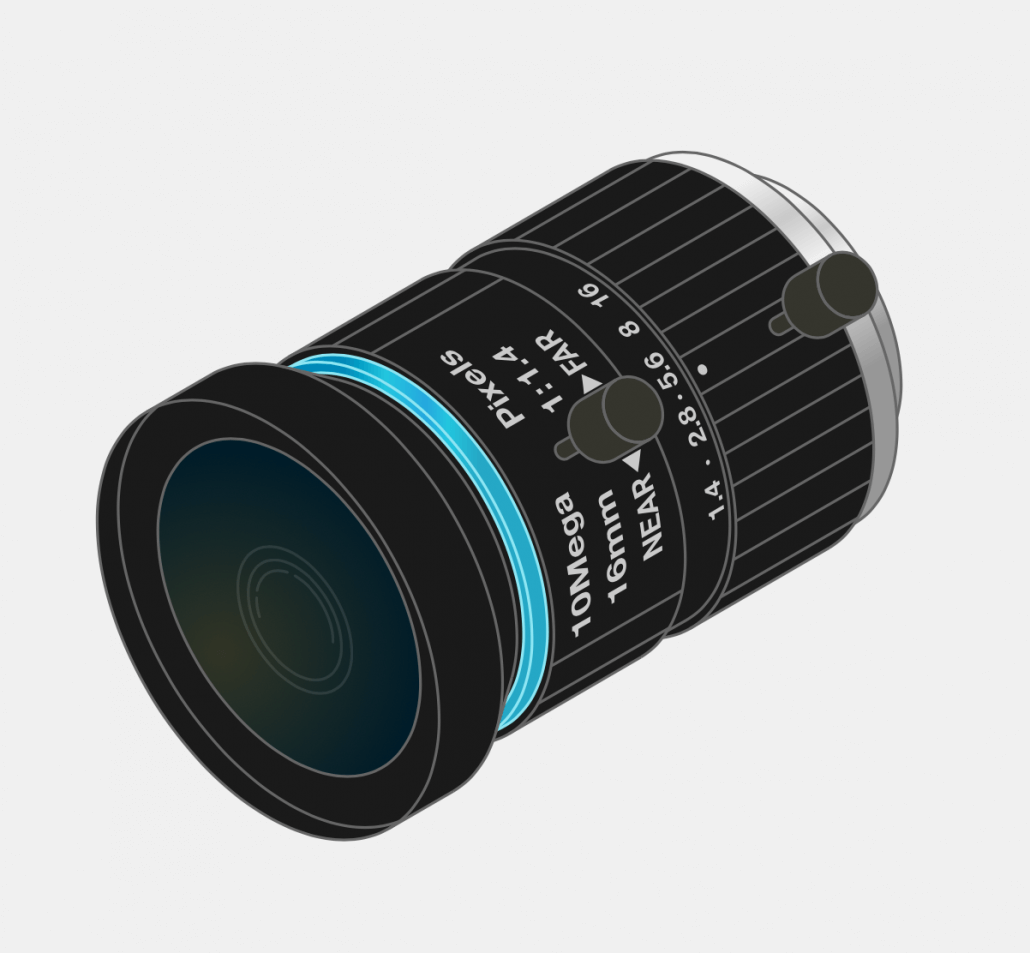
With the release of the HQ camera, two new lenses have also been brought to the market. There are 6 mm wide-angle lens and 16 mm telephoto lens.
6mm 3MP Wide Angle Lens:

16mm 10MP Telephoto Lens:

Not enough for you? Here at Seeed we offer some other Raspberry Pi Camera Modules which you might be interested in, including:
- Raspberry Pi PiNoir Camera Module V2
- Raspberry Pi Infrared Camera Module
- Raspberry Pi Wide Angle Camera Module
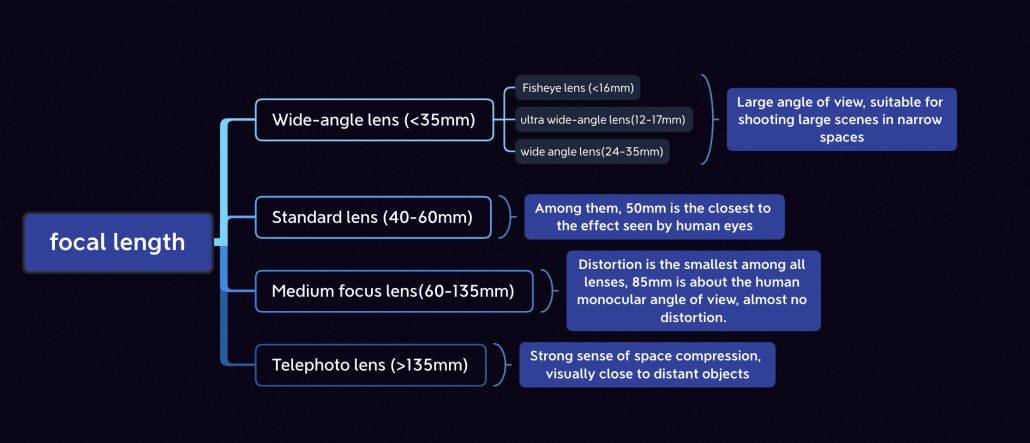
What is focal length and how does it affect the shooting result?
The focal length of the lens is the distance between the lens and the image sensor which determines the angle of view and magnification of a photograph. The smaller the number next to mm, the shorter the focal length, and thus result in:
- wider the range of view;
- more scenes contained in the picture;
- smaller the area occupied by each scene in the picture;

Therefore, different lenses are focus on different perspectives.
- ultra wide-angle lens: wider angle of view than a normal wide-angle lens, it can even reach 180 ° (on a full-frame camera). For instance, if you place it in the position where your eyes are looking up, it can even ‘see’ your feet. The image formed on the sensor is a prototype with severe distortion rather than a rectangle, thus it is a special lens.
- Short focus (wide-angle) lens: great angle of view, stronger visual impact, suitable for scenery like shooting
- Long focus lens: narrow angle of view, good blur effect when the depth of field is small, suitable for close-up shooting such as flowers and birds.
In summary,
- 6 mm wide-angle lens: Suitable for projects that require a larger viewing angle and require less imaging quality, such as CCTV cameras
- 16 mm telephoto lens: Suitable for projects that require longer distances and less lens distortion, such as portraits, delayed photography, smart doorbells, field photography (HQ camera does not have an IR version, but you can manually remove the IR filter), etc.
CS mount & C mount
CS mount and C mount are the most commonly used international standard for industrial camera and lens connection. These two types of lens mount have the same thread connection with one difference, C mount has a back focal distance of 17.5mm while CS mount has a back focal distance of 12.5mm. Hence, the CS-mount camera can be connected to the C-mount lens and CS-mount lens, but an additional 5mm ring is required with a C-mount lens.
Theoretically, apart from the official lenses release from the Raspberry Pi Foundation, all CS mount lenses with adjustable back focal distance can be used on HQ camera.
Recommended reading
- The official Raspberry Pi camera guide: https://magpi.raspberrypi.org/books/camera-guide/pdf
- Camera Module – v1 / v2 / HQ camera parameter comparison by Raspberry Pi: https://www.raspberrypi.org/documentation/hardware/camera/
- Release article by Simon: https://www.raspberrypi.org/blog/new-product-raspberry-pi-high-quality-camera-on-sale-now-at-50/
- In-depth review and comparison of the Raspberry Pi High Quality Camera by Alex Ellis: https://medium.com/@alexellisuk/in-depth-review-and-comparison-of-the-raspberry-pi-high-quality-camera-806490c4aeb7