Arduino TFT LCD Screen Tutorial using Wio Terminal Equipped with 2.4 TFT LCD
Consider choosing an LCD for your Arduino boards to display information and data from the sensors? This tutorial will introduce basics about TFT LCD and the installation of the TFT LCD library. We take the Wio Terminal as the example and offer the code for every example displayed on the TFT LCD on Wio Terminal.
This tutorial will be covered by:
- What is the Arduino TFT LCD? Basics of the TFT LCD Screen
- Installing the TFT LCD Library For Wio Terminal
- Basic graphical functions of the TFT LCD library
- How to load and display images from the SD card to the TFT LCD screen
- TFT LCD library examples
- Why choose Wio Terminal for your Arduino projects?
Wio Terminal Displaying onboard IMU data in realtime
Wio Terminal Displaying and Storing Light Sensor Data
What is the TFT LCD? Basics of the TFT LCD Screen
TFT LCD is a type of LCD (liquid-crystal display) which uses a TFT (thin film transistor) to improve image quality, unlike older technologies. Each and every pixel on a TFT LCD has its own transistor on the glass itself, which accounts for more functionality such as addressability and contrast. TFT Displays usually require less power to function while being able to display sharp images. However, TFT Displays have poor viewing angles and therefore it is necessary to view them by looking straight at them rather than viewing at an angle.
Installing the TFT LCD Library For Wio Terminal
- Visit the Seeed_Arduino_LCD repositories and download the entire repo to your local drive.
- Now, the TFT LCD library can be installed to the Arduino IDE. Open the Arduino IDE, and click
sketch->Include Library->Add .ZIP Library, and choose theSeeed_Arduino_LCDfile that you’ve have just downloaded.

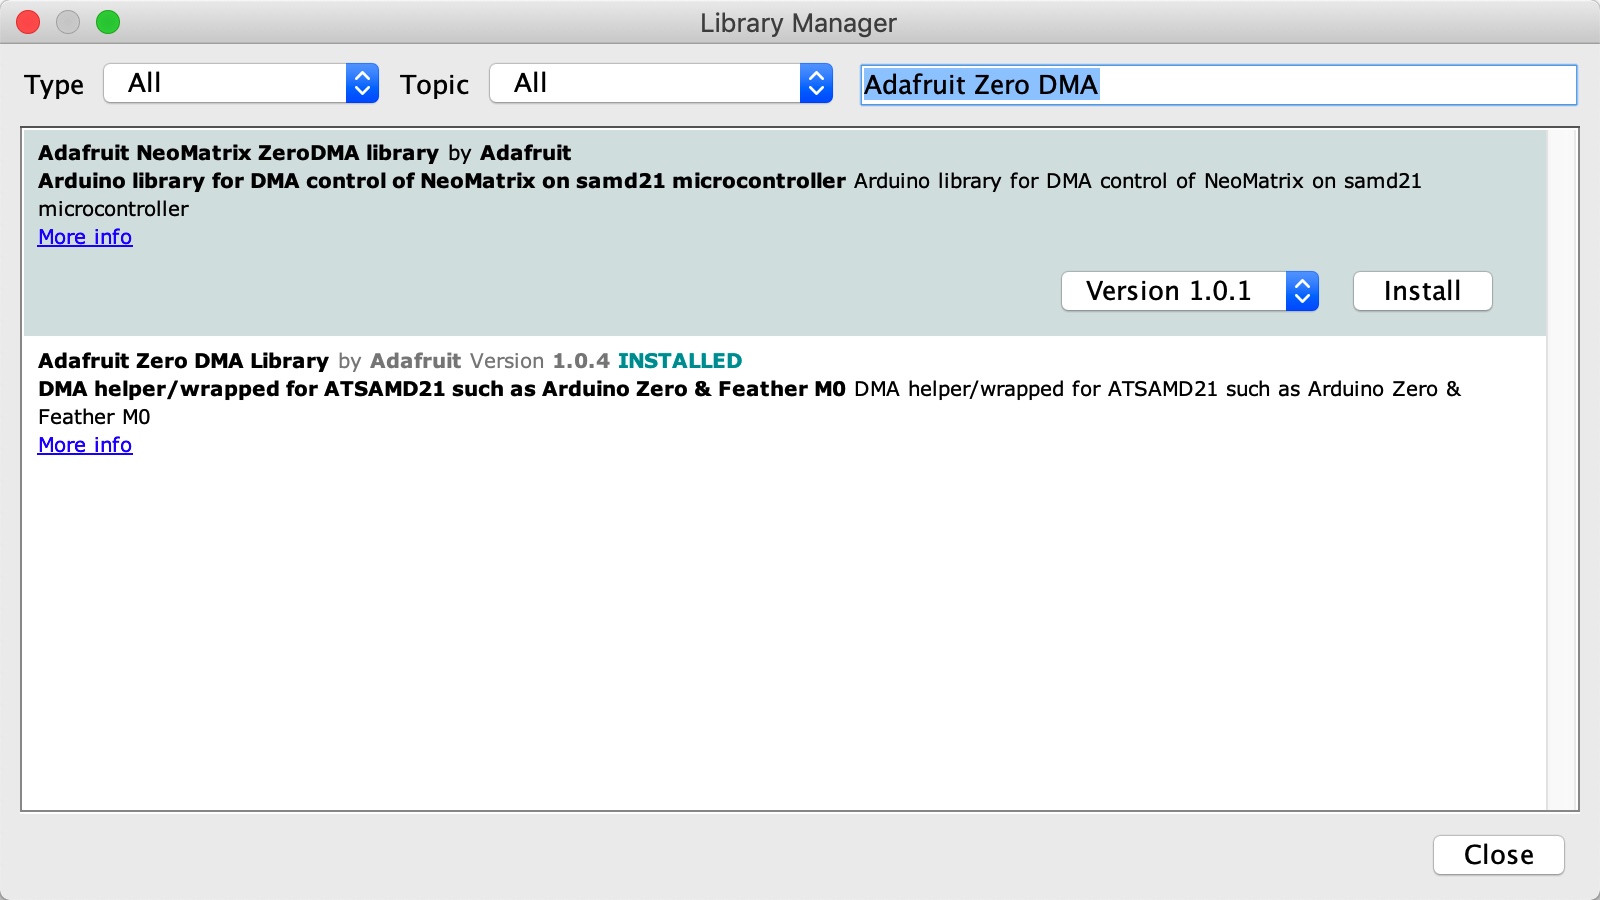
Installing the Adafruit Zero DMA Library
Some functions of the TFT LCD Library requires this library.
- Navigate to
sketch->Include Library->Manager Library, and a library manager window will appear. - Search Adafruit Zero DMA and click Install.
Basic graphical functions of the TFT LCD library
The following repo describes some of the basic graphical functions of the TFT LCD library on Wio Terminal. You can use these functions to create your own drawing functions!
Drawing Pixels
To draw a pixel on the LCD screen:
drawPixel(int32_t x, int32_t y, uint32_t color); where (x, y) is the pixel coordinate and color is the colour of the pixel.
Example code
#include"TFT_eSPI.h"
TFT_eSPI tft;

void setup() {
    tft.begin();
    tft.setRotation(3);

    tft.fillScreen(TFT_RED); //Red background
    tft.drawPixel(4,7,TFT_BLACK); //drawing a black pixel at (4,7)
}

void loop() {}
Drawing Lines
To draw a line between two points on the LCD screen:
drawLine(int32_t x0, int32_t y0, int32_t x1, int32_t y1, uint32_t color);
where the line starts drawing from (x0, y0) to (x1, y1) and color.
Example code
#include"TFT_eSPI.h"
TFT_eSPI tft;

void setup() {
    tft.begin();
    tft.setRotation(3);

    tft.fillScreen(TFT_RED); //Red background
    tft.drawLine(0,0,160,120,TFT_BLACK); //drawing a black line from (0,0) to (160,120)
}

void loop() {}
We also provide the example codes to help you draw the following graphics:
- Horizontal lines & Vertical lines
- Rectangles
- Circles
- Triangles
- Round rectangles
- Characters
- Text Strings
- Filling the Screen
Please check out Wiki for more information.
How to load and display images from the SD card to the TFT LCD screen
This repo describes how to load and display images from the SD card to the TFT LCD screen on Wio Terminal. This can be very useful implementation to your design and can be used in various places!
Libraries Installation
Installing the SD Card library for Wio Terminal
- Visit the Seeed-Arduino-FS repositories and download the entire repo to your local drive.
- Now, the SD card library can be installed to the Arduino IDE. Open the Arduino IDE, and click
sketch->Include Library->Add .ZIP Library, and choose theSeeed_Arduino_FSfile that you’ve have just downloaded.
Installing the TFT LCD Library For Wio Terminal
Image Format configuration
1. Convert image format to Windows BMP format
First, we need to resize and convert the image format to the windows .bmp format. Here, we recommend to use Microsoft paint to do so. Simply rescale the image to required size and save as the 24-bit bitmap (.bmp) file.
2. Convert the Windows BMP format to the “special” .bmp format through our Python script
To display bmp images on our embedded system, we need to get rid of some information (head files) in our Windows bmp format. We wrote a python script to do this for us, here is an instruction of how to use it:
- Create a folder name
bmpand save your Windows.bmpformat images inside this folder. - Download the Python script
bmp_converter.py, and save it in the same directory with thebmp folder. - Open
cmdorterminalto run the Python script. First,cdto the directory that saved thebmp_converter.pyandbmp folder, then run the Python script. - Two options: Enter
1for 8-bit colour convert; Enter2for 16-bit colour convert - Now, you are able to find converted the
.bmpimages inside another folder namergb332(8-bit) orrgb565(16-bit) in the bmp folder.

We prepared some gifs for the TFT LCD library examples, all the examples can be found under File->Example->Seeed_Arduino_LCD -> 320 x 240. You can use these examples to implement in your design.
Please visit our Wiki to get started with example codes.
Useful Graphics
TFT_Pie_Chart
TFT_ArcFill
TFT_ArcFillSpiral
Displaying Data
TFT_Clock
TFT_Clock_Digital
TFT_Terminal
Fonts
AII_Free_Fonts_Demo
RLE_Font_test
Displaying as Background
TFT_Starfield
TFT_Matrix
Why choose Wio Terminal for your Arduino projects?
Fully compatible with Arduino
Wio Terminal is an ATSAMD51-based microcontroller with wireless connectivity supported by Realtek RTL8720DN
You can use over 300 Grove modules to display the data on the screen.
- 300+ Grove modules to explore with IoT
- Two onboard multi-functional Grove ports can be used for Digital, Analog, I2C, and PWM
USB OTG Support for more accessible devices
- Accessible Devices: Mouse, Keyboard, MIDI Devices, Xbox/PS Gaming Controllers, 3D Printers
- Simulated Devices: Mouse, Keyboard, MIDI Devices
Not have a Wio Terminal yet? Click here to get one now!

