How to Detect Flame with Flame Sensor and Arduino?
A typical flame sensor is a device used to detect fire in a furnace but slowly made compatible with Arduino boards by integrating it into modules. In today’s post, we’ll be discussing more on flame sensors and what you need to know when using a flame sensor module for your Arduino!
Today’s guide will cover the following:
- How does a flame sensor work
- The importance of flame sensor
- How to easily clean a flame sensor
- Which flame sensor module to use with Arduino
- How to use a flame sensor with Arduino? Tutorial
What is a flame sensor and How does it work?
We’ve established earlier that a flame sensor is a device used to detect fires in furnaces but it can be referred to as a piece of safety equipment as well, providing confirmation as to whether the furnace is functioning properly.
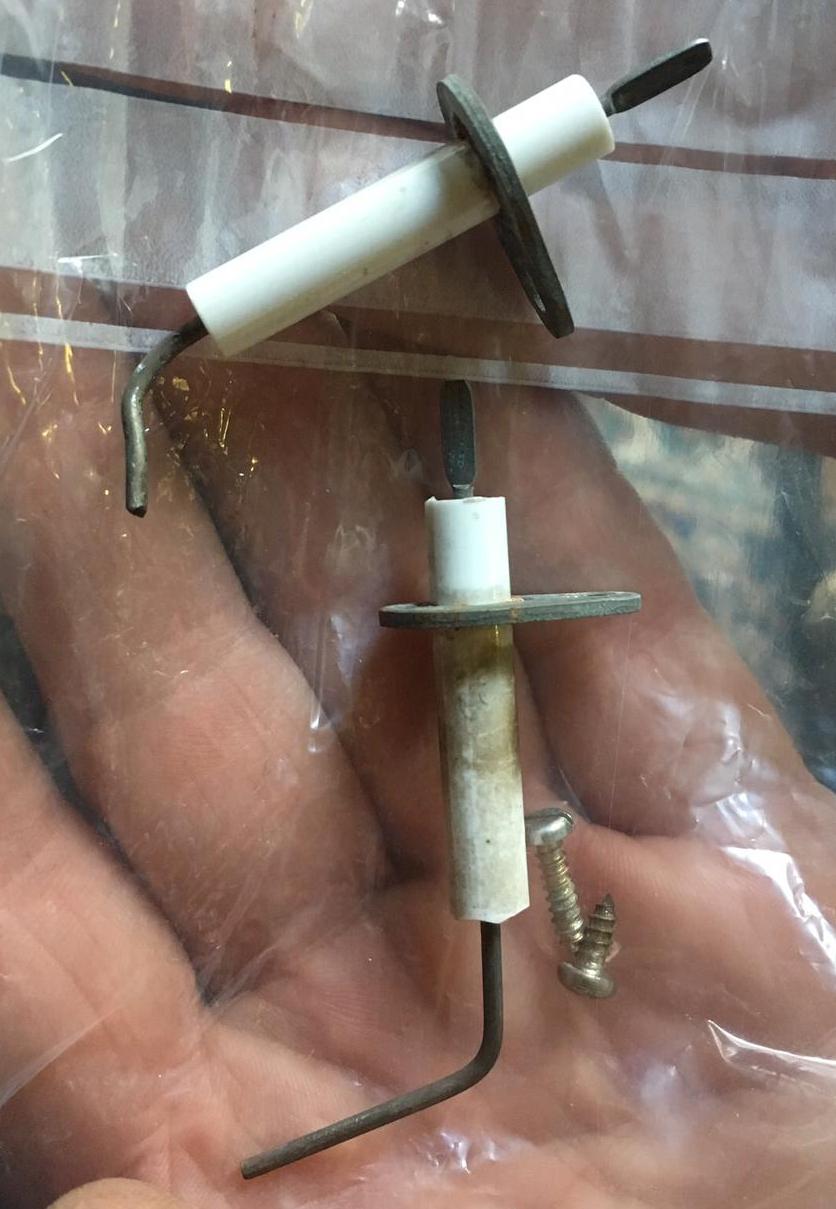
A typical flame sensor is made of not more than a stainless steel flame rectifier rod that’s partially encased in porcelain. An example of how it looks like is shown above.
Flame sensor working principle
A Flame sensor works to regulate the flow of gas entering your furnace and automatically shutting the gas valve down if the furnace does not light up. The purpose behind such working principle is to prevent built-up gas or catastrophic explosions.
- Fire will conduct a small amount of current measured in microamps within the flame sensor
- This signal will tell the processor that there’s a flame present in the pilot and allow the main gas valve to open
Why is flame sensor important and how to clean it?

Earlier we understood the principle of flame sensors but why is it important? Well, do you want to prevent an explosion or other furnace disasters? Clean the flame sensor to avoid malfunctioning!
Knowing when your flame sensor turns bad:
Before you start cleaning your flame sensor, you’ll first need to know if there’s a requirement to do so.
Hence, you should either clean or replace it when you observe either one of the following sign about your flame sensor:
- Cracked porcelain on the flame sensor
- Sooty or corroded flame sensor
Here’s how you can clean a flame sensor with the following steps:
- Turn off any electrical power and gas to your furnace
- Close the gas valve
- Locate your flame sensor; tend to be mounted outside of the burner assembly with a single wire attached
- Slowly remove the flame sensor
- Use an emery cloth with a fine grit to clean away soot and corrosion
- Once a polished surface is seen, reinstall the flame sensor
- Restart the furnace
For more on cleaning and troubleshooting a flame sensor, do refer to the following video:
Do note that if your flame sensor is not thoroughly cleaned, carbon materials or oxidation can build up in the sensor, increasing chances of furnace malfunctioning and even explosions to occur!
Types of flame sensor
Ultraviolet Flame Sensor:
- Ultraviolet or UV in short, work by detecting UV radiation that’s instantly emitted once a source is ignited
- Capable of high sensing speed and reliability; Sensing is done within 3-4 milliseconds but maintains reliability through a 2-3 seconds delay to detect false alarms
Infrared Flame Sensor:
- Affordable and reliable technology used to monitor flames in the infrared spectral band
- The light emitted from a heat source is optically seen by the sensor and amplified, sending a signal to a control circuit
- Such sensors tend to be found in thermal imaging cameras
Thermocouple:
- A thermocouple is a sensor made of two pieces of metal used to measure temperature. These two pieces of metals are welded together at one end, creating a junction where the temperature is measured
- For flame sensing, it is used extensively in combustion heating systems to cut off fuel when the flame fails
What is Flame Sensor Used for? Applications
We’ve deduced above that a flame sensor is used to reduce risks such as related disasters or explosions associated with ignition of furnaces. However, it can be used for other applications as well:
- Hydrogen stations
- Any industrial heating, gas, or drying related systems
- Gas-powered cooking appliances
- Fire alarm systems
- Fire fighting robots
Which flame sensor module to use with Arduino?

The Grove-Flame Sensor is our recommended pick if you’re looking for an Arduino Flame Sensor Module! Through Arduino usage, it’s less complicated than the ones used for furnaces.
Lets’ take a look at what this flame sensor module is all about!
Based on the YG1006 high speed, high sensitive NPN silicon phototransistor, the Grove – Flame Sensor is one that’s capable of detecting fire source or other light sources in the 760nm – 1100nm wavelength range!
It’s an infrared flame sensor type that’s highly sensitive due to its black epoxy, making it suitable for robot fighting applications, acting as robot eyes to find the fire source!
Its features include:
- Grove Interface for easy plug and play with your Arduino board instead of using jumper wires
- High Photo Sensitivity
- Fast Response Time
- Adjustable sensitivity
If you’re interested to find out more information on the schematics, datasheet, etc., do visit our product page!
Arduino Flame Sensor Tutorial with Code
Now that we’ve introduced our very own flame sensor module, let us guide you through how you can use it with your Arduino board!
For this tutorial, we’ll be detecting infrared light, a form of light present in flames.
- This module will output digital signals 0 and 1 through a comparator output. When infrared light is detected, the output value will be 0.
Hardware components needed:


-and-flame-sensor.jpg)
- Seeeduino is Seeed’s very own Arduino board, built with relative benefits over the original
- If you do not wish to purchase a Seeeduino, this tutorial is still applicable for the following Arduino boards: Arduino UNO, Arduino Mega, Arduino Leonardo, Arduino 101, Arduino Due
Hardware Assembly:
- Step 1: Connect Grove – Flame Sensor to port D2 of Grove – Base Shield
- Step 2: Connect Grove – Purple LED to port D3 of Grove – Base Shield
- Step 3: Plug Grove – Base Shield into Seeeduino
- Step 4: Connect Seeeduino to PC via a USB Cable
It should look something like this after completing the above steps:

Software Configurations and Arduino Code:
- Step 1: Copy the Arduino code provided below and flash it into the controller board
    /******************************************************************************/

#define FLAME_SENSOR 2 //connect SENSOR to digital pin2
#define LED 3 //connect Grove - LED to pin3

void setup()
{
    pinsInit();
}
void loop()
{
    if(isFlameDetected())
    turnOnLED();
    else turnOffLED();
}
    /********************************/
void pinsInit()
{
    pinMode(FLAME_SENSOR, INPUT);
    pinMode(LED,OUTPUT);
    digitalWrite(LED,LOW);
}
void turnOnLED()
{
    digitalWrite(LED,HIGH);
}
void turnOffLED()
{
    digitalWrite(LED,LOW);
}
boolean isFlameDetected()
{
    if(digitalRead(FLAME_SENSOR))
    return false;
    else return true;
}- Step 2: The LED will then light up when there’s infrared light present
Viola! That’s the end of today’s tutorial. You can now go ahead and use this flame sensor module for your applications!
Summary
That’s all for today’s guide on flame sensors and modules for Arduino usage. I hope with this, you get a better understanding of what is a flame sensor, how it works, and how you make it work with an Arduino!
Start creating your very own flame sensor project with our Grove – Flame Sensor today!