What is a Light Sensor? Types, Uses, Arduino Guide
A light sensor is a photoelectric device that converts light energy (photons) detected to electrical energy (electrons). Seems simple? There is more to a light sensor than just its definition. It comes in different types and is used in various applications! Hence, in today’s light sensor guide, we’ll be exploring all you need to know about light sensors:
- What are the types of light sensors
- Light sensor applications
- List of light sensors available at Seeed
- How to use a light sensor with Arduino
Glossary of Terms
Before starting today’s light sensor guide, we’ll have to understand the following terms commonly associated with light. I’ve simplified it for easier understanding:
Candela
- Originated from the term candles, candela refers to luminous intensity; how strong the light is to a naked eye
- The higher the luminous intensity, the higher the sensitivity it is to our eyes
Lumen
- Lumen = Total amount of light emitted in all directions
- Measures the total amount of visible light from a light source through the relationship between luminous intensity and the angle that a light beam fills
- Commonly used to rate the brightness of a lightbulb
Lux
- Lux = total amount of light that falls on a particular surface
- Used to measure illuminance, the area where the luminous flux is spread
- It’s similar to Lumen but it takes into account the surface area
If you’re still confused between Lumen and Lux, here’s a graphical representation:
Understood the terms? Let’s now get started!
What are the Types of Light Sensors?
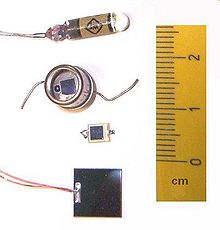
Different types of light sensors are available, mainly Photoresistors, Photodiodes, and Phototransistors. Sounds technical? I’ll break it down with the explanations below!
1. Photoresistors
The most common light sensor type used in a light sensor circuit are photoresistors, also known as Light-Dependent Resistors (LDR). Photoresistors detect whether a light is on or off and compare the relative light levels throughout the day.
What are Photoresistors Made Of?
Photoresistors are made of highly-resistance semiconductor material called cadmium sulfide cell, which is highly sensitive to visible and near-infrared light.
How do Photoresistors Work?
As its name suggests, photoresistors work similarly to your regular resistors, but the resistance change depends on the amount of light it is exposed to. High light intensity will cause a lower resistance between the cadmium sulfide cell, while low light intensity results in a higher resistance between the cadmium sulfide cells.
This working principle can be seen in applications such as street lamps, wherein during the day, the high light intensity results in lower resistance, and thus they are not lit up when the sun is still shining brightly.
2. Photodiodes
Photodiodes are another type of light sensor. But instead of using the change in resistance like LDR, it’s more complex to light, easily changing light into a flow of electric currents. It is also commonly known as a photodetector or photo sensor.
What are Photodiodes Made Of?
Photodiodes are mainly made from silicon and germanium materials and comprise optical filters, built-in lenses, and surface areas.
How do Photodiodes Work?
Photodiodes work on the working principle called the inner photoelectric effect. When a beam of light hits, electrons are loosened, causing electron holes that result in the electrical current flowing through. The brighter the light, the stronger the electrical current will be.
Photodiode Light Sensor Applications
Since the current generated by photodiodes is directly proportional to light intensity, it makes it favorable for light sensing that requires fast light response changes. Also, they are very responsive to infrared light, thus more projects can be done in that field.
Here are some of the applications of photodiode:
- Compact disc players
- Smoke detectors
- Remote control devices
- Solar panels
- Medical applications
3. Phototransistors
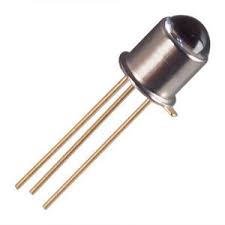
The last light sensor type we’ll be exploring today is the phototransistor. The phototransistor light sensor can be described as a photodiode + amplifier. With the added amplification, light sensitivity is far better on the phototransistors. However, it does not fair better in low-light detection than in photodiodes.
Since both light sensor types share a similar working principle, do refer to the previous explanation!
Light Sensor Applications
Consumer Electronics
Ever wonder what’s behind your smartphone and tablets that allow for auto-screen brightness adjustments? Yes, it’s an ambient light sensor! It measures the ambient light level of your surroundings and determines the suitable brightness of your screen so that your eyes won’t hurt in the dark and you can read messages under the scorching sun!
Automobiles

Similar to how light sensor works on smartphones, it is used in automobiles to support the driver’s field of vision. The present light sensor detects surrounding ambient light, and if it’s getting too dark, it’ll automatically turn on the light systems. It is very helpful when you enter a tunnel or when it starts to rain!
Agricultural Usages
We all know crops need mainly two things for growth; sunlight and water. This is where a light sensor comes to play, helping farmers keep their crops hydrated yet not overhydrating them. Here’s how:
- A light sensor is connected to a sprinkler system, detecting the sunlight level and only activating it when the sun isn’t at its brightest
- It is used alongside other temperature sensors to help gather informative data for analytics purposes
Security Applications

Light sensors are connected to circuits and placed inside the cargo during shipments. They can detect whenever a container is accidentally opened, as there will be a change in light exposure. This helps to decrease lost goods and damages. Photoresistors are commonly used in this case.
Light Sensors Available at Seeed
Since photoresistors, photodiodes, and phototransistors offer versatility at affordable pricing, you can collect illuminance data using Arduino or Raspberry Pi through our selection of light sensors available at Seeed!
Low-Cost Option: Grove – Light Sensor v1.2
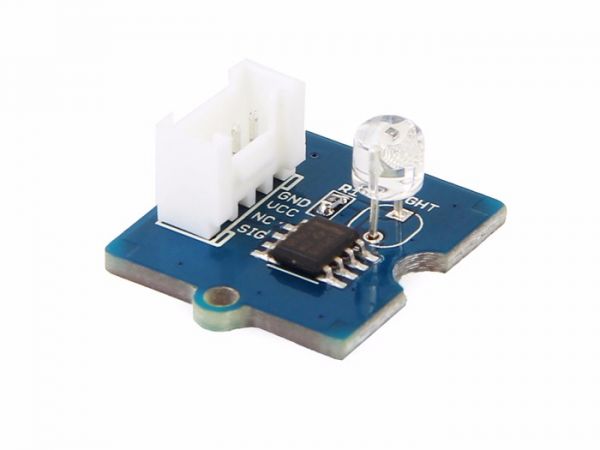
Starting off the list of light sensors available here at Seeed is the Grove – Light Sensor v1.2! Alongside its low price tag of $3.20 comes a highly sensitive and reliable photodiode for your light-sensing needs!
Easily parable with your Arduino board through our Grove plug-and-play system, you’ll save yourself some trouble connecting jumper wires and soldering them on!
Features:
- Dual OpAmp chip LM358 on board
- Analog module
- Onboard Grove port for easy interfacing
- Convertable electrical signal output
- Depends on the ADC on your controller board, E.g. it can output 0-255 for an 8-bit ADC)
- Small form factor
- Recognize wider spectrum
Phototransistor Option: Grove – Light Sensor (P) v1.1
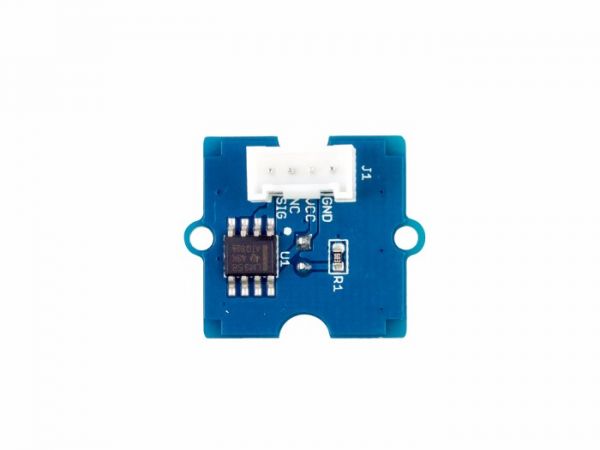
Need a light sensor that uses a phototransistor instead of the traditional light-dependent resistor (LDR)? This option is for you! Similar to the earlier Grove – Light Sensor v1.2, this light sensor is priced at $3.20!
Packed with an LS06-S phototransistor, this light sensor module has a much more linear analog output conforming to illuminance, ranging from 0 to the supplying voltage of normally 5V.
Features:
- Linear analog output conforming to illuminance
- Low dark current and low working lux
- Integrated Grove port for ease of usage
- Small form factor
Digital Signal Output Option: Grove – Digital Light Sensor

If you’re looking for a digital signal output option alongside a selectable light spectrum range, the Grove – Digital Light Sensor is the one for you!
Based on the I2C light-to-digital converter TSL2561 that does the digital signal outputting, this light sensor module features dual light-sensitive diodes, where you can switch between three modes to take your reading! These modes are the infrared mode, full-spectrum, and human visible mode.
Features:
- Wide dynamic range: 0.1 – 40,000 LUX
- Wide operating temperature range: -40deg to 85deg
- High-resolution 16-Bit digital output at 400 kHz I2C Fast-Mode
- Programmable interrupt function with user-defined upper and lower threshold settings
- Selectable detection modes
Sunlight Detection Option: Grove – Sunlight Sensor
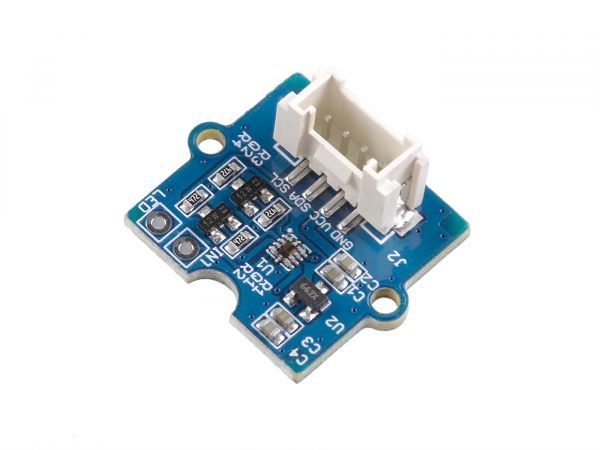
This sunlight sensor is based on the SI1145, a low-powered, reflectance-based, infrared proximity, UV index, and ambient light sensor with an I2C digital interface and programmable-event interrupt output.
Features:
- Variety of use (UV, visible, and infrared light)
- Wide spectrum detection range (280 – 950 nm)
- Programmable configuration
- Low power consumption (3.3/5V supply)
- Detect sunlight directly
- Onboard Grove port, I2C Interface (7-bit) for easy interfacing
Smart Light Sensor Option: Grove – Heelight Sensor
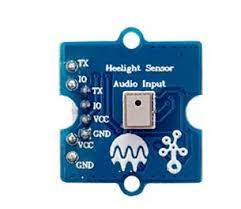
Perhaps the most interesting light sensor option on this list is the Grove – Heelight Sensor! Unlike any other light sensor on this list, this only does contactless light control through voice recognition.
Based on heelight, a smart colorful bulb controlled by digital sound waves, this sensor does not require any Bluetooth, WiFi, or ZigBee!
However, do note that this sensor only recognizes digital voices. If you need human voice recognition, try the Grove – Speech Recognizer.
Features:
- Digital voice recognition
- Support for over 500 digital voice commands
- Compatible with Grove system
How to use a Light Sensor with Arduino?
We’ve gone through the theoretical side of light sensors, now it is time for our light sensor with Arduino tutorial.
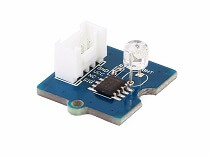
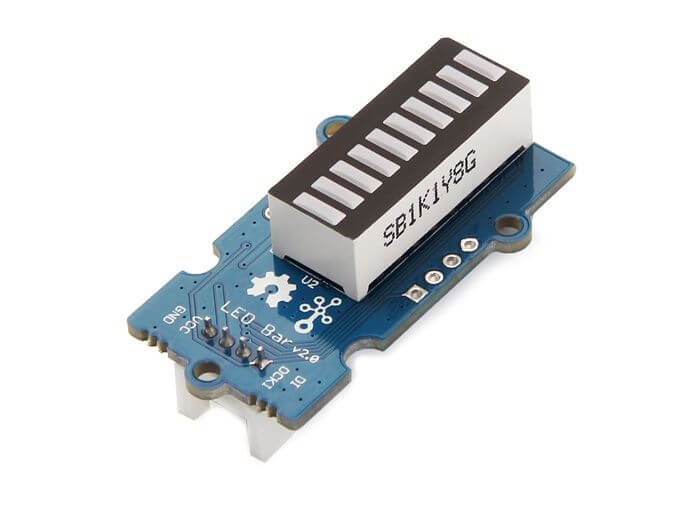
For today’s tutorial, we’ll use the Grove – Light Sensor v1.2 module and an LED bar to build a simple circuit that changes based on the light!
Here’s What You Need:
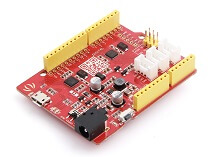
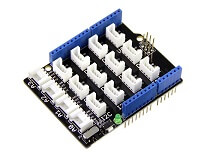
Hardware connections:
- Step 1: Connect Grove – Light Sensor to port A0 of the Grove – Base Shield
- Step 2: Connect Grove – LED Bar to port D2 of Grove – Base Shield
- You can opt to directly connect Grove – Light Sensor to Seeeduino as well
- Step 3: Plug Grove – Base Shield into Seeeduino
- Step 4: Connect Seeeduino to PC through a USB cable
It should look something like this after the above steps:

Software configurations with Arduino Code
- Step 1: Download the Grove-LED Bar Library from Github
- Step 2: Refer to How to install library for installation of library for Seeeduino
- Step 3: Copy the code below into Arduino IDE and upload it
#include <Grove_LED_Bar.h>

Grove_LED_Bar bar(3, 2, 0);  // Clock pin, Data pin, Orientation

void setup()
{
  // nothing to initialize
  bar.begin();
  bar.setGreenToRed(true);
}

void loop()
{

  int value = analogRead(A0);
  value = map(value, 0, 800, 0, 10);

  bar.setLevel(value);
  delay(100);
}- The LED Bar should now change based on light
If you would like a video tutorial on the above light sensor, you may refer to this instead:
Resources and Going Further
Light Sensor Projects:
Want to go further than just building a light sensor circuit with LED? Try this list of light sensor projects available on our hackster.io page!
Product Resources:
For Grove – Light Sensor v1.2 and Grove – Light Sensor (P) v1.1
- [Codecraft] CDC File
- [Eagle&PDF] Eagle File for Grove – Light Sensor V1.0
- [Eagle&PDF] Eagle File for Grove – Light Sensor(P) V1.0
- [Eagle&PDF] Eagle File for Grove – Light Sensor(P) V1.1
- [Datasheet] LS06-MΦ5 Reference Information
- [Datasheet] LM358.PDF
For documents on the three other light sensor recommendations, you can visit their respective product pages.
Summary
That’s all for today on light sensors. I hope with today’s blog, you get a deeper understanding of what it is, how it works, its usages, and what it takes to build one with an Arduino.
To help you easily get started, consider the list of touch sensors I’ve recommended, and hopefully, you will try out your very own light sensor projects today!


