Makecode Microbit Tutorial – Block Language, Getting Started, How to Use the Editor

Just got a micro:bit and can’t wait to play around with it? New to coding and programming? As you know, programming the micro:bit is beginner friendly and you do not need to have years of experience. All you need is just a few minutes learning the basics and you are good to go!
Before you move on if you have not started on the micro:bit, here is a guide on Getting Started With Micro:Bit where you learn more about the micro:bit and its functions. If you haven’t yet got yourself a Micro:bit, what are you waiting for? Get our micro:bit Telec version here now!
Back to the topic, the micro:bit currently supports 3 different programming languages:
- Microsoft Makecode – Graphical block-based system
- CodeKingdoms JavaScript – another graphical drag-and-drop interface
- MicroPython – Text-based editor mostly used by pro developers
If you are new and just starting out, start with Makecode or JavaScript first until you are familiarised with the system before proceeding to Micropython.
In this tutorial, we will cover all about Microsoft Makecode where you will learn how it works and how to use it. We will cover:
- Blocks Language
- Getting Started – Creating your own program
- Simulating your Program
- Saving and Uploading code to Microbit
- Sharing your Program
Before you start, at this point, you do not need your micro:bit connected yet! You can do all this on your desktop or laptop and open up makecode micro:bit and create a new project!
Blocks Language
When you enter the workspace, you will see a long list of blocks on your left as shown below. You will be using the blocks to program your micro:bit so you will need to learn how to use them and what are they! So before we go further, we will first go through every single block and their functions to learn more about them.
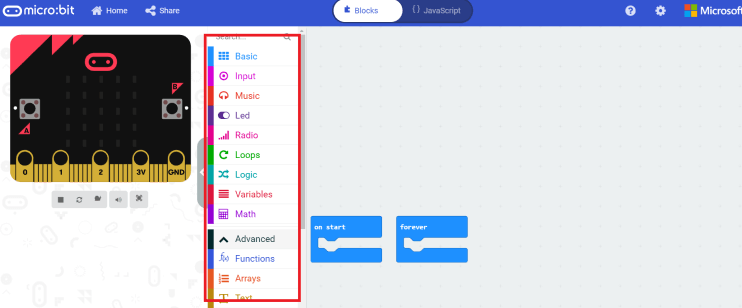
Blocks snap into each other to define the program in which your micro:bit will run when uploaded. Blocks can be events like buttons, shake or snapped together into an even to run. As you can see on your workspace, there are two blocks already present which are on-start and forever. On-start event will run first and forever event will be looped.
Let us now look at the individual block types and their function:
Basic Blocks

As you may already know, the basic blocks are the basic functions where all the functions are all pretty straight forward:

Shows the number you key in on the micro:bit LED display

Light up its selected LEDs on the micro:bit

Shows a string of text on the micro:bit LED display

Shows an icon that you pick on the LED display

Pause a number of milliseconds before the next command

Turn off all the LED lights on the LED screen

Draws an arrow on the LED screen from a direction (eg. North, Northeast, South, West)
Input Blocks

Next up, we have the Input blocks which are based on events and data from sensors like the button, accelerator, compass and temperature sensor. Let us look at the blocks:

Start an event handler where a program will run when something happens where in this case, is when a button is pressed. For example, you can use this block to command the micro:bit to show a display when button A, B or A+B is pressed.

It starts an event handler when a gesture is made like shake, tilt left, tilt right, face down, free fall, etc. Most of the gestures are pretty straight forward but there are three gestures 3g, 6g, 8g that may not understand. Well, they represent different levels of g-force which is a measurement of the type of force per unit mass.

It starts an event handler when a pin is touched together with GND and released within 1 second. What happens during this will be as you hold the GND pin with one hand and touch pin 0,1 or 2 with the other, a small but safe electric current will flow through your body and back into the micro:bit. It is like you are a big wire where you complete the circuit.

This is to check whether a button on the micro:bit is pressed. For example, you use this block to check whether a block is pressed where if it is pressed, it will show a certain display if not it will show another display.

Similar to the previous block, this block is to test whether a gesture is being detected.

Similarly, this is to check whether the pin stated is pressed or not pressed together with the GND pin.

This command finds out which direction the micro:bit is facing with its compass.

With this block, you can find out the temperature measured in celsius of where you are. It is able to do this by detecting how hot its computer chips are to get an estimate of the temperature.

Allows you to get the acceleration value in milli g-force in one of three dimensions or the combined force in all directions of X, Y and Z. With this, you can find out how fast the micro:bit is speeding up or slowing down.

As you can tell, this block will find the light level of your environment (how bright or how dark). It does so through its LEDs on the LED screen. The first time you use this block, it will show 0. After that, it will say the real light level. This is because the light sensor has to be turned on first.

With this, you can find out how much the micro:bit is tilted in different directions.

Find out the amount of magnetic force of one direction, X,Y or Z.

Calculate the amount of time the program has since been started in milliseconds.

Similar to the previous block, but in microseconds instead.

Set the highest acceleration range that your micro:bit will measure in case you have to measure high or low acceleration.
Music Blocks

As you can tell from its name of the block, the music blocks allow you to control music tones from playing, stopping, resting and everything else music-related.

This block allows you to play a musical tone through pin P0 for a set amount of beats (up to 4).

Use this block to play a musical tone through pin P0 which will continue playing until told not to with another block which we will cover below.

This block is to rest which is to stop playing sound through pin P0 for the number of beats you specify.

This block commands the micro:bit to start playing a musical melody through pin P0 of the micro:bit. There are various built-in melodies that you can pick from which are already composed and easy to use. If you wish to play your own melody, you can compose one and use it.

As melodies are played either in the foreground or background where also, more than one melody can be active at once, this block allows you to stop playing a musical melody. You can either choose to stop a melody or all the melodies playing.

This block raises events for melodies or music events.

Returns the duration of a beat in milliseconds.

Find out the tempo / speed of a piece of music in beats per minutes.

Changes to tempo of a melody to faster or slower as specified by you.

Set and makes the tempo of a melody as fast or slow as specified by you.
LED Blocks

Coming up next, we have the LED block which is, of course, to control the micro:bit LED display.

This command will turn ON the LED light you state on the LED display.

On the other hand, this block will turn OFF the LED light you state on the LED display.

This command checks whether the LED on the LED display is on or off.

This command toggles an LED specified through its coordinates on the LED display where if it is OFF, it will turn it ON and where it is ON, it will turn off.

Allows you to find out the brightness of your LED display when it is turned on.

This block turns on a LED light with a stated brightness on the LED display.

Using this block, you can set how bright the LED screen will be when it is turned on.

As you probably can tell from its name, this block stops any animation that is currently and any animations that are going to play on the LED display.

With this block, you will be able to display a bar graph to show numbers as lines with different lengths.

Want to render your LEDs? With this block, you can set the display mode to either black and white or greyscale which allows you to create a sense of colour depth (difference in darkness between the pixels in the display) with the display mode setting.

This block turns your LED display on and off. (False = Off, True = On)
Radio Blocks

Next up, we have the Radio blocks! They are responsible for sending and receiving data using radio packets to other micro:bits.

For the first block, this block allows you to broadcast a number to other micro:bits that are connected to the radio.

Sends a string of up to 19 characters to other micro:bits connected to the radio.

Want to send more than a number or string to other micro:bits? With this block, you can send a string of up to 8 characters together with a number to other micro:bits.

Commands the micro:bit to run part of a program when it receives a number over the radio.

Similar to the previous block, this block commands the micro:bit to run part of a program when it receives a string over the radio.

This block commands the micro:bit to run part of a program when it receives a name and number pair over the radio.

With this block, you can get a selected property from the last received radio packet. For example, using signal strength, you can get the strength of the radio signal when the packet was received where you can use this to gauge the approx. distance between 2 micro:bits.

With this block, make a program have a group where you use to send and receive with radio. The group acts as a cable channel where a micro:bit can only send or receive in one group at a time.
There are still 4 other advanced Radio blocks which we will not go through as they are for advanced users which we will hardly use as beginners. If you are interested, you can check them out at Makecode Microbit Reference page!
Loop Blocks

As you can tell from its name, with the loop blocks, they allow you to repeat codes and your program.

Loop part of a program a specified amount of times using an index variable (we will cover variable blocks later on).

Repeats code while a Boolean (using logic blocks which we will cover in the next part) condition is true.

Loops part of a program for a specified amount of times.

This block runs part of a program for each element in a list, most of the time in an array of ” “.
Logic Blocks

The logic blocks. They consist of logic operators and constants like conditional statements and true or false values to run codes.

This block is a logic block that will run code depending on whether a boolean condition is true or false.

This block is similar to the previous logic block which will run code depending on whether a boolean condition is true or false if not it will run another code.

This logic block is used to check whether a certain number meets the condition like equals to, less than, more than, etc to run code.

Similar to the previous block, this logic block is used to check whether a variable meets the condition like equals to, less than, more than, etc to run code. They mostly involve numbers.

This block is also another Boolean logic operators that is used.

This block is used to evaluate the opposite negotiation of a Boolean variable.
Variable Blocks

The variable blocks are pretty straight forward and you will use them very often when programming. As you can tell from its name, you are going to use the variable blocks to create variables and change their properties.

This block allows you to set a variable value. You can also use this block to set a variable value of another variable.

This block allows you to change a variable value.
That’s a brief introduction to the block language! We did not cover the Math blocks that use numbers, number operators and math functions as they are pretty straightforward. As for the other functions like functions, arrays, text, game, images, pins, serial, and control, they are all advanced blocks which we will not cover as we will not be using them much as we are just getting started. If you are interested, you can check out them respectively through each of their individual links.
By the way, you guys may notice this block lying around called the extensions block:

Well, in Makecode, you can create custom blocks to use in the editor and include them in your own projects. They are very useful if you are using any additional accessories and hardware, as well as adding in new software features. Just click on the block if you wish to add any extensions into your makecode editor!

Getting Started – Creating your own program
Now that you’ve known the blocks functions and uses, its time to start building with them and create your very own program.
As you can see, with Makecode micro:bit, creating your own program is very easy! All you need to do is:
- Select a block from the desired category on the left-hand side of the interface.
- Click and drag to the workspace area on the right and snap them onto existing blocks. When connecting, the interface will highlight the connecting parts when they are in a valid position before connecting them together.
- If you are unsure whether a block will snap onto one another, its shape will give you a rough clue and indication of where they might fit.
- If you wish to delete any blocks in your program, you can easily delete them using any of these 3 ways:
- Pressing the delete button or backspace button on your computer
- Select and drag the block into the blocks menu where a bin will appear
- Select a block and right-click on it where a drop-down menu will open and select the delete block option.
- If you can’t find the block you are looking for, you can use the search function above the block menu.

That’s all! It’s that simple to create your own program with the Makecode editor.
Simulating your Program
Once you are done with your program, Makecode micro:bit can simulate your program before you upload it to a micro:bit to test if its working. The simulator acts just like a physical micro:bit. Here is a simple example of the simulator in action
As you can see, we created and simulated a simple dice program where it will greet you at the start and once shaken, it will display a random number from 1 to 6. With this simulator, you can simulate many different features like its light sensor, compass, to the accelerator and many more.
Saving and Uploading code to Microbit
Saving
For saving your work in Makecode editor, it is done automatically as you go. All your projects and work will be saved and displayed at the homepage where you can access them:

Uploading
As for uploading your code onto a micro:bit, you must first download it by clicking the big purple download button in the editor.

It’ll initiate a download of a “hex” file, a compact format of your program that your micro:bit can read.
Once it’s downloaded, copy it to your micro:bit like how you would normally copy a file to a USB drive

While the code is programmed, the micro:bit will pause, with yellow LED on the back blinking. Once it’s finished, the code will run automatically!
Sharing your Program
Want to share an amazing program that you have just created? Just simply click the sharing icon on the top left-hand side of the editor. Before sharing, your code will be first uploaded to the cloud and published before sharing it or embed it in other web pages.
You can either share your project with a link or embed the editor into a webpage using their generated code snippets. For embed options, there are a few like code, editor and simulator which you can pick and embed them. Below is an example of the editor option where you can share your code where people can download them, view the Javascript and also open the code in the editor and edit the codes themselves as well. Furthermore, you can use the simulator to see what the code does!
Summary
That’s all for Makecode Microbit Tutorial – How to get started and how to use the Interface! After this tutorial, I hope you learned how to use the Makecode micro:bit editor and its functions!
Now that you’ve learned the basics, why not try creating your own projects now! Here are 25 Top Micro:bit Projects You Must Try 2019 to get you started!
New to micro:bit? You can check out our BitStarter Kit and BitGadget Kit with everything you need to build fun and cool micro:bit projects with instructions that shine, move and make sound with our Grove modules!
Interested in more micro:bit products? We also offer various other kits, shields, cases, and extensions like Bitwear, BitPlayer,BitCar, BitWearable Kit, Kittenbot and many more!