How to use fingerprint sensor for Arduino and Raspberry Pi
Looking to get started on an optical biometric fingerprint sensor for your Arduino and Raspberry Pi Projects? Here at Seeed, we offer a fingerprint sensor module that not only does that, but it’s price affordably as well!
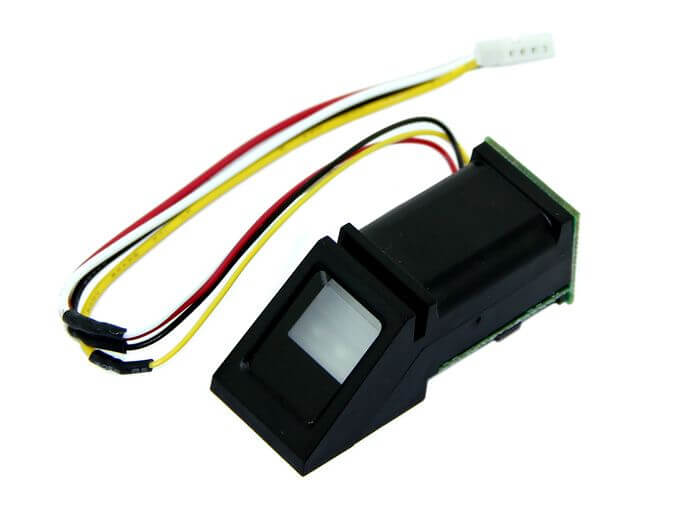
Grove – Fingerprint Sensor

This is the Grove – Fingerprint Sensor Module, typically used in safes, it’s highly powered by a DSP AS601 chip that does the image rendering, calculation, feature-finding and searching. Sufficient onboard FLASH memory allows for up to 162 fingerprints to be stored as well!
Not only can you use this fingerprint sensor module for your Arduino or Raspberry Pi projects, but it’s also simple to get started, and easily integrated into other microcontrollers through TTL serial.
Hardware Overview:
Technical Details (Features and Specifications):
- Fingerprint adaptable
- Flexible in setting the baud rate, security level
- Supply voltage: 3.6~6.0 V
- Operating current (Max): 120 mA
- Fingerprint imaging time: 1.0s
- 1:1 (Match Mode: Compare Mode)
- Search Mode: 1:N
- Storage capacity: 162 templates
- False Acceptance Rate: 0.001% (Security Level 3)
- False Reject Rate: 1.0% (Security level 3)
- Baud Rate: 9600, 19200, 28800, 38400, 57600bps (default is 57600)
- Interface: TTL Serial, compatible with most microcontrollers
- Work Temperature: -20 ~ +50 ℃
Pinout Interface
| Pin Number | Name | Type | Function Description |
|---|---|---|---|
| 1 | Vin | in | Positive Power Supply Input Terminal (Line color: Red) |
| 2 | TD | out | Serial data output, TTL logic levels (Line color: Yellow) |
| 3 | RD | in | Serial data input, TTL logic levels (Line color: White) |
| 4 | GND | – | Signal ground (Line color: Black) |
Why you should pick the Grove-Fingerprint Sensor
You may be wondering; There is plenty of other fingerprint scanners online including the r305 and r307, why pick the Grove-Fingerprint sensor?

Worth the pick – Seeed’s very own Grove system
Grove system is Seeed very own initiative, mainly aimed at helping users like yourself to easily use different modules, through our plug and play system!
This means no more using messy and complicated jumper wires, soldering, or debugging electronic circuits!
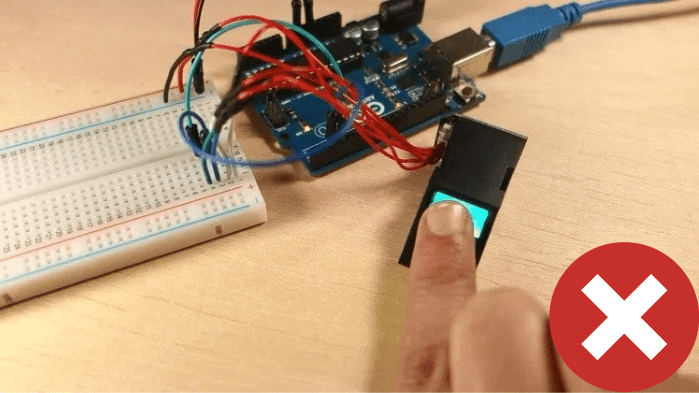
Normal Fingerprint Sensor 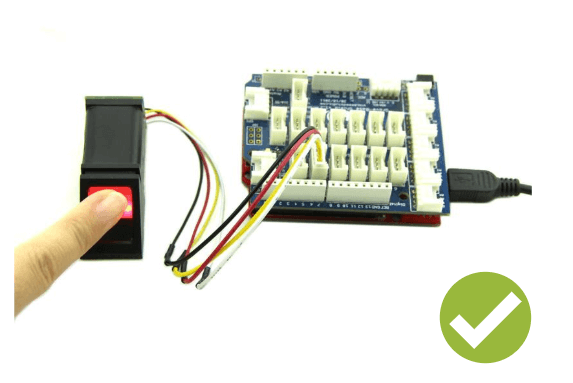
With Grove – Fingerprint sensor module
Like how simple and less messy it is now?
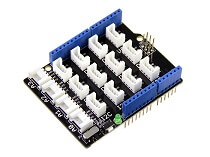
All you need is a Grove Base Shield alongside your Arduino and you’re good to go! Switch to using grove today!
Connecting Grove – Fingerprint Sensor with Arduino
Liked what you’ve seen so far and interested in building an Arduino Fingerprint Sensor? Let us get started in the Arduino Guide right now!
Note: This fingerprint sensor is compatible with Raspberry Pi, LinkIt ONE, and other microcontrollers through the TTL serial but users have to write their own software library as it’s not possible to provide codes for all possible MCU platforms.
What you’ll need to get started
Hardware components:
Software applications:
Hardware Configurations:
- Step 1: Connect the Grove Fingerprint to the Digital Port 2 of the Grove – Base Shield
- Step 2: Plug the Grove – Base Shield into Arduino and connect Arduino to PC by using a USB cable
- Need a USB cable? Here’s a Type-B USB cable for you!
Wonder if the sensor is working? You should see red LED blinking when you plug in the power!
Software Configurations:
- Step 1: Download the Finger Print Sensor Library and Unzip it into the libraries’ file of Arduino IDE by the path: ..\arduino-1.0.1\libraries
The ability to enroll and search with the library makes it perfect for any project. It can help you get running in under 10 minutes!
- Step 2: Open the enroll code directly by the path: File->Example->FingerPrint->Enroll.
- Step 3: Upload the code into Arduino
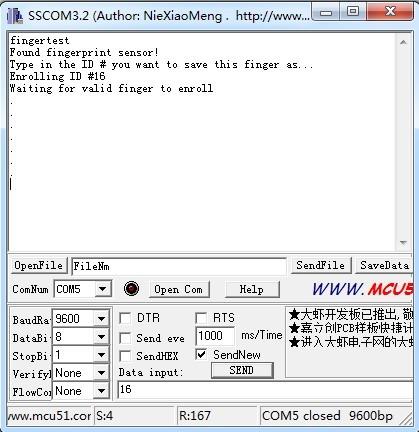
- Step 4: Start up Serial Tool and Select the ComNum and BaudRate used by the Arduino
- Step 5: Select the “SendNew” option. Send the ID # you want to use. Up to 162 ID numbers can be used. It’ll then ask you to press the finger on the sensor. You should see the red LED blink

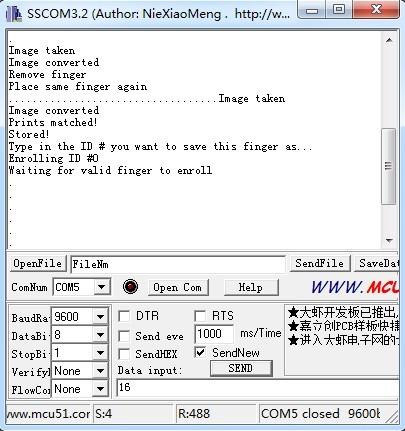
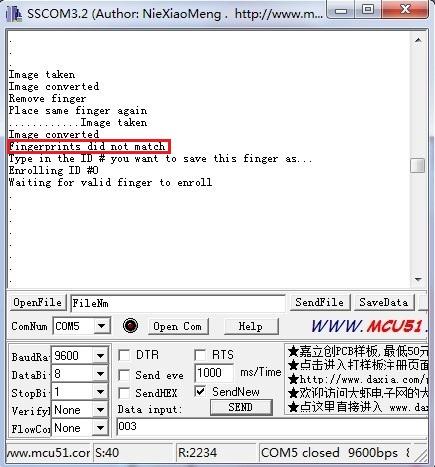
Afterwards, you should see the following message if your fingerprint press is ok. You’ll have to repeat the process to get a second clean print. Remember, use the same finger!
- On the success of your second print, you’ll see this message:
- If there’s an issue such as a bad print/image, you’ll have to do it again.
Step 6: Once you have the finger enrolled, test it out if it can be found in the database!
- Open the demo code: fingerprint and upload it
- When prompted, press a different/same finger to the sensor. If it’s the same finger, you should get a match with the ID # as shown below:
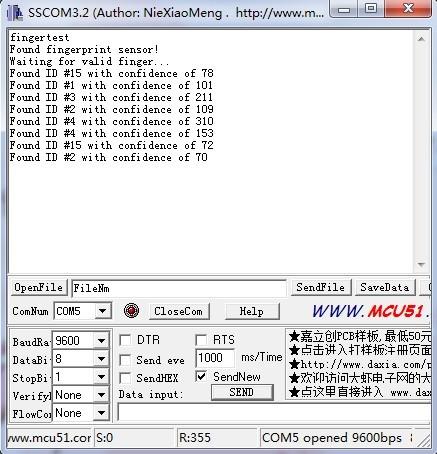
- If it’s not a finger in the database, this serial port will output nothing
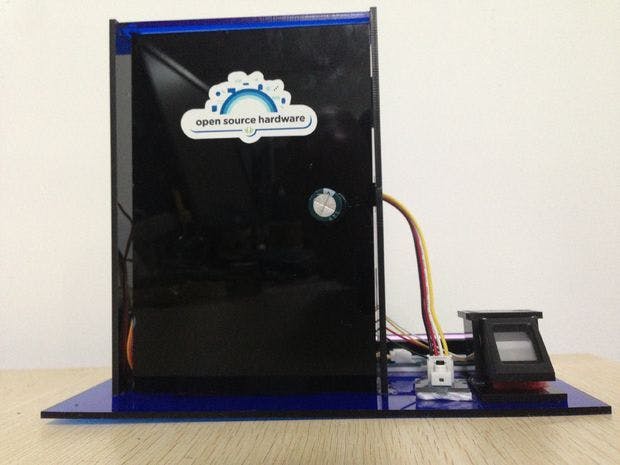
Arduino Fingerprint Projects
Cost of Fingerprint scanner like the one above may be too high for the ordinary to purchase, but what if you could save cost by building an Arduino Fingerprint lock? This recommended project does just that!
Arduino Fingerprint Door Lock
What do you need?
Hardware components:
- Seeeduino
- Grove – Fingerprint Sensor
- Grove – Infrared Reflective Sensor
- Grove – Servo
- Energy Shield
- Grove – LCD RGB Backlight
Interested? You can find the full tutorial by loovee at Seeed Project Hub here!
Resources and Going Further
- [Library] Finger Print Sensor Library File
- [Datasheet] ZhianTec ZFM-206 Series Datasheet (for this version, but in Simplified Chinese)
- [Datasheet] ZhianTec ZFM-20 Series Datasheet (for older series, but in English)
Summary
Overall, the Grove – Fingerprint Sensor makes fingerprint detection and verification super simple. Its ease of usage through grove and compatibility with microcontrollers makes it by far the best fingerprint sensor you can get.
Pair it with your Arduino and others today! Pick one up and be in awe of its capabilities.