What is HMI? – Introduction to Human Machine Interface with Nextion
HMI also known as Human Machine Interface, is a display that allows the user to control and monitor their machines. One common example of an HMI would be an ATM machine where a user will use the screen and buttons to withdraw or deposit money.
Today, through this guide, we will cover:
- Introduction to HMI (Human Machine Interface)
- HMI with Nextion
- Why use Nextion HMI
- Nextion HMI Displays
- Getting Started with Nextion Display
- HMI Project ideas
Introduction to HMI – Human Machine Interface
- A human-machine interface is a component of certain devices that allows a user to interact with a machine.
- The interface consists of hardware and software which allows the user input to be translated as signals for machines which in turn provide information to the user.
- Information includes temperature, pressure, speed, time, battery and many more!
- The interface can also come in many forms and sizes from single-touch display, smartphones, smartwatches, etc.
- With HMI, you can closely monitor your machine and also control and maintain it. This, in turn, improves efficiency, diagnostics, and monitoring.
- One of the greatest advantages of an HMI is the user-friendliness of the graphic display. You can add colours, pictures which allow for easy and fast identification which eases the problems of illiteracy.
- You can practically use HMI wherever human intervention with a machine or automated device is needed. For example, you can use them with your 3D printer, a medical device, a car, etc.
HMI with Nextion
- Nextion is a Seamless Human Machine Interface (HMI) solution that provides a control and visualization interface between a human and a process, machine, application or appliance.
- Nextion is mainly applied to the Internet of Things (IoT) or consumer electronics field. It is the best solution to replace the traditional LCD and LED Nixie tube.
- With the Nextion Editor software, you can quickly and easily develop the HMI GUI and create pages and place objects by dragging and dropping components like graphics, text, button, slider, etc. With ASCII text-based instructions for coding, you can also include whatever control you need to move between the page that you have created.
- You can easily connect Nextion HMI display through their peripheral MCU via TTL serial to provide event notifications that peripheral MCU can act on.
- The peripheral MCU can easily update progress and status back to Nextion display utilizing simple ASCII text-based instructions.
- With Nextion HMI display TTL serial interface, you can easily connect them to your microcontrollers and SBCs (single board computers) like you Arduino and Raspberry Pi or any system with the ability to communicate over a serial port.
- Imagine having a display to control and monitor your favourite Arduino and Raspberry Pi projects! The possibilities are endless.
Why use Nextion HMI
So, why use Nextion?
Easy to Use
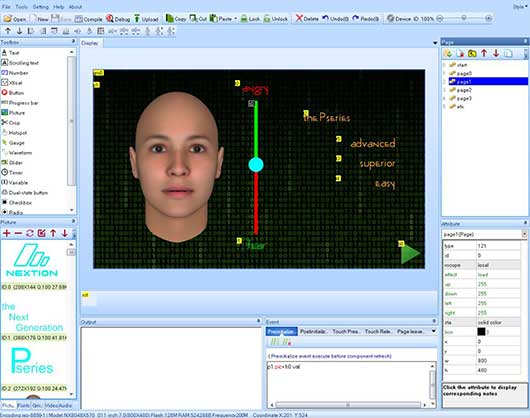
- Firstly, Nextion is easy to use. With the Nextion Editor software, you can easily create an intuitive touch user interface even if you are a beginner.
- For example, adding a static picture as your background and defining functions by components, you can easily and quickly make a simple GUI in only a few minutes.
- With the drag and drop components and simple ASCII text-based instructions, you do not have to spend a huge amount of time on your HMI project development.
Cost-Effective
- Afraid that the cost of an HMI display may cause a hole in your wallet? With the Nextion display, you do not have to worry!
- The easy-to-use components, touch event programming, and customized GUI at screen side all come at a cost-effective price for you to develop your projects.
- Here at Seeed, Nextion display price ranges from only $15.70 for a 2.4” HMI 320*240 Touch Display to $129.00 for a 10.1” HMI 1024*600 Touch Display for your Arduino or Raspberry PI
Variety
- With a wide variety of TFT LCD touchscreen sizes from 2.4″, 3.2″, 3.5″, 4.3″, 7.0″, and 10.1″ with varying resolutions with the lowest being 320*240 to the highest being 1024*600, you are spoilt for choices. With so many various HMI displays available, you will definitely find one that suits your Arduino or Raspberry Pi project the most.
Support
- Need help or technical assistance for your HMI project? No worries, as Nextion got you covered with technical support.
- Nextion technical support team offers a basic hardware technical service with prompt response through all time zones and also enhanced support if you require further technical assistance.
- Nextion also has a user forum where users can ask questions, share topics and advise one another.
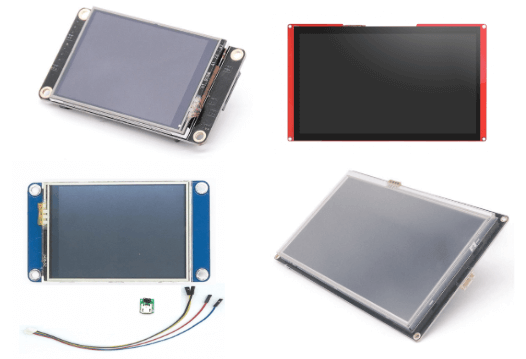
Nextion HMI Displays
Here are the Nextion HMI displays that we offer!
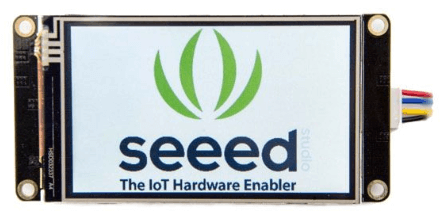
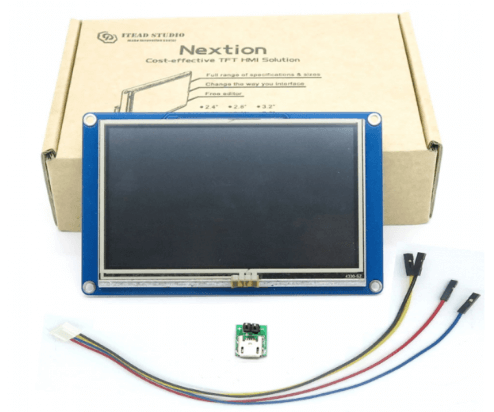
Nextion Enhanced NX3224T024 – Generic 2.4” HMI 320*240 Touch Display for Arduino Raspberry Pi ($15.70)

- At only $15.70 you can now get yourself a Nextion HMI Display!
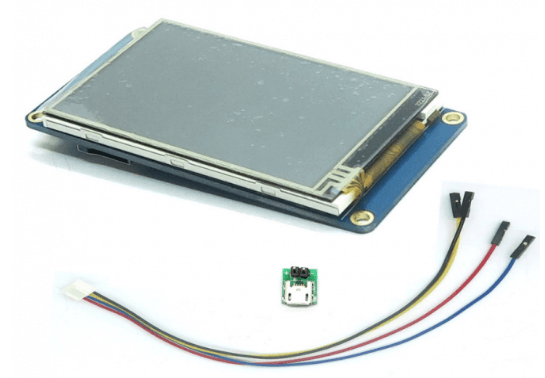
- Nextion(NX3224T024) display is a TFT display with a resolution of 320*240 that is 2.4” wide. The touch panel for this display is resistive touch.
- This Nextion display has an MCU, and its frequency is up to 48MHz. With the help of 4MB flash, 3584Byte RAM, and an SD card socket, this display is embedded with rich storage for HMI programming.
Nextion Enhanced NX3224K024 – Generic 2.4” HMI Touch Display ($20.40)
- Nextion Enhanced NX3224K024 is a powerful 2.4” HMI (Human Machine Interface) TFT display. With 16MB Flash data storage space, 1024 bytes EEPROM, and 3584 bytes RAM, a large amount of codes and data can be processed.
- With GPIO supported, users can also now use Nextion to control external devices.
Nextion Enhanced NX4024T032 – Generic 3.2” HMI 400*240 Touch Display for Arduino Raspberry Pi ($21.90)
- Nextion(NX4024T032) display is a TFT display with a resolution of 400*240 that is 3.2″ wide. The touch panel for this display is resistive touch.
- Similarly to the Nextion Enhanced NX3224T024 Touch Display, this Nextion display has an MCU, and its frequency is up to 48MHz. With the help of 4MB flash, 3584Byte RAM, and an SD card socket, this display is embedded with rich storage for HMI programming.
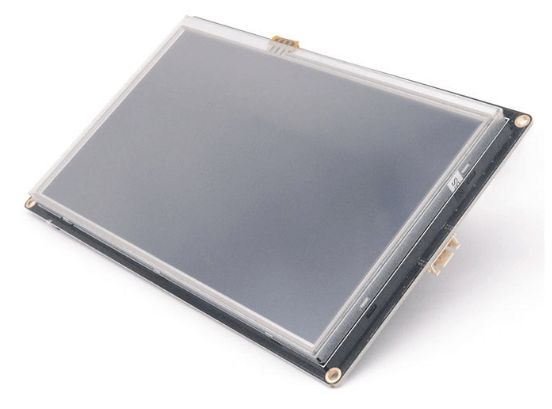
Nextion Enhanced NX4832T035 – Generic 3.5” HMI 480*320 Touch Display for Arduino Raspberry Pi ($26.90)
- Nextion(NX4832T035) display is a TFT display with a resolution of 400*240 that is 3.5″ wide. The touch panel for this display is resistive touch.
- As this is a “T” type Nextion display, it also has an MCU, and its frequency is up to 48MHz. With the help of 16MB flash, 3584Byte RAM, and an SD card socket, this display is embedded with rich storage for HMI programming.
Nextion Enhanced NX4827T043 – Generic 4.3” HMI 480*272 Touch Display for Arduino Raspberry Pi ($43.00)
- Nextion(NX4827T043) display is a TFT display with a resolution of 480*272 that is 4.3” wide. The touch panel for this display is resistive touch.
- Similarly to the “T” type boards, this Nextion display has an MCU, and its frequency is up to 48MHz. With the help of 16MB flash, 3584Byte RAM, and an SD card socket, this display is embedded with rich storage for HMI programming.
Nextion Enhanced NX8048P070-011R – Generic 7.0” HMI 800*480 Touch Display for Arduino Raspberry Pi ($79.95)
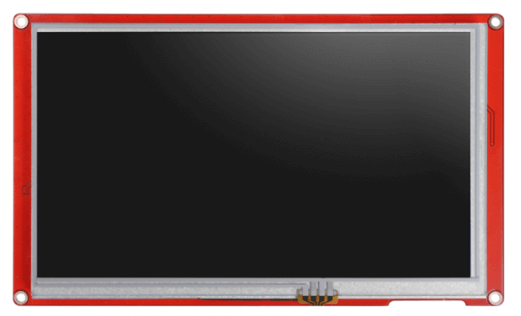
- Nextion(NX8048P070-011R) display is an IPS display with a resolution of 800*480 that is 7.0″ wide. The touch panel for this display is resistive touch.
- Nextion display has an MCU, and its frequency is up to 200MHz. With the help of 120MB flash, 512KB RAM,1024 Byte EEPROM, and SD card socket, this display is embedded with a rich storage for HMI programming.
- Different from the other type”T” Nextion displays, the type”P” Nextion has 8 extra GPIOs (two of which are PWM pins) for connecting peripheral equipment.
- In addition, there is an RTC module on the display for controlling these devices in real-time.
Nextion Enhanced NX8048K070 – Generic 7.0” HMI Touch Display ($81.90)
- Nextion Enhanced NX8048K070 is a powerful 7.0” HMI (Human Machine Interface) TFT display. With 32MB Flash data storage space, 1024 bytes EEPROM, and 8192 bytes RAM, a large amount of codes and data can be processed.
- With GPIO supported, now customers can use Nextion to control external devices.
Nextion Enhanced NX1060P101-011C-I – Generic 10.1” HMI 1024*600 Touch Display for Arduino Raspberry Pi ($129.00)
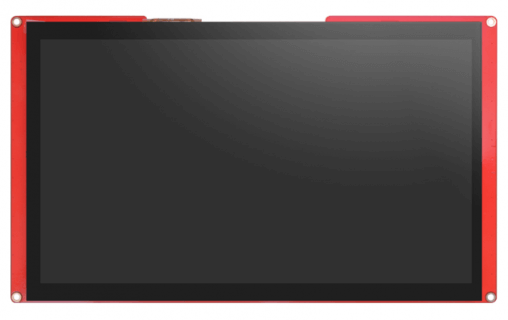
- Nextion(NX1060P101-011C-I) display is an IPS display with a resolution of 1024*600. The touch panel for this display is capacitive touch.
- Similar to the Nextion Enhanced NX8048P070-011R touchscreen display, it also has an MCU, and its frequency is up to 200MHz. With the help of 120MB flash, 512KB RAM,1024 Byte EEPROM, and an SD card socket, this display is embedded with rich storage for HMI programming.
- Different from the other type”T” Nextion displays, this type”P” Nextion has 8 extra GPIOs(two of which are PWM pins) for connecting peripheral equipment. And there is an RTC module on the display for controlling these devices in real-time.
To make it easy for you, we have created a table and compared its features so you can easily pick the Nextion Display that suits your project the most:
| Display | NX3224T024 | NX3224K024 | NX4024T032 | NX4832T035 | NX4827T043 | NX8048P070-011R | NX8048K070 | NX1060P101-011C-I |
|---|---|---|---|---|---|---|---|---|
| Size | 2.4″ | 2.4″ | 3.2″ | 3.5″ | 4.3″ | 7.0″ | 7.0″ | 10.1″ |
| Resolution | 320*240 | 320*240 | 400*240 | 480*320 | 480*272 | 800*480 | 800*480 | 1024*600 |
| Touch Panel | RTP | RTP | RTP | RTP | RTP | RTP | RTP | CTP |
| Flash | 4MB | 16MB | 4MB | 16MB | 16MB | 128MB | 32MB | 128MB |
| RAM | 3584 Byte | 3584 Byte | 3584 Byte | 3584 Byte | 3584 Byte | 512 KB |
8192 Bytes | 512 KB |
| MCU Frequency | 48 MHz | 48MHz | 48 MHz | 48 MHz | 48 MHz | 200 MHz | 108MHz | 200 MHz |
| EEPROM | – | 1024 Byte | – | – | – | 1024 Byte | 1024 Byte | 1024 Byte |
| GPIO | – | – | – | – | – | 8 | – | 8 |
| RTC | – | – | – | – | – | Yes | – | Yes |
| Price | $15.7 | $20.40 | $21.9 | $26.9 | $43.0 | $79.95 | $81.90 | $129.0 |
Getting Started with Nextion Display
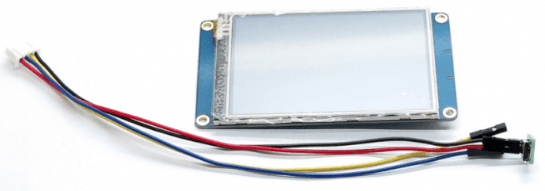
- Nextion includes a hardware part (a series of TFT boards) and a software part (the Nextion editor).
- The Nextion TFT board uses only one serial port to communicate which allows users to avoid the hassle of wiring.
- For the software part, Nextion has rich resources.
- Nextion Editor is a Windows software for GUI development. Nextion editor has mass components such as button, text, progress bar, slider, instrument panel, etc. to enrich the interface design. Furthermore, the drag-and-drop function ensures that users spend less time in programming, which will reduce 99% of their development workloads. With the help of this WYSIWYG editor, designing a GUI is a piece of cake.
Nextion editor guide can help you easily set up Nextion Editior. - There are libraries for serial communication with Arduino boards and Raspberry Pi.
- Moreover, a mass of API is defined for users in The Nextion Instruction Set. It also includes how to use the software and program it.
- Nextion editor guide can help you set up the Nextion editor software.
- With these resources, I believe you will have an easy experience with this display.
- Nextion Editor is a Windows software for GUI development. Nextion editor has mass components such as button, text, progress bar, slider, instrument panel, etc. to enrich the interface design. Furthermore, the drag-and-drop function ensures that users spend less time in programming, which will reduce 99% of their development workloads. With the help of this WYSIWYG editor, designing a GUI is a piece of cake.
- It’s also easy to adapt Nextion family HMI to existing projects- users. You will just need to provide a UART.
- Furthermore, if you require any technical support while setting up your Nextion display, you can contact Nextion Technical support or visit their forums.
Nextion HMI Display Project ideas
Here are some Nextion HMI Display project ideas to get you started!
Lightweight Arduino GSM Mobile Phone
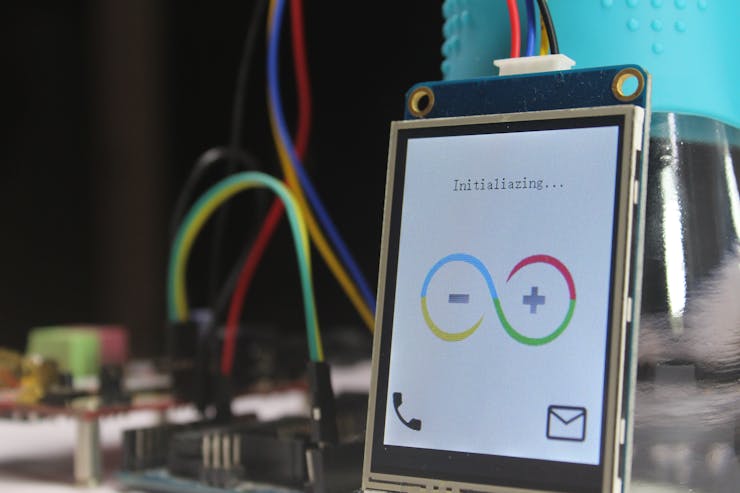
With the Arduino and Nextion HMI display, you can easily make a lightweight phone that is able to make calls, receive calls, send and also receive SMS. It uses a GSM module to connect to the mobile network and Nextion display to visualize GUI interfaces.
What do you need?
- Seeeduino V4.2 / Arduino UNO Rev3
- GPRS Shield V3.0
- Nextion Enhanced NX8048P070-011R – Generic 7.0” HMI 800*480 Touch Display for Arduino Raspberry Pi
- SIM Card
- Arduino IDE software
- Nextion Edition software
- Paint.net Software
Interested, you can find the full tutorial by Avishek at Hackster.io!
Nextion Alarm Clock

With the Nextion HMI display, you can now build yourself an ultimate alarm clock. This Ultimate Alarm clock will have features such as:
- Anti-fool feature: Restrict setting a new alarm directly after the alarm was stopped
- Limited snoozing: Only x times snooze for y minutes after an alarm is allowed or no snoozing is allowed
- User-defined sound: Wake you up with randomly changing sounds/music
- and many more!
What do you need
- Nextion Enhanced NX3224K024 – Generic 2.4” HMI Touch Display
- Arduino Micro with Headers
- Grove – MP3 V3 -Music Player
- Grove – Buzzer
- USB Supplied Speaker
Interested? You can check out the full tutorial by Chris B on hackaday.io!
Temperature, Humidity and Pressure Nextion HMI Display
With the BME280, you can now monitor the temperature, humidity, and pressure with a Nextion Display. You may be wondering why can’t you use other displays? Well, other displays may require more memory, processing time which makes them unsuitable for Arduino boards which have limited memory.
What do you need?
- Seeeduino V4.2 / Arduino UNO Rev3 / Seeeduino Nano /
Arduino Nano v3 - Grove – BME280 Environmental Sensor (Temperature Humidity Barometer)
- Any Nextion Display
- USB CP2102 Serial Converter
- Arduino IDE software
- Visuino Software
Interested? You can find the full tutorial by Boian Mitov on hackster.io!
Arduino Weather Station with Nextion Display
Ever wanted to build your own weather information system? With the Arduino and Nextion Display, you can tell the temperature and humidity of the weather easily!
What do you need?
- Seeeduino V4.2 / Arduino UNO Rev3
- Bread board Clear – 8.2 x 5.3cm
- Temperature-Humidity Sensor-DHT22(AM2302)
- Nextion Enhanced NX4024T032 – Generic 3.2” HMI 400*240 Touch Display for Arduino Raspberry Pi (
Interested? You can find the full tutorial by educ8s on Instructables!
Summary
With the Nextion Display, you can now easily control and monitor your Arduino or Raspberry Pi machine, application or appliance project! Together with Nextion Editor software, beginners can also now create intuitive touch user interface.
What do you think about these Nextion HMI Displays? Do let us know what are your thoughts on these Nextion Displays in the comments section down below!