How to look after Soldering Iron Tips
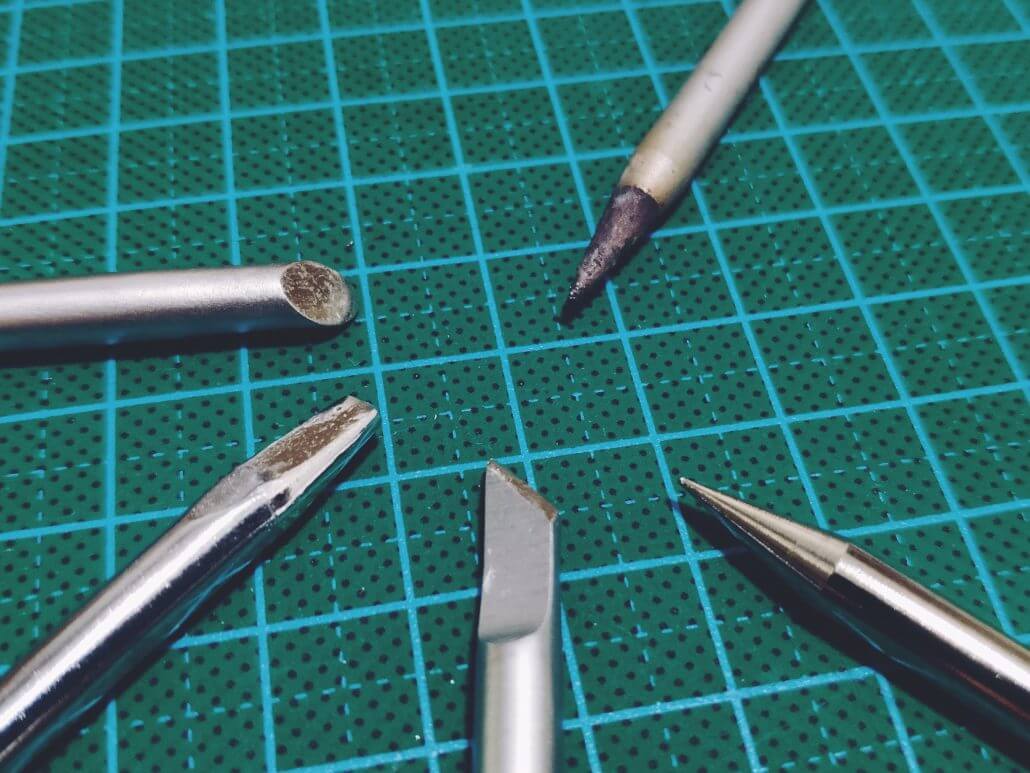
Frustrated because you can’t seem to get that perfect solder joint? Chances are that something’s wrong with your soldering iron tip. Poor solder tips have been cited as the leading cause of low-quality solder joints, which is why soldering tip maintenance should not be ignored. It’s inevitable for soldering tips to wear out over time and need replacing. Here’s what you can do to keep your soldering iron working for years to come, and prevent badly maintained solder tips from affecting your work.
Use High-Quality Solder
Protecting your solder tips can start as early as from the beginning of a solder tip’s lifetime. For starters, choose high-quality solder. Low-quality solders contain impurities that may accumulate on the tip of the soldering iron, which hinders heat transfer and make soldering more difficult.
Solder quality can be determined by how easily it melts. High-quality solder will melt readily at their specified melting points while low-quality ones may struggle to fully liquidize. For example, lead alloy solder in the composition of 60/40 solder (tin/lead) melts easily at 460 degrees Fahrenheit.

(Source: Oscarliang)
Another way to ascertain solder quality is by appearance. High-quality leaded solder generally appears shiny and low-quality ones will look more matte and dull. But do take note, good-quality lead-free solder also has a matte appearance. It’s worth investigating what brands other people recommend and coughing up the higher price.
Keep the Tip Clean
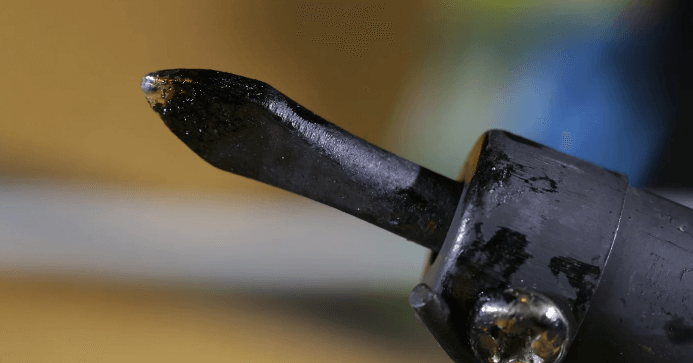
During soldering, it’s natural for the iron plating on the tip to oxidize and form an iron oxide layer. This oxidized layer hinders heat transfer from the tip to the pads, which is why some joints never seem to melt no matter how much you turn up the heat.
(Source: Metcal)
Maintaining the habit of keeping your soldering iron tip clean before, during, and after use will extend the life of the soldering tip. And if you are using a shared soldering iron at your school or workplace, where dirty irons are commonplace, it helps to know how to deal with the material buildup on the tip.
One conventional way to keep a soldering tip clean during use is to use a damp sponge (not soaked). Rubbing a hot soldering iron tip on a wet sponge causes the solder to contract at a different rate than the soldering iron, knocking off any traces of solder stuck on the tip.
You can also opt to use a brass or stainless steel wool. Brass wool is softer while stainless has a longer life. Using brass wool is a popular way to clean soldering tips, as it gently scrubs the tip without damaging the iron plating on the tip.

If the solder tip does become oxidized, apply flux-core solder to the oxidized tip. Heat from the solder tip will activate the flux and start the chemical reaction that removes oxides. After soldering, immediately coat the tip in fresh solder to prevent oxidation.
Avoid using sandpaper or anything that is too aggressive tools to remove oxidation. This can damage the iron plating that protects the copper underneath, shortening the life of the soldering iron.
Avoid Applying Excessive Heat
One of the main components of the soldering iron is the heating element. To prevent its premature failure, run it at temperatures in the range that works for your solder, and avoid temperatures higher than that. For example, typical lead-free solder requires higher temperatures than standard solder types, at around 300℃.
Know When to Turn Off the Heat
When you are not actively using the soldering iron, it is good practice to turn it off or set the temperature to an idle setting to extend its service life. Nowadays, there are advanced soldering tools that have an auto-sleep function which helps to automatically power down the iron when not in use.
For example, Seeed’s Mini Soldering Iron that comes with a built-in temperature display so that you can easily monitor the temperature. With temperature sensors, this pen-like soldering iron is capable of putting itself to sleep mode and warning its user of over-heating.


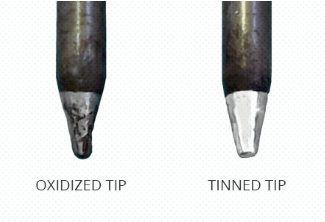
Tin your Tips
This is a step that is often forgotten by many in their haste to get soldering. Each time before and after each soldering session, you should clean and tin your tip with a thin layer of solder. In fact, throughout the project, it is a good practice to also clean and tin your tip after every few solder joints, as you would want to keep your tip covered in this layer of protection at all times.
(Source: Weller Tools)
This layer prevents oxidation of the working surface by protecting the iron plating from the air. The best type of solder to protect against oxidation is one with a high amount of flux. The difference is striking and will make soldering sessions much more pleasant and efficient.
Reactivating Your Tips
If your tip is badly oxidized and appears unsalvageable, you can use a tip activator to rescue it. Just rub the soldering tip over the paste-like substance and move it around. The abrasives present in the substance will remove the contaminants and the oxide layer. Once the tip is mostly shiny again, you can remove it from the tip activator and give it a scrub on brass or steel wool. Finally, tin your tip with a coat of solder. Repeat as necessary and it should be good to go!

(Source: Youtube – WellerSoldering)
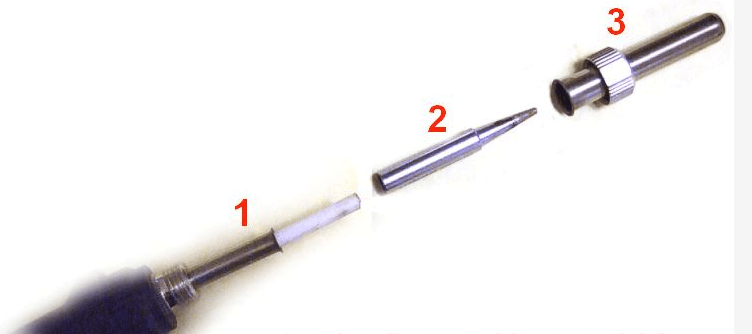
Replace a Soldering Iron Tip When You Have To
A well-maintained tip can be used without a problem, as long as the iron plating on the tip stays intact. But eventually, even the best-maintained solder tip will have to be replaced once it has come to the end of its service life or been violently abused.
The first signs that signal the need for a replacement are when cracks or holes begin to form in the iron plating. These imperfections in the protective layer can cause the copper underneath to dissolve into the solder. The loss of material will leave a vacant spot on the tip, preventing proper heat flow and resulting in a soldering iron with thermally erratic behavior.
(Source: GQ Electronics)
Before disassembling your solder iron, first ensure that it is unplugged and cooled down all the way to be handled safely. Then unscrew the locking nut that holds the tip and tip-retaining sleeve. This can be done by hand, or a small set of pliers if the locking nut is stuck. Next, slide the nut and the retaining sleeve off the heating element and remove the tip. Fit your new soldering tip onto the tip-retaining sleeve, and slide it back onto the heating element. Lastly, slide the locking nut back over the tip and tip-retaining sleeve and tighten it by hand.
Try not to over-tightening the locking nut. As the soldering iron heats and cools, it expands and contract. Hence, over-tightening and cause the locking nut to bind and cause future tip changes to become difficult. You never know when a damaged tip can overheat and destroy your components, so inspect before use and replace if necessary!
Contact Seeed for Great Soldering Results
Cultivating good soldering tip maintenance habits will certainly help to extend the lifetime of your soldering tips and improve the quality of your solder joints. But sometimes, component assembly can be too much of a hassle, especially when components are shrinking. Seeed’s Fusion PCB Assembly service offers a much more seamless way of getting your boards assembled, by procuring your parts and assembling it on your behalf.
That’s all we have now. Got an ingenious way of protecting your solder tips? Put it in the comments below!